---
title: Create and Manage Payment Terms
url: https://docs.maxio.com/configuration/maxio-core/admin-lists/payment-settings/create-and-manage-payment-terms
applies_to: Maxio Core
updated: 2026-10-20
---
# Create and Manage Payment Terms
Payment Terms calculate an Invoice's Due Date from its Invoice Date. Each Payment Term is assigned to Invoices, and Maxio derives each Invoice's Due Date from the term.
## Where payment terms come from
Payment Terms sync into Maxio from QuickBooks Desktop, QuickBooks Online, NetSuite, and Sage Intacct. You can also create and manage Payment Terms directly in Maxio, but **Payment Terms created in Maxio should not be used for Invoices that will sync to your general ledger.**
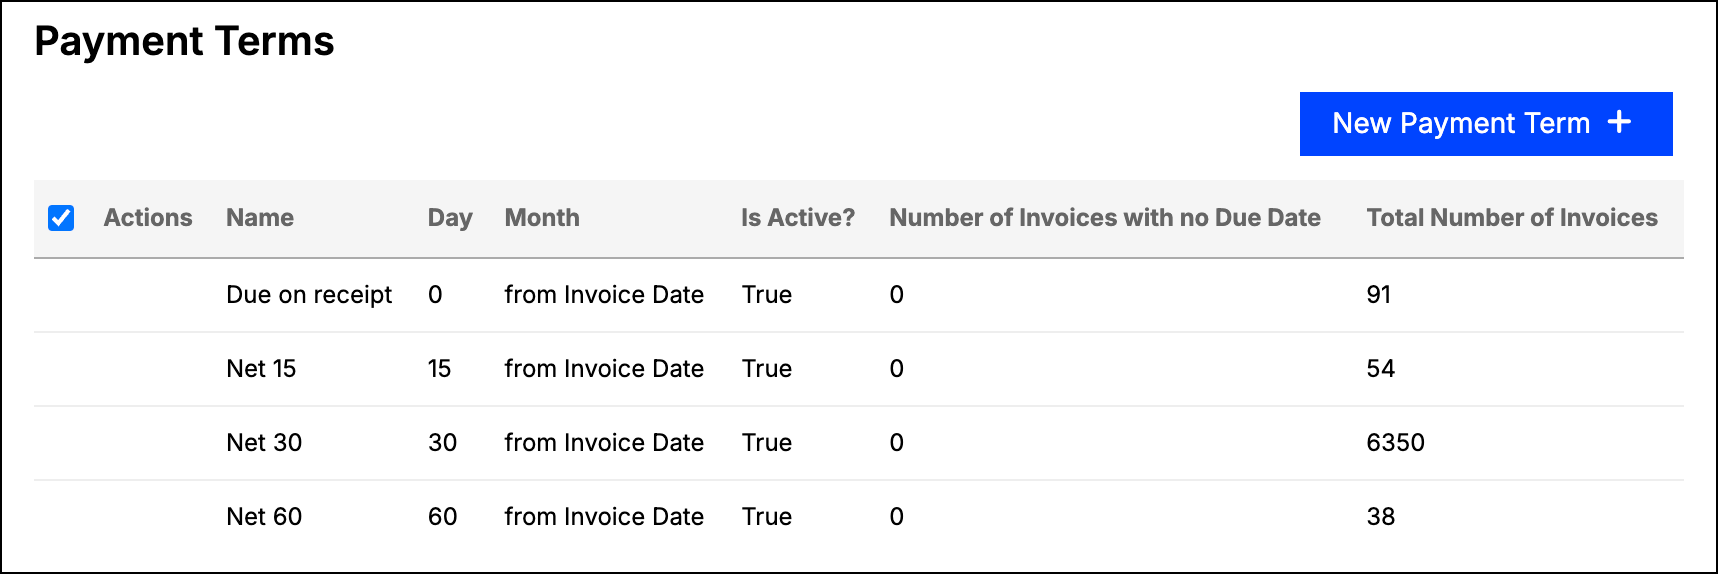
*The Payment Terms list, with invoice counts per term*
Working with Payment Terms requires Admin permissions, including viewing the list.
## How a Due Date is calculated
A Payment Term has both a **Number of Days** and an optional **Month**, and the two combine differently depending on whether a Month is set.
### When no month is set
With no Month selected, the Due Date is the Invoice Date plus the number of days. This is the familiar *Net 15* or *Net 30* form: an Invoice dated 01/01 with a term of Net 15 is due 01/16. The word *Net* means the total value of the Invoice is due, and the number is the count of days past the Invoice Date.
### When a month is set
With a Month selected, Maxio first advances the Invoice Date by that many months, and then the **Number of Days** value is treated as a *day of the month* rather than an offset. A term of *in 1st Month after Invoice Date* with 15 days means the 15th of the following month. Setting the days to 0 leaves the day of the month alone, so the Due Date is the same day in a later month.
If the day of the month you choose does not exist in the target month, Maxio uses the last day of that month instead. A term set to day 31 resolves to February 28 in a standard year and February 29 in a leap year.
## What each payment term field sets
Each Payment Term carries the following fields.
| Field | Description |
| :--- | :--- |
| Name | The name of the Payment Term, as it appears wherever Payment Terms are selected. |
| Is Active | Marks the term *Active*. New Payment Terms are created *inactive*, so check this box if you want to use the term right away. Inactive terms sort to the bottom of the list. |
| Number of Days | The number of days after the Invoice Date, when no Month is set. When a Month is set, this is the day of the month instead. Must be 0 or higher, and must be between 0 and 31 when a Month is set. |
| Month | How many months after the Invoice Date the Due Date falls: the same month, or the 1st through 6th month after. Leave it unset for a days-only term. |
The Payment Terms list shows each term's ID, Name, Day, Month, and Is Active? status, along with the **Number of Invoices with no Due Date** and the **Total Number of Invoices** associated with that term. If NetSuite or QuickBooks is enabled, the list also shows that system's identifier for the term.
## Download the payment terms list
You can export every Payment Term to a CSV file or a Google Sheet, with the same columns shown on the list, including each term's Maxio ID, the ID an Update import looks up a term by.
**To download the payment terms list**
1. From the Payment Terms screen, click **Download**.
2. Select **Export All Columns - Download** to download a CSV file, or **Export All Columns - Google Sheets** to export to Google Sheets.
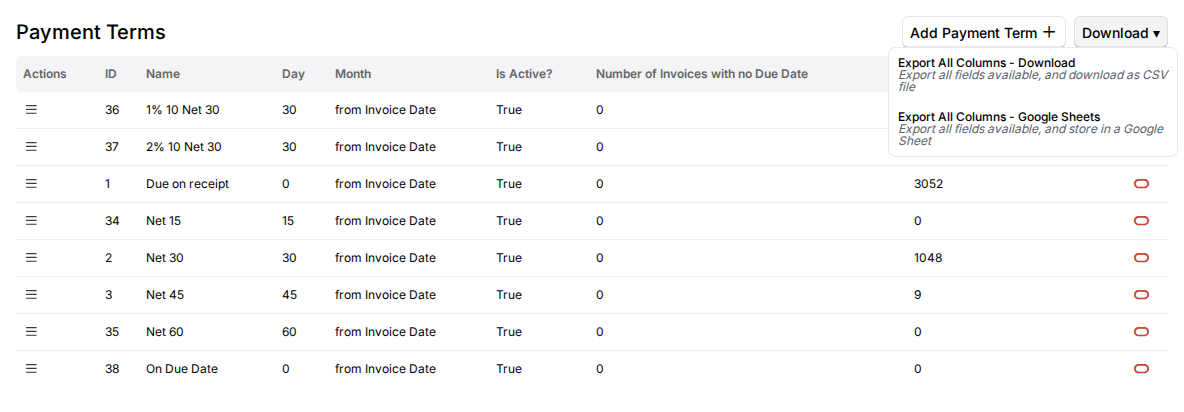
The exported list includes every Payment Term, active and inactive, with one row per term. The NetSuite ID and QuickBooks ID columns are included only when that integration is enabled, the same as on the page.
Exporting to Google Sheets uses your own connected Google account. If you haven't connected yet, Maxio takes you to a Google Sheets setup page first, and the export is created once you're connected. For setup steps, see Connect to Google Sheets.
## Create a Payment Term
Review the note about general ledger syncing above before creating Payment Terms in Maxio.
**To create a Payment Term**
1. Open the Payment Terms screen from the Admin menu, then click **Add Payment Term**.
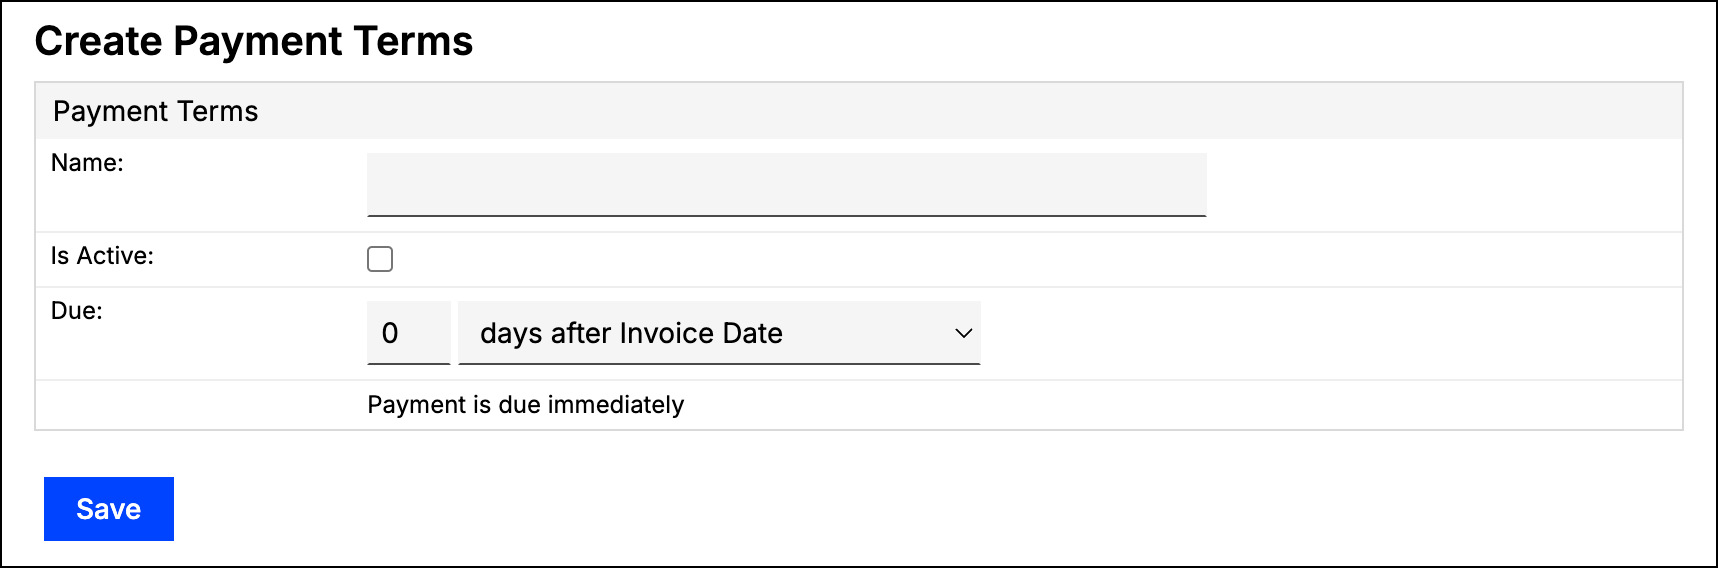
2. Enter a **Name** for the term, and check **Is Active** to make it available for use.
3. Enter the term's **Number of Days**, and select a **Month** if the Due Date should fall in a later month.
4. Click **Save**.
## Edit or delete a Payment Term
Use the menu icon next to a term to edit or delete it. A confirmation screen appears before a delete, and the deletion cannot be undone.
Payment Terms that synced in from QuickBooks cannot be edited or deleted in Maxio. Terms that synced from NetSuite or Sage Intacct can be, so take care when changing one, since the change does not travel back to the source system.
## Bulk-manage payment terms with the importer
You can also create or update Payment Terms in bulk from a CSV using Maxio's importer, instead of working one term at a time on this screen. This is useful for loading the same set of Payment Terms onto a new site, or for correcting several terms' General Ledger IDs at once.
**To bulk-create or bulk-update Payment Terms**
1. Open the Admin menu's **Import** options, and choose **Create Records** to add new Payment Terms or **Update Records** to change existing ones.
2. Select **Payment Terms** as the **Maxio Object**, and download the sample CSV for the action you chose.
3. On a Create import, map at least **Name**. **Number of Days**, **Month**, and **Is Active** are optional, and a blank **Is Active** creates the term inactive, the same as leaving it unchecked above.
4. On an Update import, map the **Payment Terms ID** column to the ID shown on this list for the term you're changing; an unrecognized ID fails that row. You can download every term's ID at once instead of reading them off the list one row at a time; see **Download the payment terms list** above. Any other column left blank keeps the term's current value, and mapping **Month** to **Clear Value** switches a term back to days after the Invoice Date.
5. If your account syncs with QuickBooks Online, Sage Intacct, or NetSuite, you can also map that system's ID column. A QuickBooks ID is importable for QuickBooks Online only, since a QuickBooks Desktop sync deletes any Payment Term whose QuickBooks ID it doesn't receive back. Mapping a GL ID already used by another term fails the row instead of merging the two terms.
6. Submit the import and review its results the same way as any other import.
Like the Items, Customers, and Accounts importers, updating a GL-synced term through the importer overrides it, letting you correct or clear a mistyped ID. That GL's next sync can overwrite your correction afterward, the same as any other synced object. A **Create and/or Update** action is not offered for Payment Terms, matching the other importers keyed on a system-assigned ID.
Changing a term's Days or Month through the importer does not recalculate the Due Date on Invoices that already use it, the same as editing one on this screen. Run **Set Invoice Due Dates** below for those.
## Set Invoice Due Dates
Maxio can fill in the Due Date on Invoices that do not have one, using a Payment Term to calculate it. When a term has Invoices eligible for this, a **Set Invoice Due Dates** action appears in its menu, and the list highlights the term's **Number of Invoices with no Due Date**.
> **WARNING:** Setting Invoice Due Dates cannot be undone.
An Invoice is eligible only if all of the following are true:
- It has no Due Date.
- It either uses the Payment Term directly, or has no Payment Term while its Customer's billing profile uses that term.
- It has not synced to an external system. Invoices that have reached QuickBooks, NetSuite, Sage Intacct, Xero, Rillet, Stripe, Recurly, or Advanced Billing are excluded.
- It is not an open e-Bill Invoice.
The confirmation screen lists the Invoices that will change, and you can export that list to CSV before committing. Selecting **Recalculate** sets each Invoice's Due Date from the term and assigns the term to those Invoices.
## How payment terms and due dates appear on an invoice
On the Invoice screen, the Invoice Date, Payment Terms, and Due Date fields stay in step with one another:
- Changing the Invoice Date or the Payment Terms recalculates the Due Date.
- Changing the Due Date selects the Payment Term that matches the new span. If no Payment Term matches that span, the Payment Terms field is cleared rather than adjusted.
Because of that last case, choose either Payment Terms or a Due Date for a given Invoice, rather than setting both. If you enter the Due Date manually you do not need Payment Terms, and if you use Payment Terms the Due Date is calculated for you.
If you use e-Bill, you can include any or all of the Invoice Date, Due Date, and Payment Terms on a particular Invoice.