
Setup the Intacct Integration
Applies to: Maxio Core
Last updated on Aug 24, 2026
Connect Maxio to Sage Intacct by enabling web services, creating an integration user, and authorizing Maxio to exchange data securely. This setup is required before any customers, items, invoices, or payments can sync between the two systems. Completing these steps ensures a stable foundation for configuring and testing the Intacct integration.
Before you begin
Confirm that you have the required administrator access in both systems:
- Intacct Administrator access
- Maxio Administrator access
Step 1 - Enable Web Services
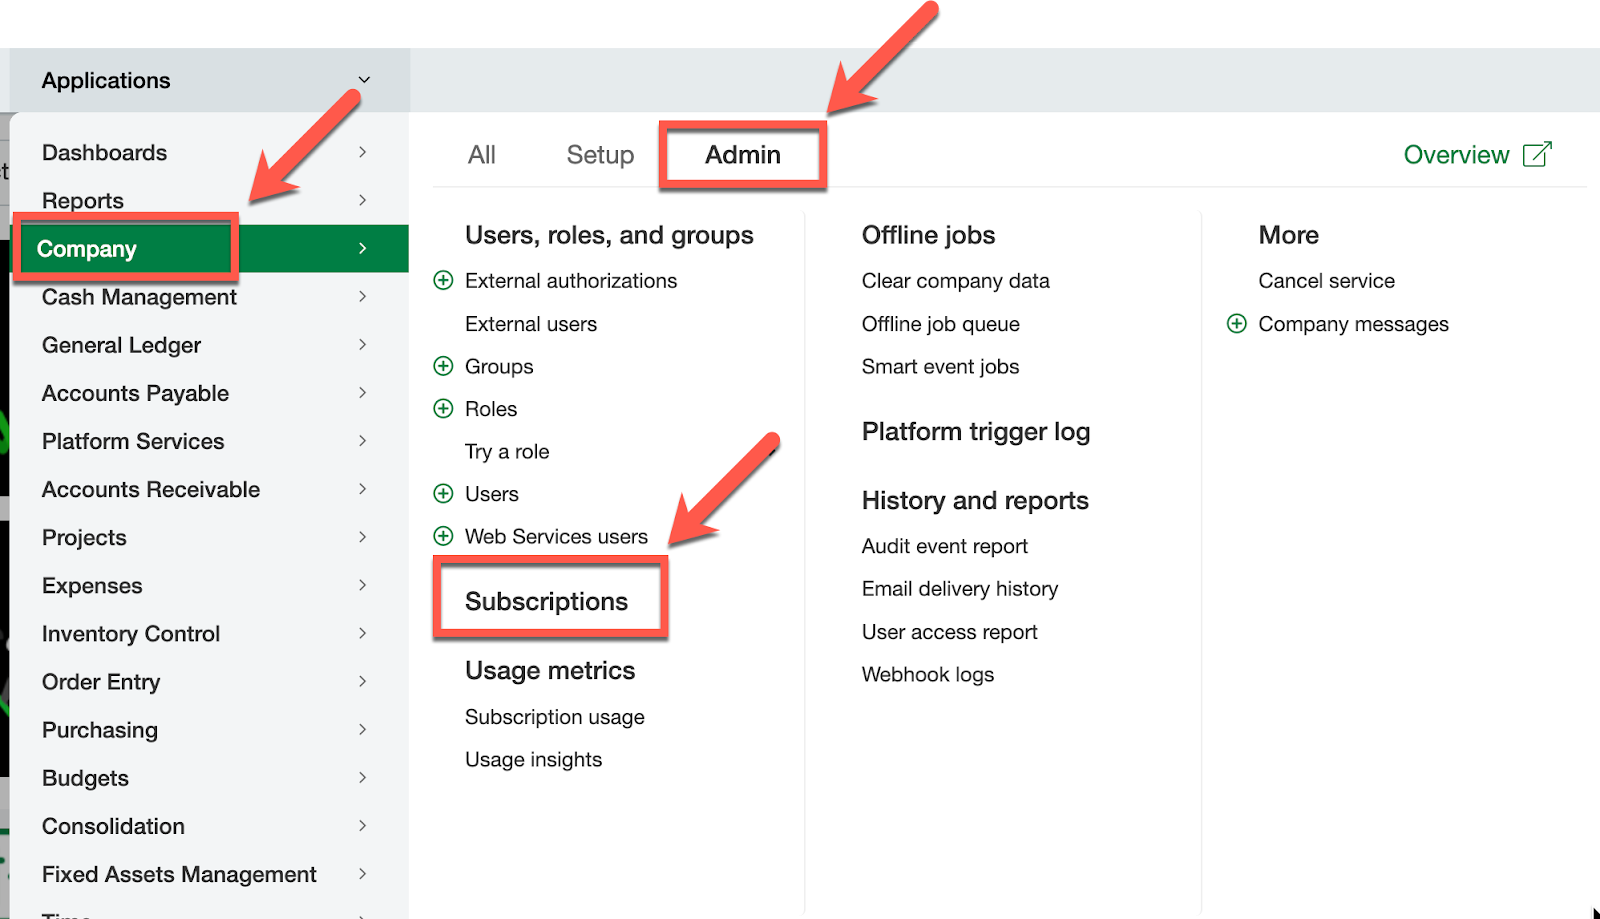
- Click the Applications drop-down, select Company, click the Admin tab, and select Subscriptions.
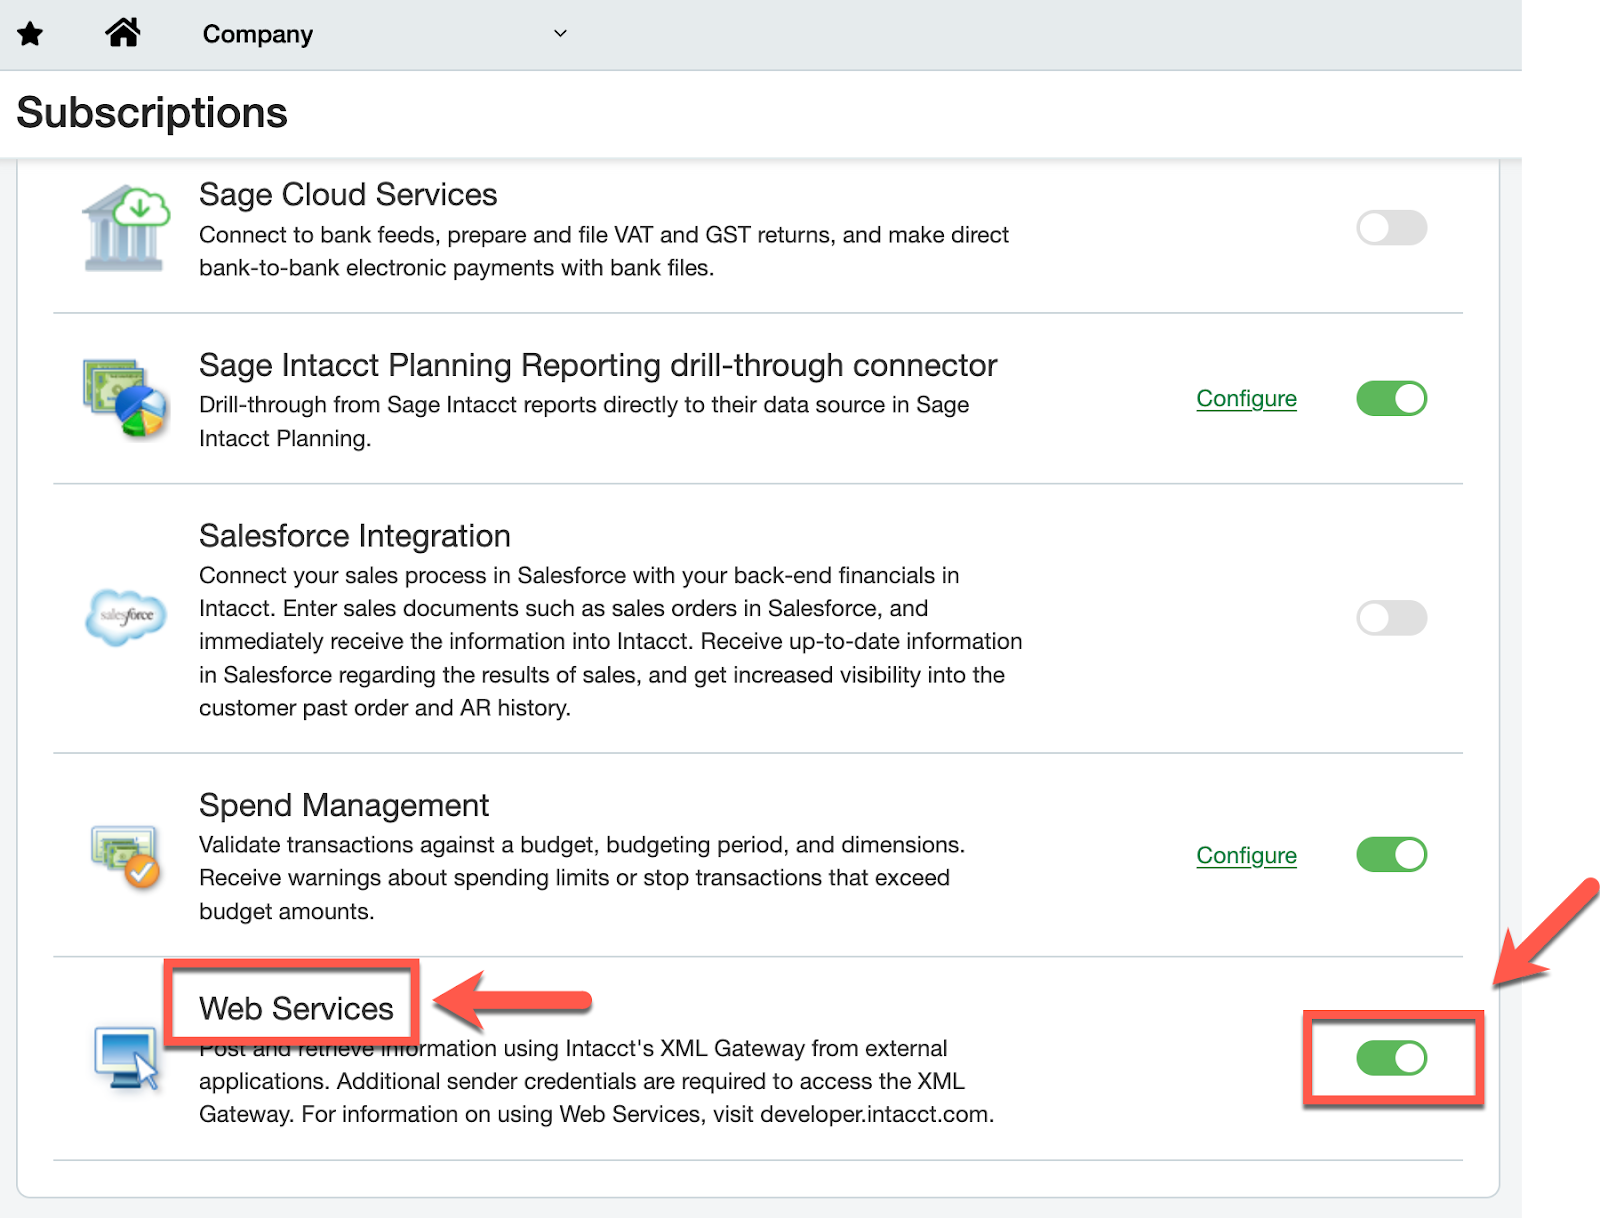
- At the bottom of the Subscriptions list, enable the Web Services option.
- Click Done.
Step 2 - Create a Web Service User
Create a Web Services user if one does not already exist. Otherwise, skip to Step 6.
- To create a Web Services user inside Intacct, click the Applications drop-down and select Company.
- Click the Admin tab and select Web Services users.
- (Required) Enter a User ID.
- Enter a Contact name and Username.
- (Required) For Email, use the email of an Intacct Administrator. That person will need the password Intacct sends for the integration.
- For User type, select Business.
- For Admin privileges, select Full.
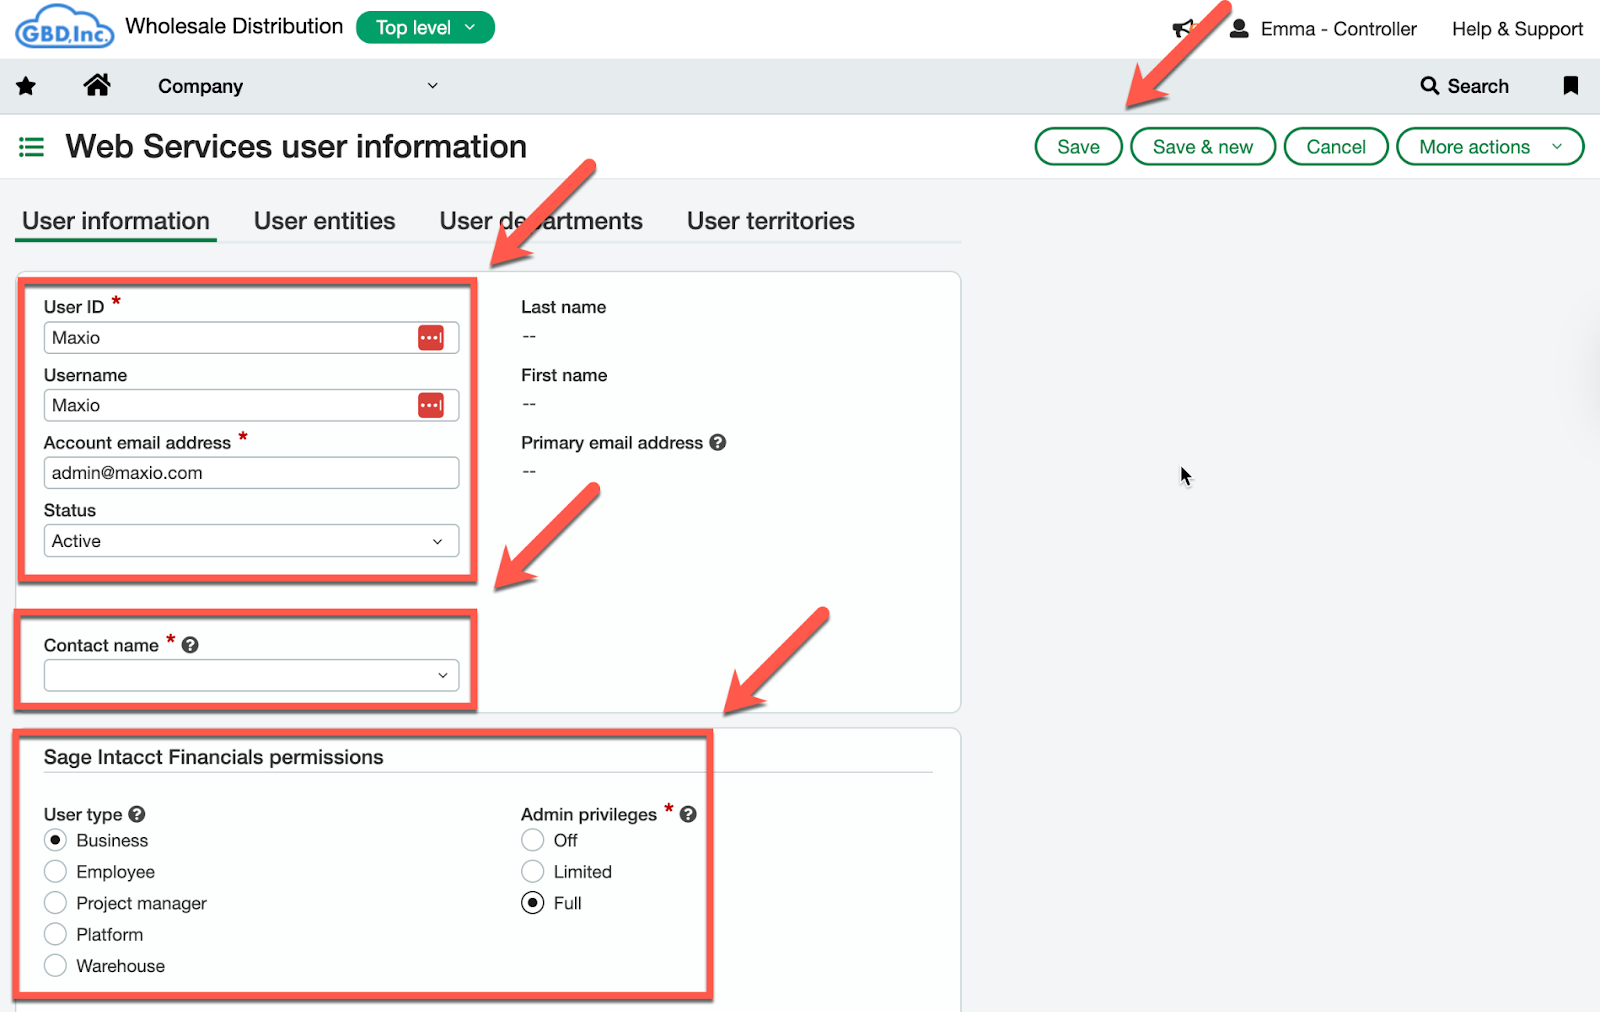
- When the user data is complete, click Save.
- If you already have an integration user in Intacct, make sure that user is a Business user type with Full Admin privileges.
- Locate the email from Web Services containing the relevant IDs and passwords. You'll use this information in Step 4.
Step 3 - Assign Admin role to your Web Service User
- Navigate to your newly created Web Service User and click Edit.
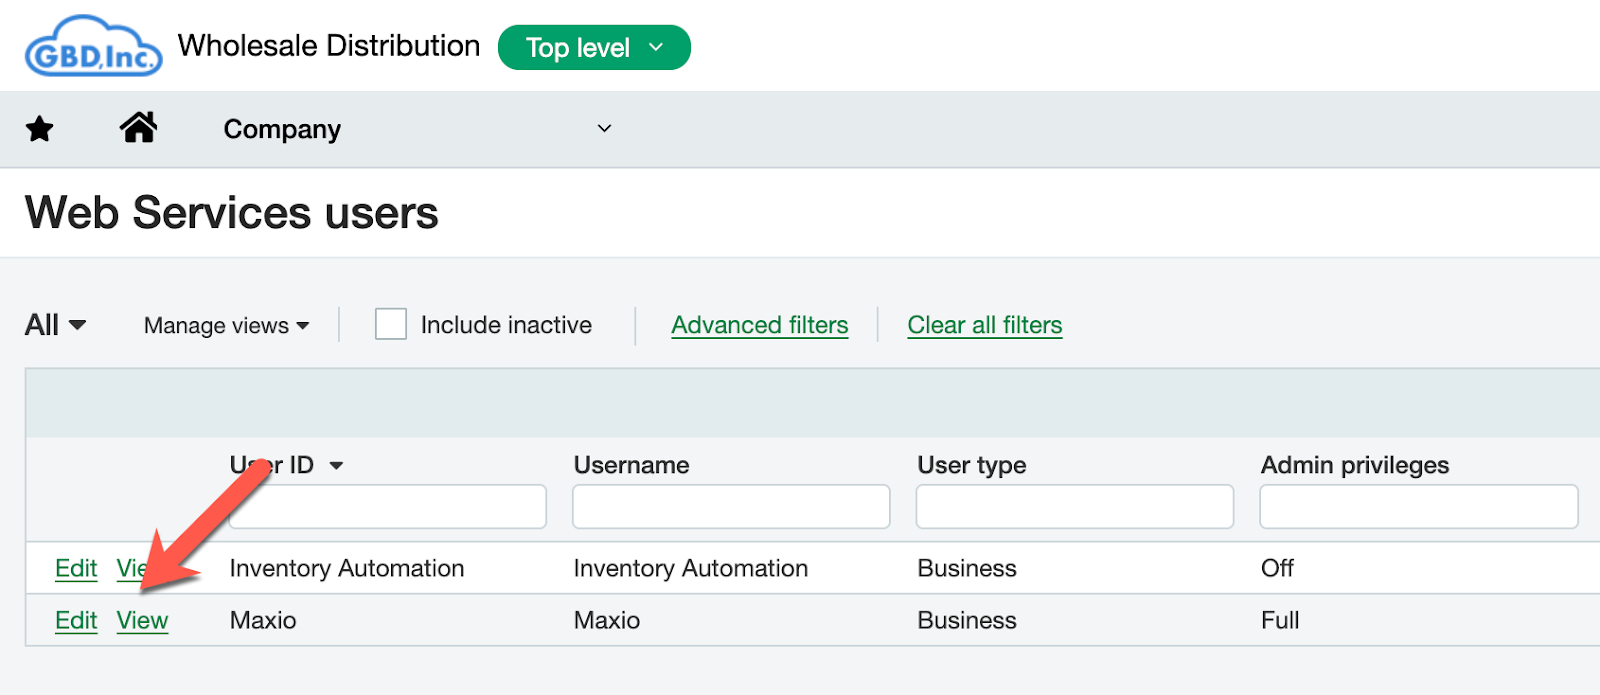
- Scroll to the bottom of the page under Financial permissions and select the Admin role.
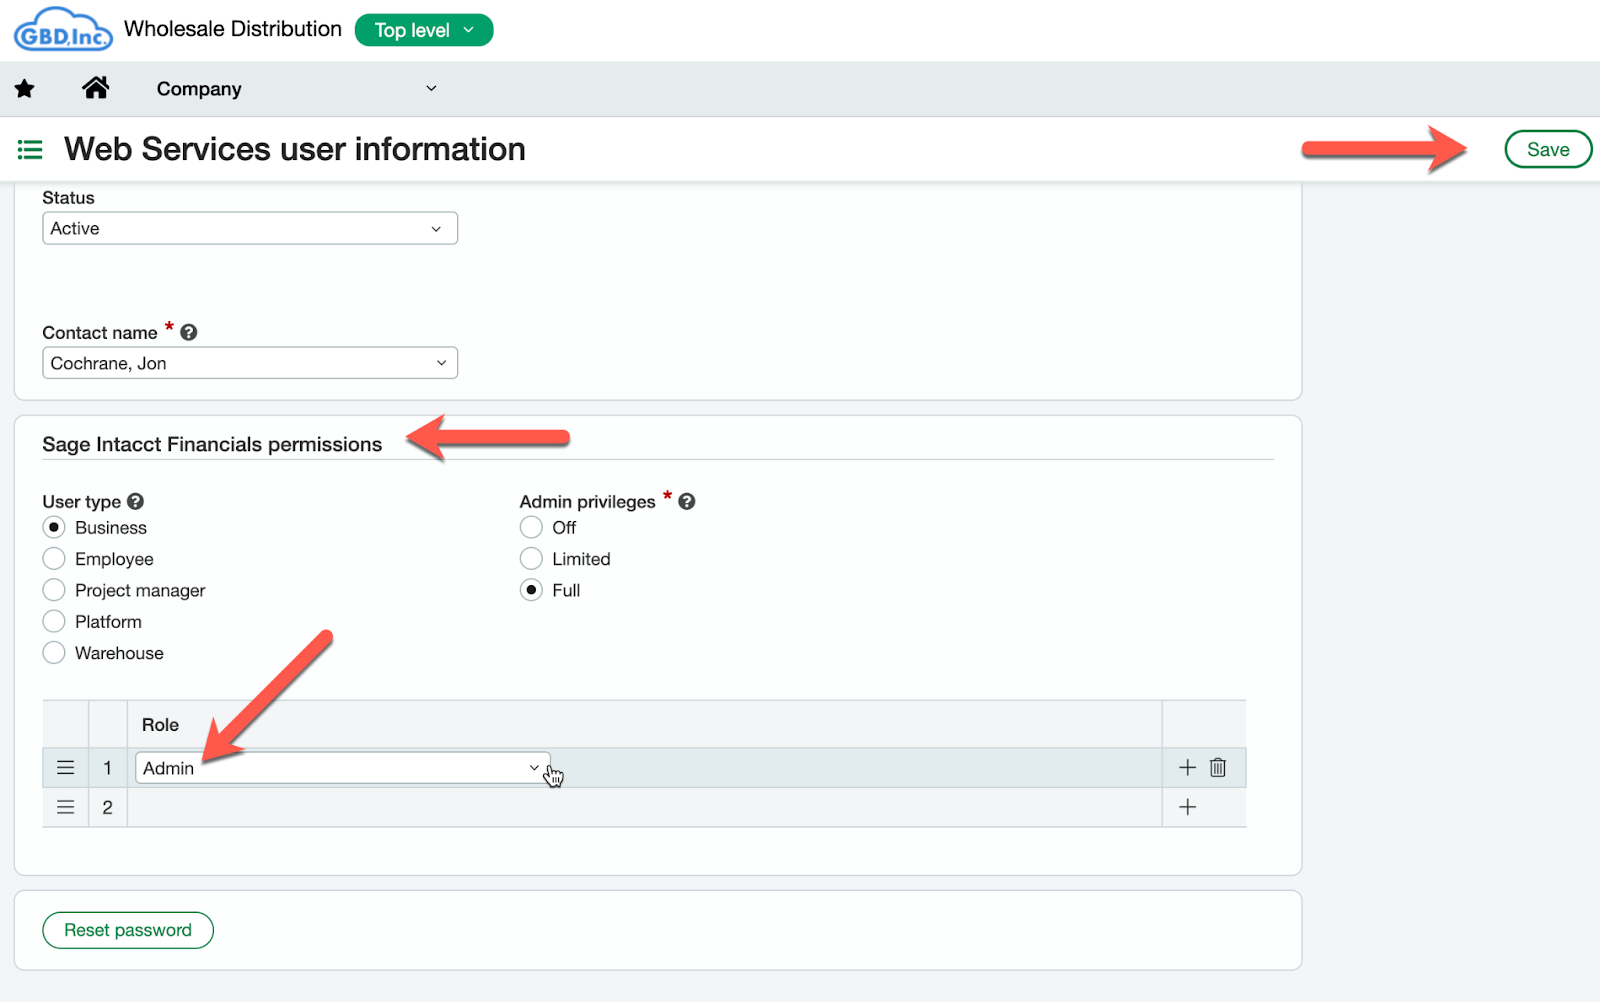
- Click Save.
Step 4 - Gather Web Service User Information
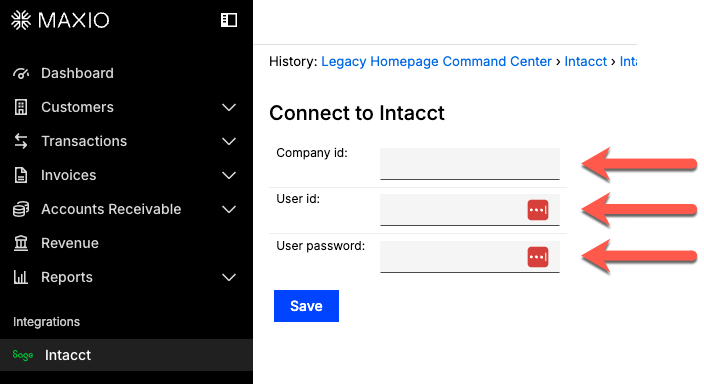
Locate the email you should have received from Intacct in Step 2 and verify you have the following information:
- Company ID
- User ID
- User Password
If you can't locate these fields, or didn't receive the email, contact your Intacct administrator or Intacct support.
Step 5 - Add Maxio to your permitted Sender IDs
-
Click the Applications drop-down, select Company, click the Setup tab, then under Configuration, select Company.
-
Navigate to the Security tab and click Edit.
-
Scroll down to Web service authorizations and click Add.

-
Enter the following information and click Save:
- Sender ID: maxioMPP
- Description: Maxio
- Status: Active
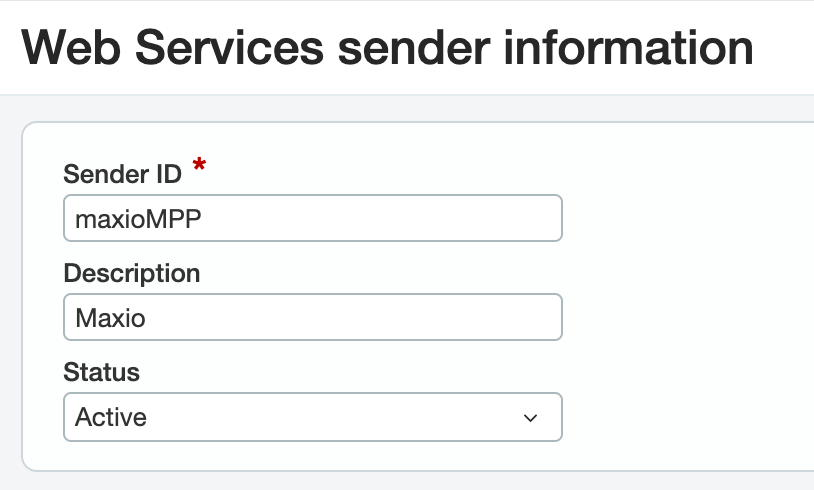
This authorizes Maxio to send and pull data from Intacct.
Step 6 - Add Maxio to your Authorized client applications
Important: Most accounts don't need this step. It only applies if Maxio Support has enabled Intacct Integration V2 for your account. If you're unsure whether this applies to you, skip to Step 7 and contact Maxio support if the connection doesn't succeed.
-
Click the Applications drop-down, select Company, click the Setup tab, then under Configuration, select Company.
-
Navigate to the Security tab and click Edit.
-
Scroll down to Authorized client applications and click Add.

-
Enter the following information and click Save:
- Client ID: 3d6e21dd8048ea5260ad.app.sage.com
- Status: Active
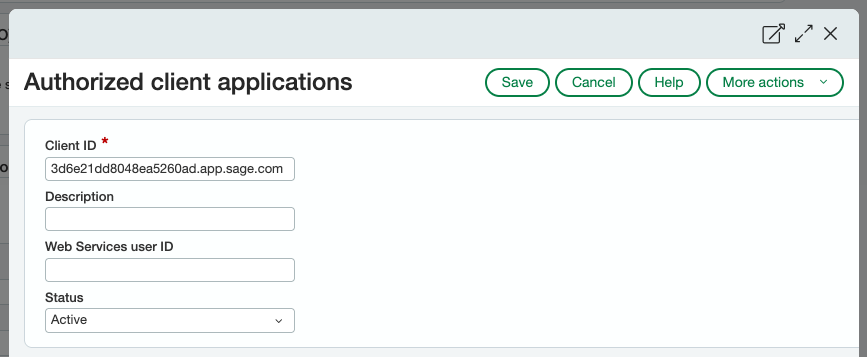
This authorizes Maxio to send and pull data from Intacct.
Step 7 - Connect Maxio to Intacct
- Log in to Maxio and from the side navigation panel, select Intacct.
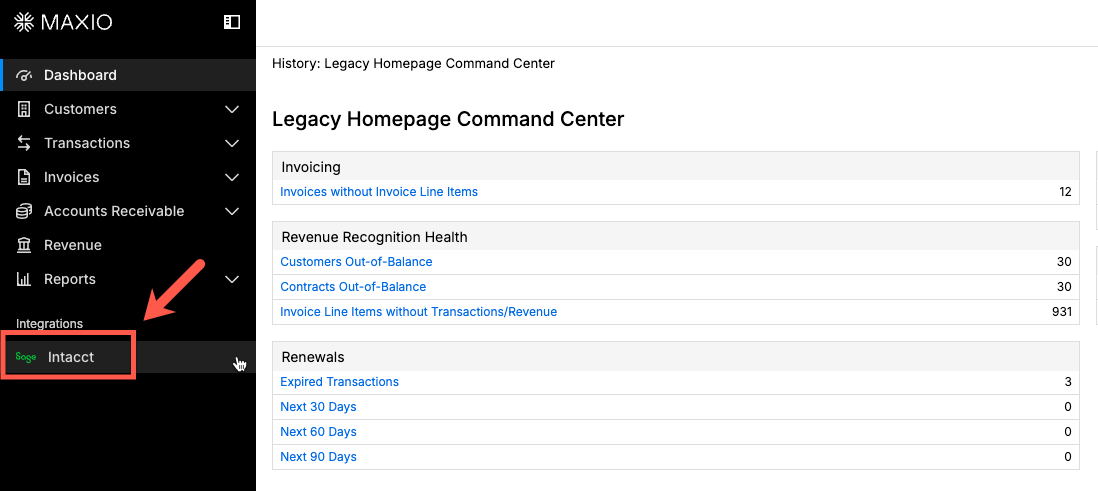
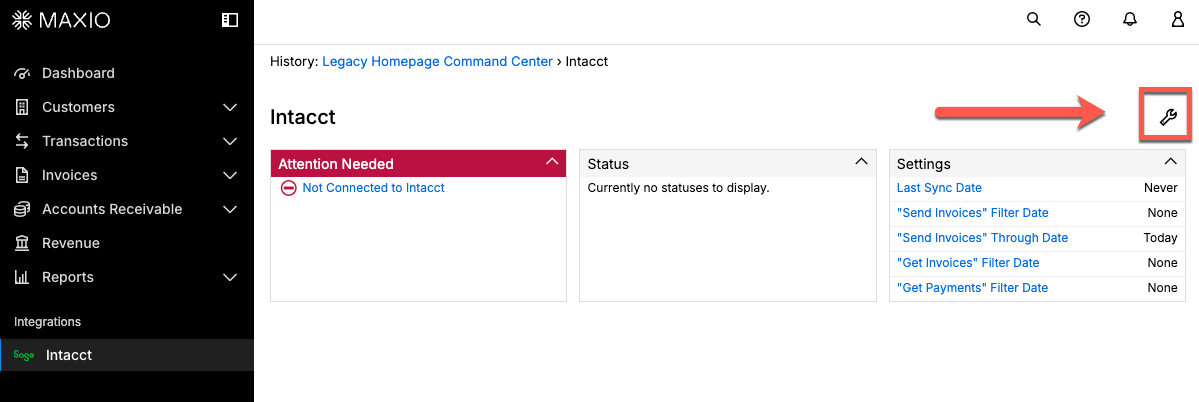
- From the Sage Intacct page, click the Integration Settings wrench icon.
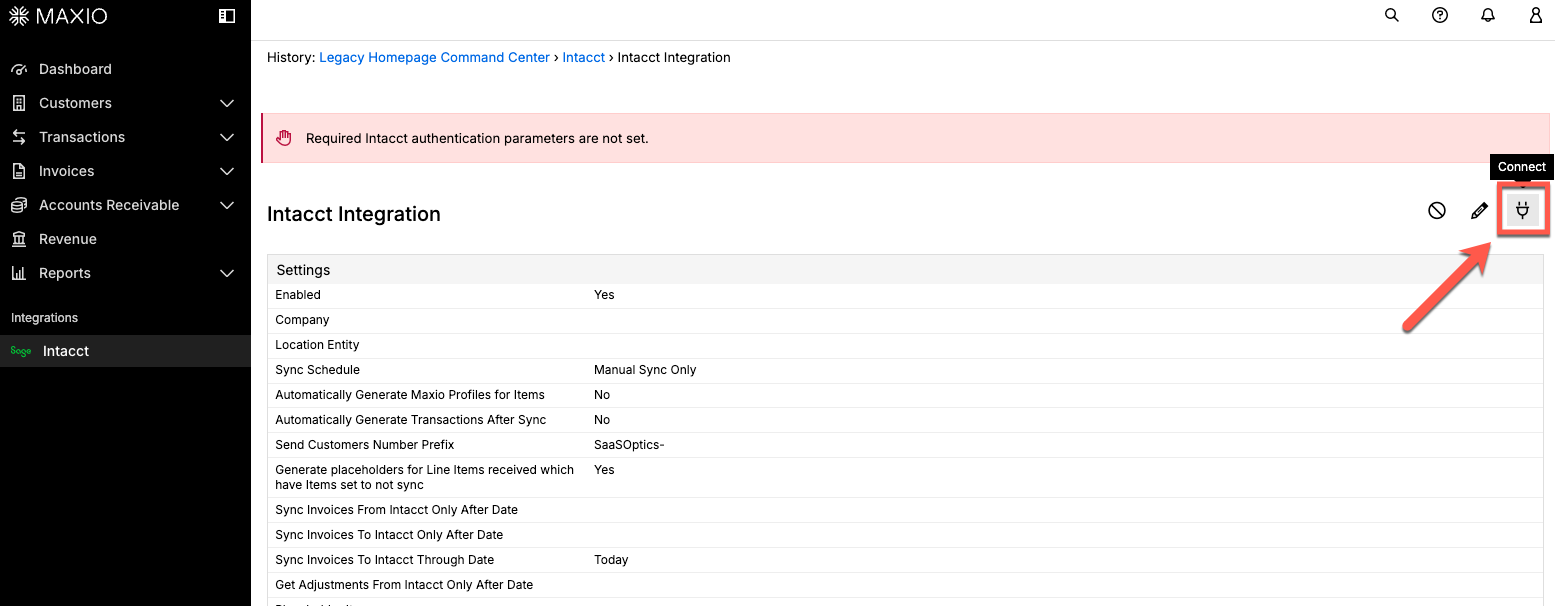
- From the Intacct Integration page, click the Connect Integration icon.
- Enter the information you gathered in Step 4 and click Save.
Next steps
You are now connected. Next, configure the sync between Maxio and Intacct.
Continue to Configure the Intacct Integration.
Still need help?
Reach out and our support team will take it from here.