
Monitor and Run Intacct Syncs
Applies to: Maxio Core
Last updated on Aug 24, 2026
Use the Intacct integration dashboard in Maxio to run syncs and monitor status. This covers day-to-day workflows once the integration is configured.
View the Intacct dashboard
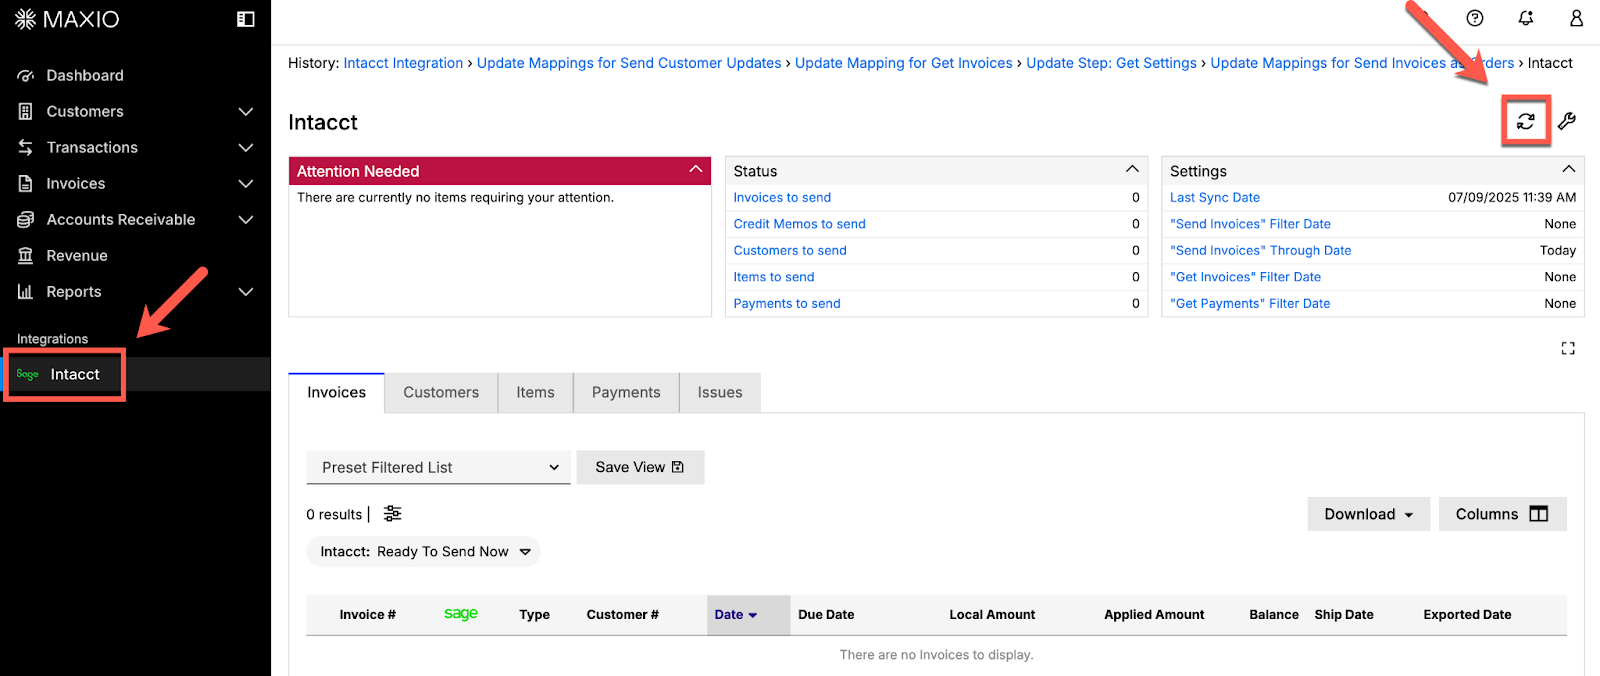
To view the dashboard, go to the left navigation panel, under Integrations, and select Intacct.
Run a sync
Step 1 - Run the first sync (building item profiles)
Before your first sync, check the date filters in Configure the Intacct Integration to control how much historical data syncs. Then click the sync icon in the upper-right corner of the dashboard to manually trigger a sync.
If Automatically Generate Maxio Profiles for Items is disabled (the default), a new item detected during Get Items needs a Maxio profile completed before Get Invoices can run. If any items still need a profile once the sync reaches that step, the sync halts with a message similar to "Sync stopped: There are new Items that need Maxio Profiles before Get Invoices can run."
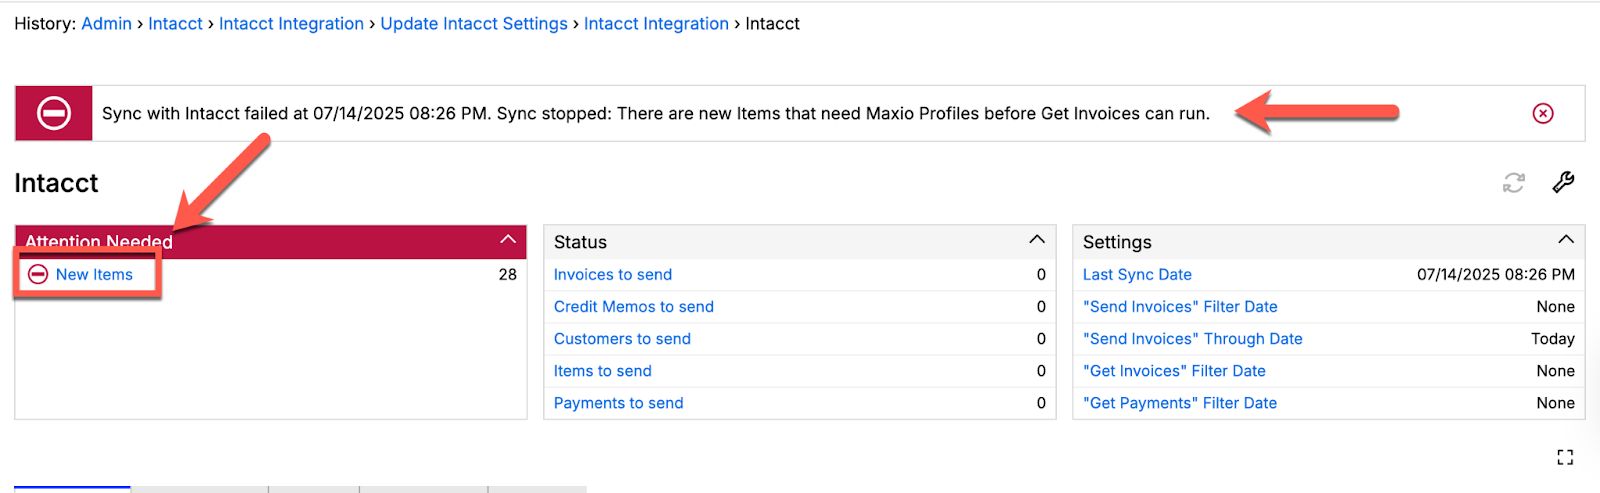
Click the New Items entry under Attention Needed to complete profiles one by one, or apply settings in bulk. To avoid this altogether, enable Automatically Generate Maxio Profiles for Items in Configure the Intacct Integration before your first sync.
Step 2 - Run additional syncs (customers, invoices, payments)
Once item profiles are complete, click the sync icon again to pull in customers and their financial records (invoices, credits, payments, and so on). Subsequent syncs run the same way, by clicking the sync icon whenever you want to trigger one manually.
Monitor sync status
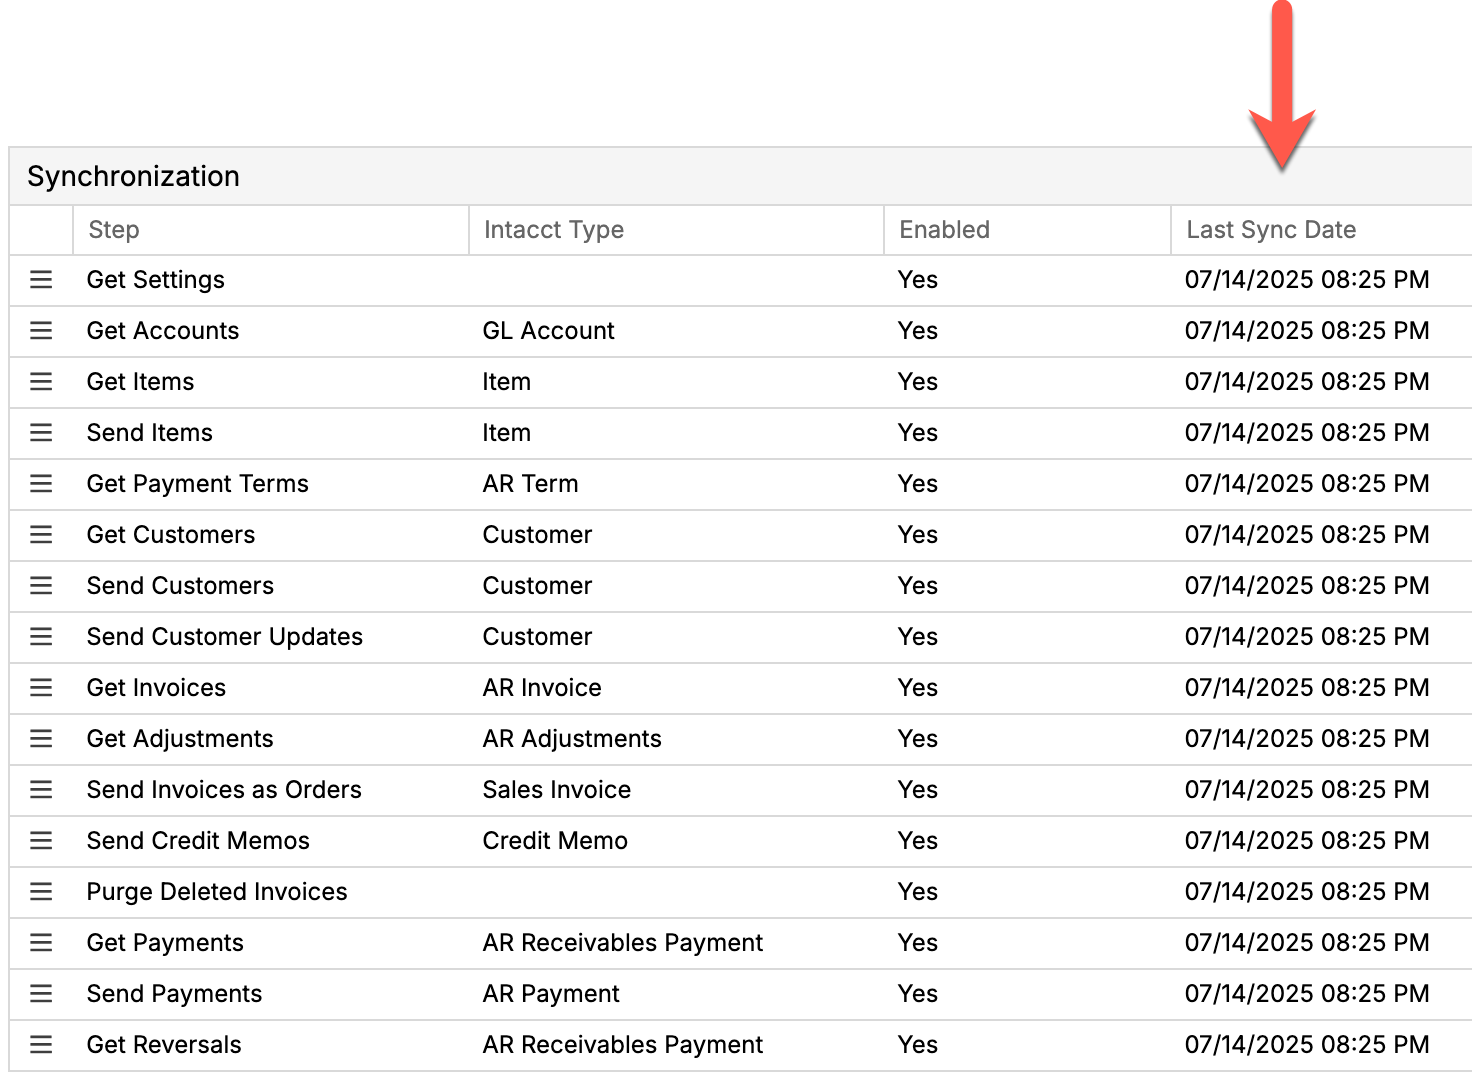
Once a sync completes, each enabled sync step's last sync date updates. To check this, go to Intacct > Integration Settings (wrench icon) and scroll down to the sync steps.
Related information
To reset sync stamps and force a full re-sync, see Clear Intacct Sync Dates.
To understand what each sync step actually does, see Understand Intacct Sync Steps.
For common sync errors and how to resolve them, see Troubleshooting and FAQs.
Still need help?
Reach out and our support team will take it from here.