
Setup QuickBooks Desktop
Applies to: Maxio Core
Last updated on Oct 9, 2026
The QuickBooks Desktop integration enables information to flow between your Maxio account and your desktop version of QuickBooks. Maxio exchanges this information through the Intuit Web Connector, a free application that ships with every PC desktop version of QuickBooks, running on the computer or server where QuickBooks Desktop is installed.
Before you begin
Important: QuickBooks Integration must be enabled in your account by Maxio Support before you can connect. Contact support@maxio.com to get started.
Confirm your setup meets these requirements:
- Windows - Windows 10 or later.
- QuickBooks Desktop - Pro, Premier, or Enterprise 2015 or later (US, Canada, or UK editions). QuickBooks Mac and QuickBooks POS aren't supported.
Back up both systems before you begin. Back up your QuickBooks file first, since it's the most important, then back up your Maxio account (Admin > Backup). Do this before every sync while you're still new to the integration.
Download and set up the Web Connector
Before you begin, keep these in mind:
- You must be logged into QuickBooks as an Administrator to complete these steps.
- Download a fresh QWC file for each computer that will run the Web Connector. Maxio doesn't tie a QWC file to a specific computer technically, since every install authenticates with the same account-wide connection user credentials, but downloading a separate file per computer keeps your installs easy to track. Maxio also only allows one active sync session at a time, so don't run the Web Connector on more than one computer at the same time.
- Your first sync sends all of your Items, Customers, and Invoices to Maxio and can take from ten minutes to well over an hour, depending on how many records you have.
- The Web Connector's progress bar can look frozen during a sync, but it's still running. Don't exit or close the Web Connector until the progress bar reaches 100%.
- Don't enable the Auto-Run option in the Web Connector. Maxio's QWC file doesn't set or control this option since it's entirely a Web Connector application setting, but turning it on removes your chance to review data before it syncs, and adds unnecessary load from repeated automatic syncs.
With those in mind, install and set up the Web Connector.
To download and set up the Web Connector
-
Download a QWC file. Go to Admin > Integration > QuickBooks, then select Download QWC File. The file contains information unique to your Maxio account.
-
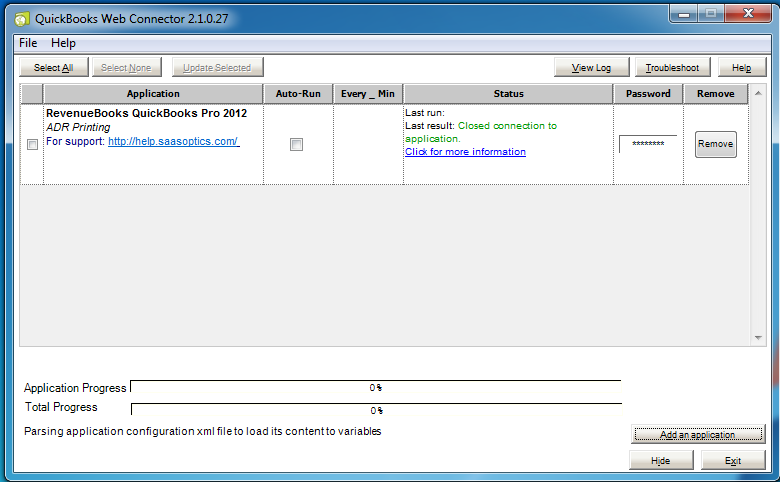
Open the Web Connector application that installed with your desktop version of QuickBooks. It's typically in the QuickBooks application folder. If it's not installed, download the latest version from Intuit's QuickBooks Web Connector page and install it.
Select Add Application in the bottom right, then select the .qwc file you downloaded.
-
Authorize. Select OK in the dialog that appears.
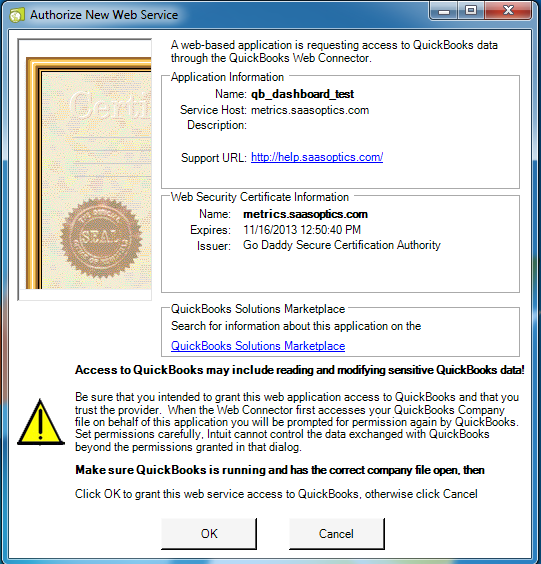
You may see an error at this step. Make sure every QuickBooks screen (preferences, settings, or any other) is closed and not in edit mode, then select OK again.
QuickBooks Web Connector failed to connect. QuickBooks returned the following error: <QuickBooks Web Connector error 1053: A modal dialog box is showing in the QuickBooks user interface.>. Fix the problem and then click OK to try again. -
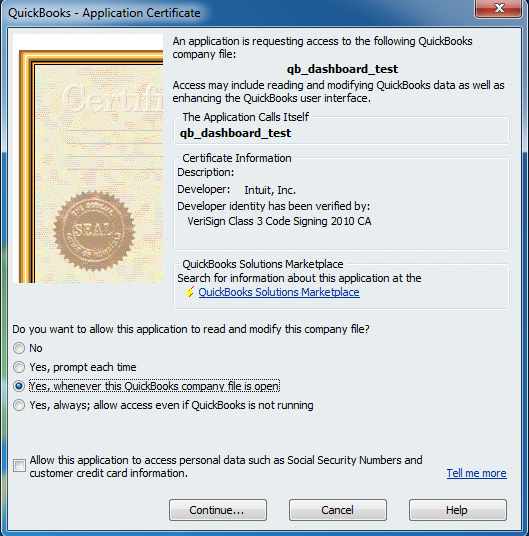
Verify Certificate. Choose how Maxio can communicate with and update your QuickBooks file. Yes, whenever this QuickBooks company file is open is the preferred option.
-
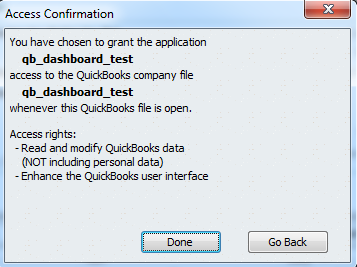
Confirm Access.
-
Set the password for the connection user in Maxio. Go to Admin > Users, find the connection user (the user Maxio created for the Web Connector), and select Change Password. Enter a strong password. You'll enter this same password into the Web Connector in the next step.
-
Sync. In the Web Connector, select the checkbox next to the RevenueBooks entry, enter the password you set in the previous step, then select Update Selected to start the sync.
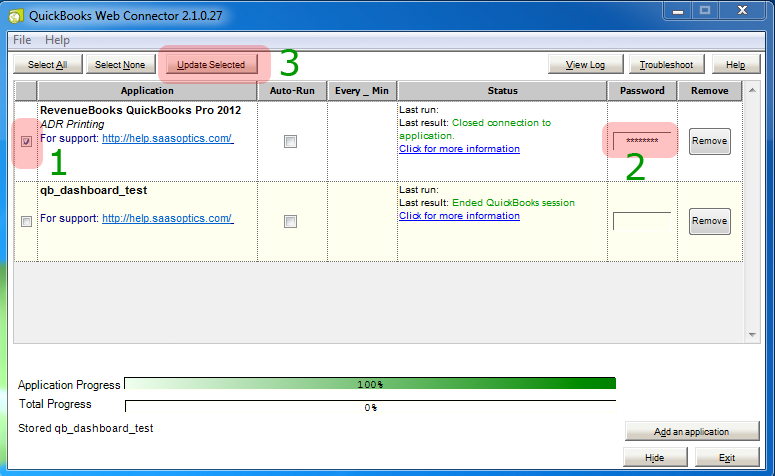
Once the progress bar reaches 100%, the sync is complete. You can select Update Selected again at any time to sync manually; later syncs typically take a minute or two since only changed records are exchanged.
Change the connection user password
Go to Admin > Users, select the connection user, then select Change Password.
You can change this password whenever you'd like. If you do, you must also update it in the Web Connector on every computer that syncs to your account, since they all share the same connection user credentials.
If the Web Connector isn't working
If your Web Connector stops working properly, you may need to reinstall it. See Upgrade to Web Connector 2.2.0.71.
What to expect next
Once connected, see Understand the QuickBooks Integration for how Maxio and QuickBooks share data, and Sync QuickBooks Data for sync conditions and behavior.
Related information
For the settings that control how this connection behaves once it's live, see Configure QuickBooks Integration Settings.
Still need help?
Reach out and our support team will take it from here.