
Migrate to the New HubSpot Advanced Billing Cards
Applies to: Advanced Billing
Last updated on Sep 11, 2026
HubSpot app cards run on a newer, React-based framework. Move each of your Maxio cards to the equivalent Advanced Billing card built on that framework, so your team keeps seeing subscription, invoice, and customer data on your records.
Important: HubSpot disables the legacy cards on September 30, 2026. After that date, the legacy cards no longer appear on your records. Migrate before the deadline to avoid a gap in visibility.
Before you begin
- You need a HubSpot Super Admin role, or Customize record page layout permissions, to complete this migration.
- Complete the migration separately for each CRM object type where you use Maxio cards: Contacts and Deals. There's a separate Advanced Billing card for each type of data — for example, Contacts has separate cards for customer details, subscriptions, and invoices — so repeat the swap for every card your team uses.
- If you manage more than one HubSpot portal with Maxio installed, repeat this migration separately in each portal.
Option A: Migrate from a CRM record
This is the fastest path if you're already viewing a record that shows a legacy card.
To swap a card from a record view
-
In HubSpot, go to the CRM section for an object type where you use Maxio cards — for example, CRM > Contacts or CRM > Deals.
-
Click into any record.
-
In the right sidebar, locate the legacy card.
-
Click the Customize gear icon at the top of the record's sidebar.

-
In the page layout editor, add the corresponding Advanced Billing card, then remove the legacy card. Save the layout.
Repeat these steps for each card and each object type your team uses.
Option B: Migrate from connected apps settings
Use this path if you'd rather manage every card from one settings screen instead of record by record.
To swap cards from Connected Apps
-
In HubSpot, click the Settings icon and go to Integrations > Connected apps.
-
Click Maxio Previously Chargify.
-
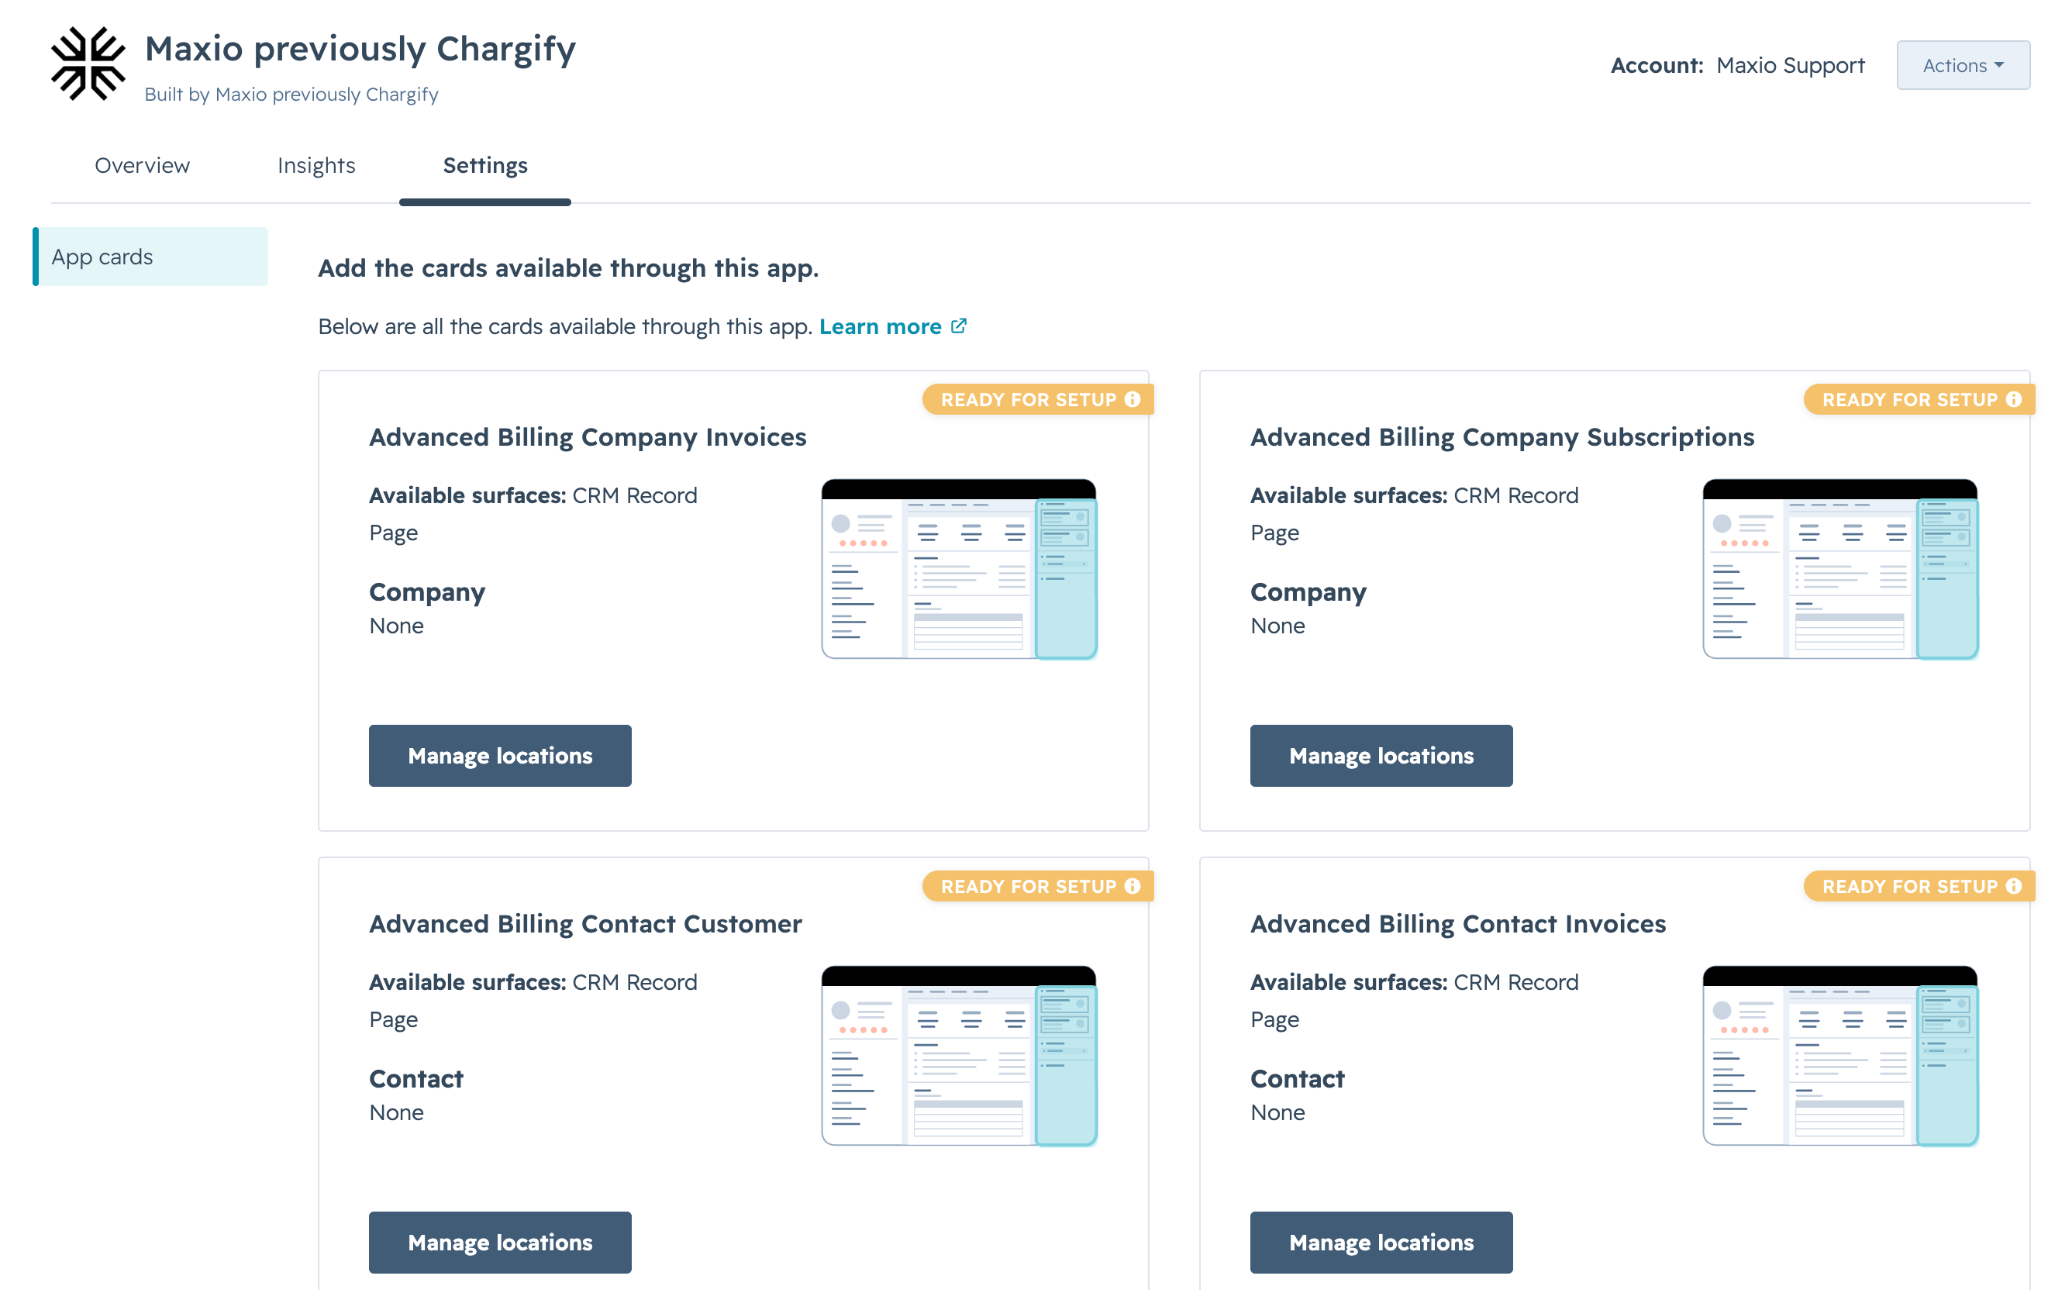
Click the App cards tab. Every new Advanced Billing card is listed here.
-
For each card, click Manage locations, select the checkbox next to every view where you want it to appear — the panel is organized by object type (Contacts, Companies, Deals) — and click Save.
-
After you confirm a new card works in its views, go to each object's page layout, open Customize layout, and remove the legacy card it replaced.
-
Repeat steps 4 and 5 for every remaining card until all relevant object types are all migrated.
What to expect after migration
The new cards apply to all users in your HubSpot account immediately — no action is required from individual team members. Your existing Maxio connection isn't affected, and all historical data (subscription details, billing events, and so on) continues to display on the new cards.
Frequently asked questions
What happens if I don't migrate to the new cards before September 30, 2026?
HubSpot disables the legacy cards on that date. Until you complete the migration, no Maxio cards appear on your records.
Do I need to re-authenticate or reconnect Maxio to migrate?
No. Your existing Maxio connection and data aren't affected — this migration only changes which cards display, not how the integration connects or syncs.
Does my historical data still appear?
Yes. All existing Maxio data, including subscription details and billing events, continues to display in the new cards.
I manage multiple HubSpot portals with Maxio installed. Do I need to migrate each one separately?
Yes. Complete the card migration separately in every HubSpot portal where Maxio is installed.
Related information
For general HubSpot connection issues or common sync problems, see Troubleshooting and FAQs, which also covers questions specific to this card migration.
Still need help?
Reach out and our support team will take it from here.