
Receive and Apply Payments to Invoices
Applies to: Maxio Core
Last updated on Aug 24, 2026
Efficiently manage payment records with Maxio's Receive Payments functionality. Whether you record payments manually or through integrations like QuickBooks or Stripe, this feature ensures seamless transaction tracking. Storing payment information in Maxio is essential for leveraging the Collections feature of our Advanced A/R functionality. Below, you will learn how to manage payments, apply credits, handle foreign currency transactions, and merge duplicate payment records.
Payment list
The Payment List screen (Accounts Receivable > Payment List) displays all received invoice payments, including those from QuickBooks, Stripe, and other sources. Users can filter, configure columns, and edit and delete payments.
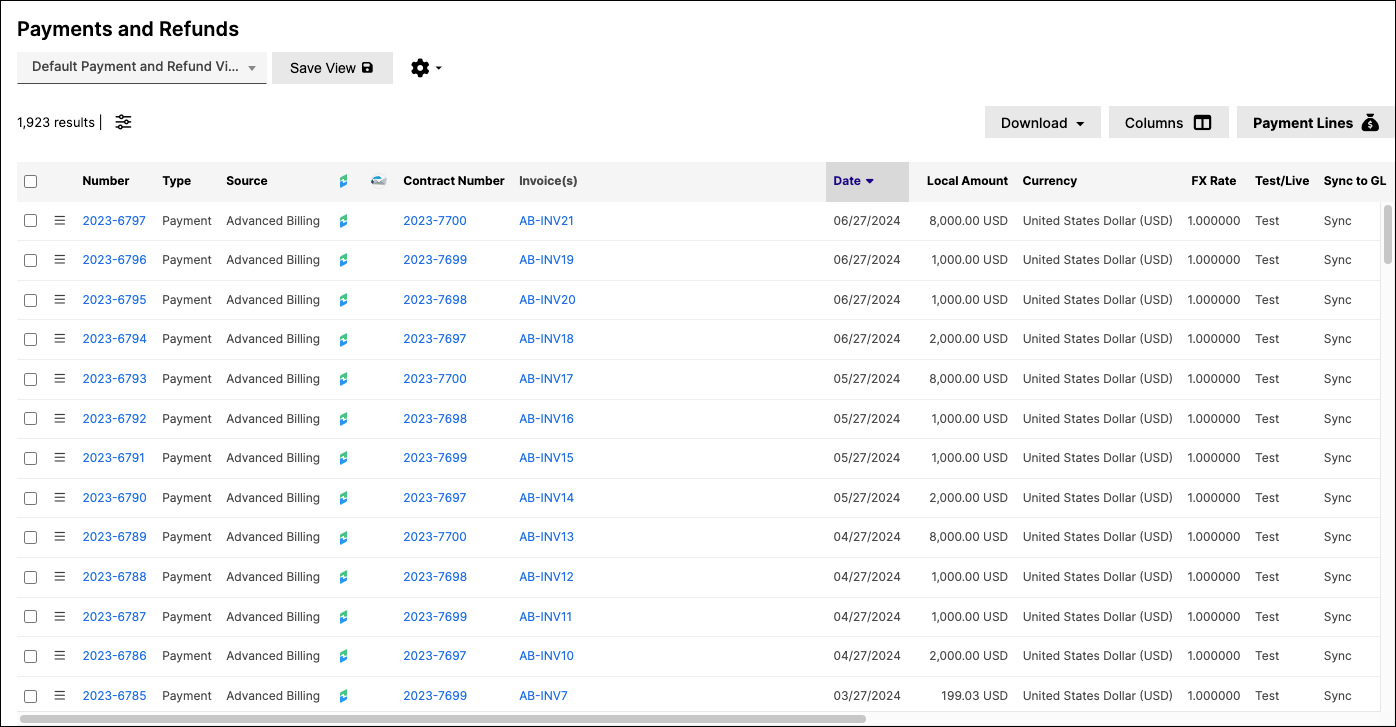
You can delete a payment if it was entered manually or imported, hasn't synced to an external system, and isn't in a closed period. Deletion happens one payment at a time.
Each payment record shows its source of receipt (such as Manual Entry, e-Bill, or QuickBooks) and, where applicable, a linked ID for further reference in QuickBooks, Stripe, or e-Bill.
Manually receive a Payment
A single payment can be applied across multiple invoices at once.
- Payments can be applied across multiple invoices simultaneously.
- If you select a Contract on the Receive Payment screen, you can only apply the payment to that contract's invoices. Leave Contract blank to apply a payment across invoices from different contracts.
- The one restriction that always applies: for QuickBooks SubCustomer/Job contracts, a payment can't be applied across invoices that belong to different SubCustomers.
To receive a payment manually
-
Open the Receive Payment screen:
-
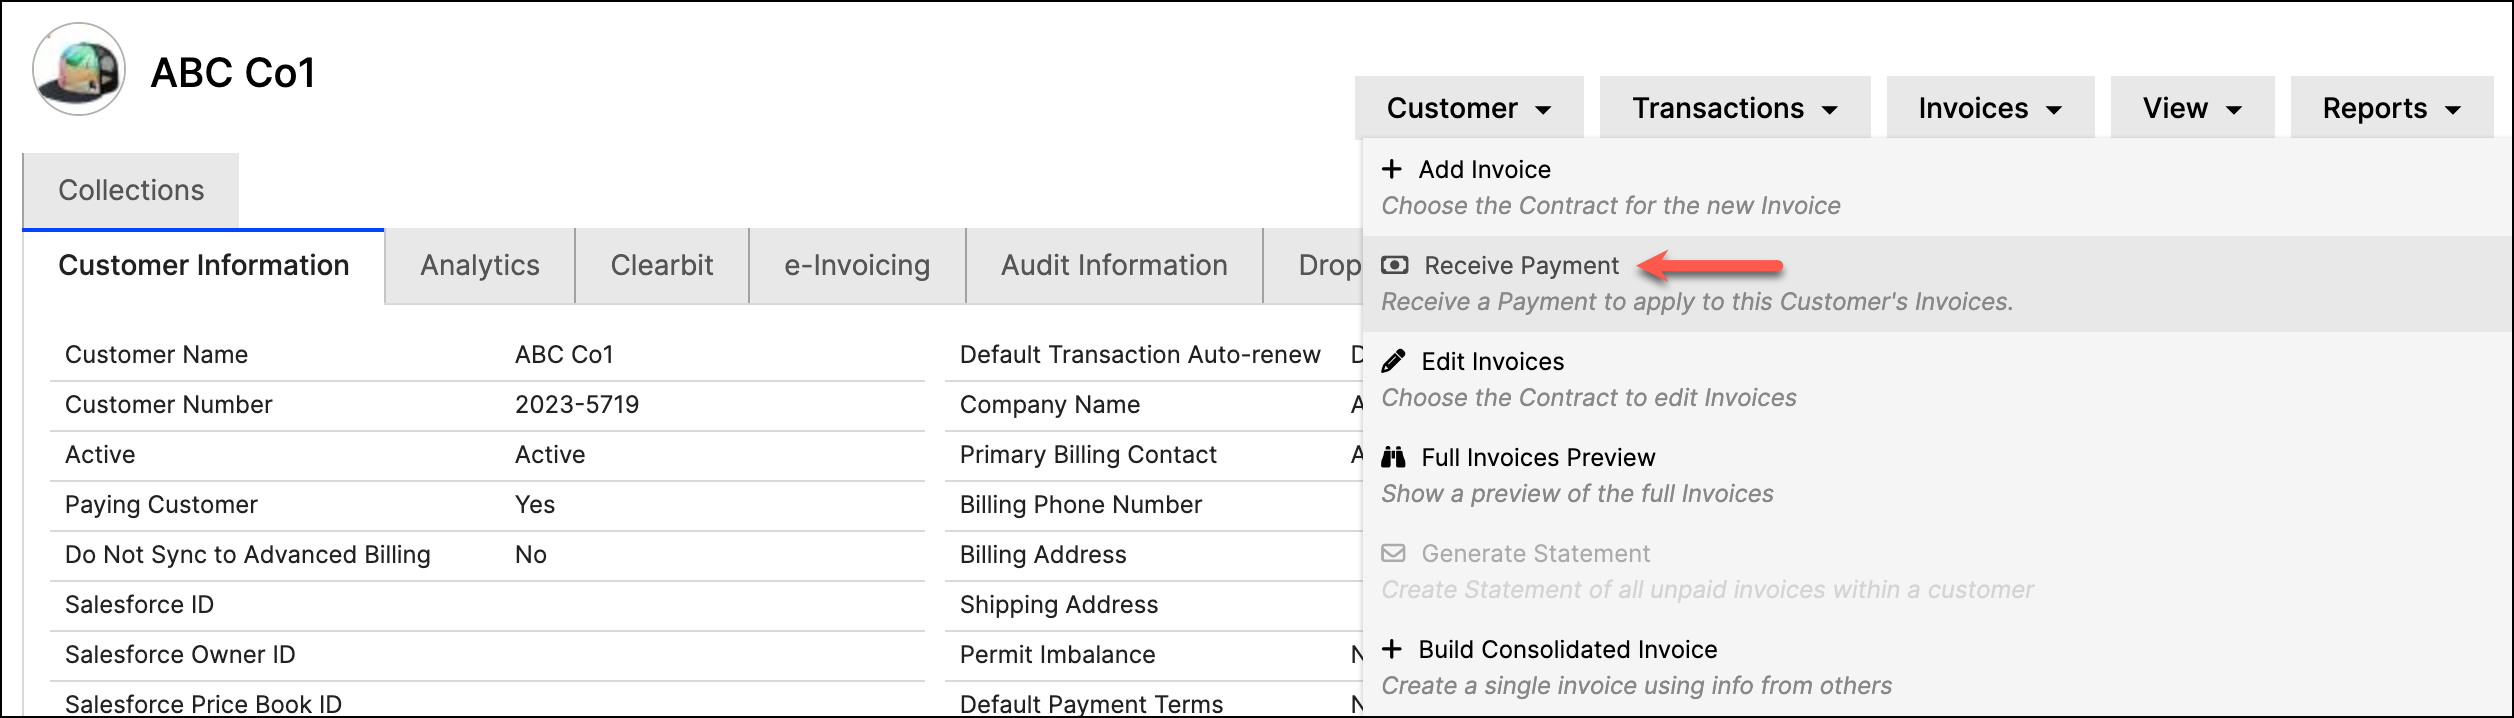
From the Customer screen: Hover over Invoices, and choose Receive Payment.
-
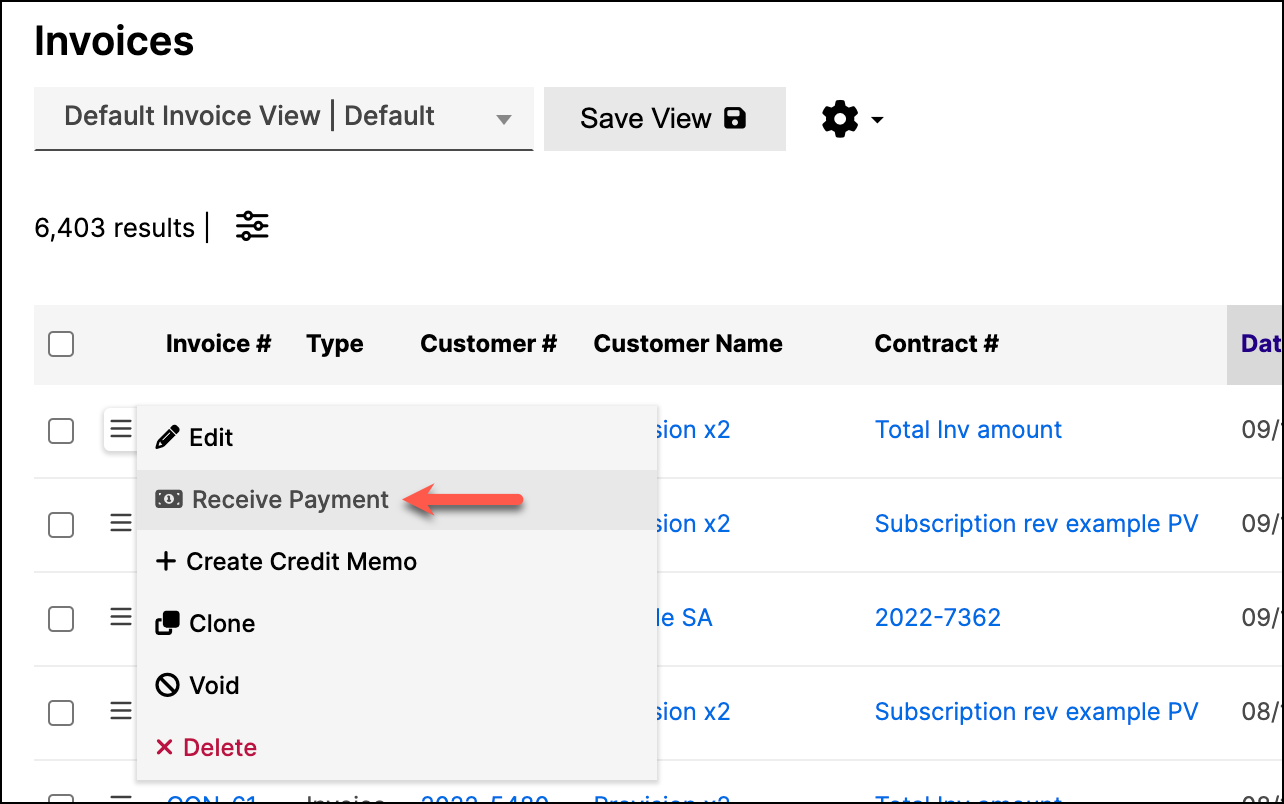
From the Invoice List view: Hover over the More icon next to the invoice and select Receive Payment.
-
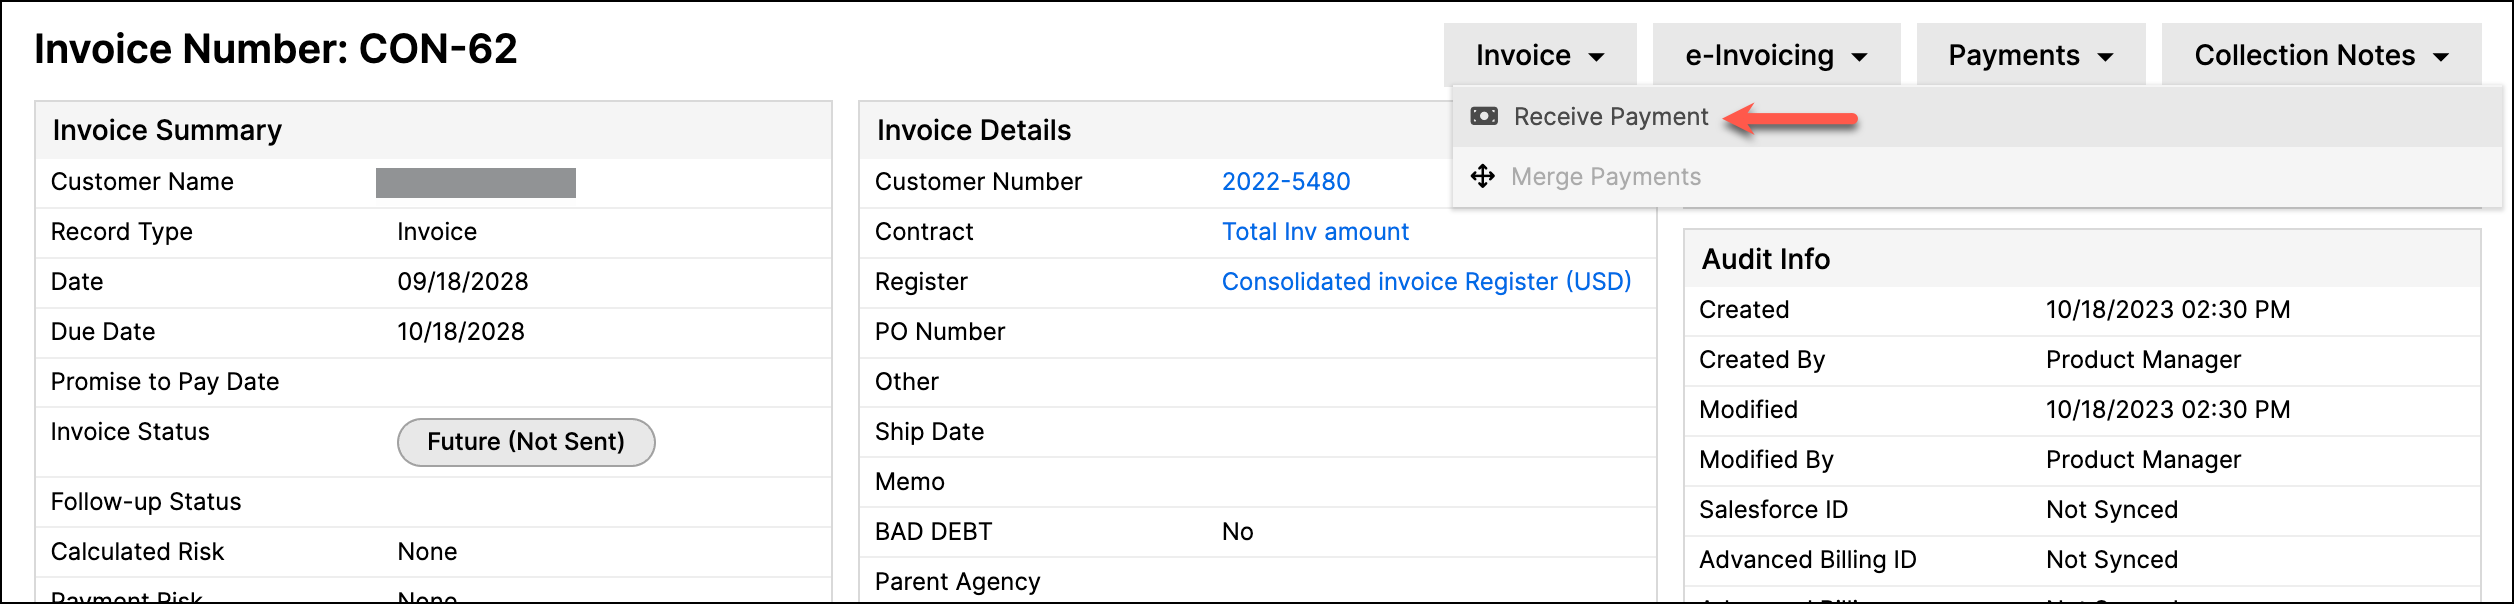
From the Invoice screen: Hover over Payments, and choose Receive Payment.
-
-
The Receive Payment screen or pop-up will now appear, depending on your selected option.
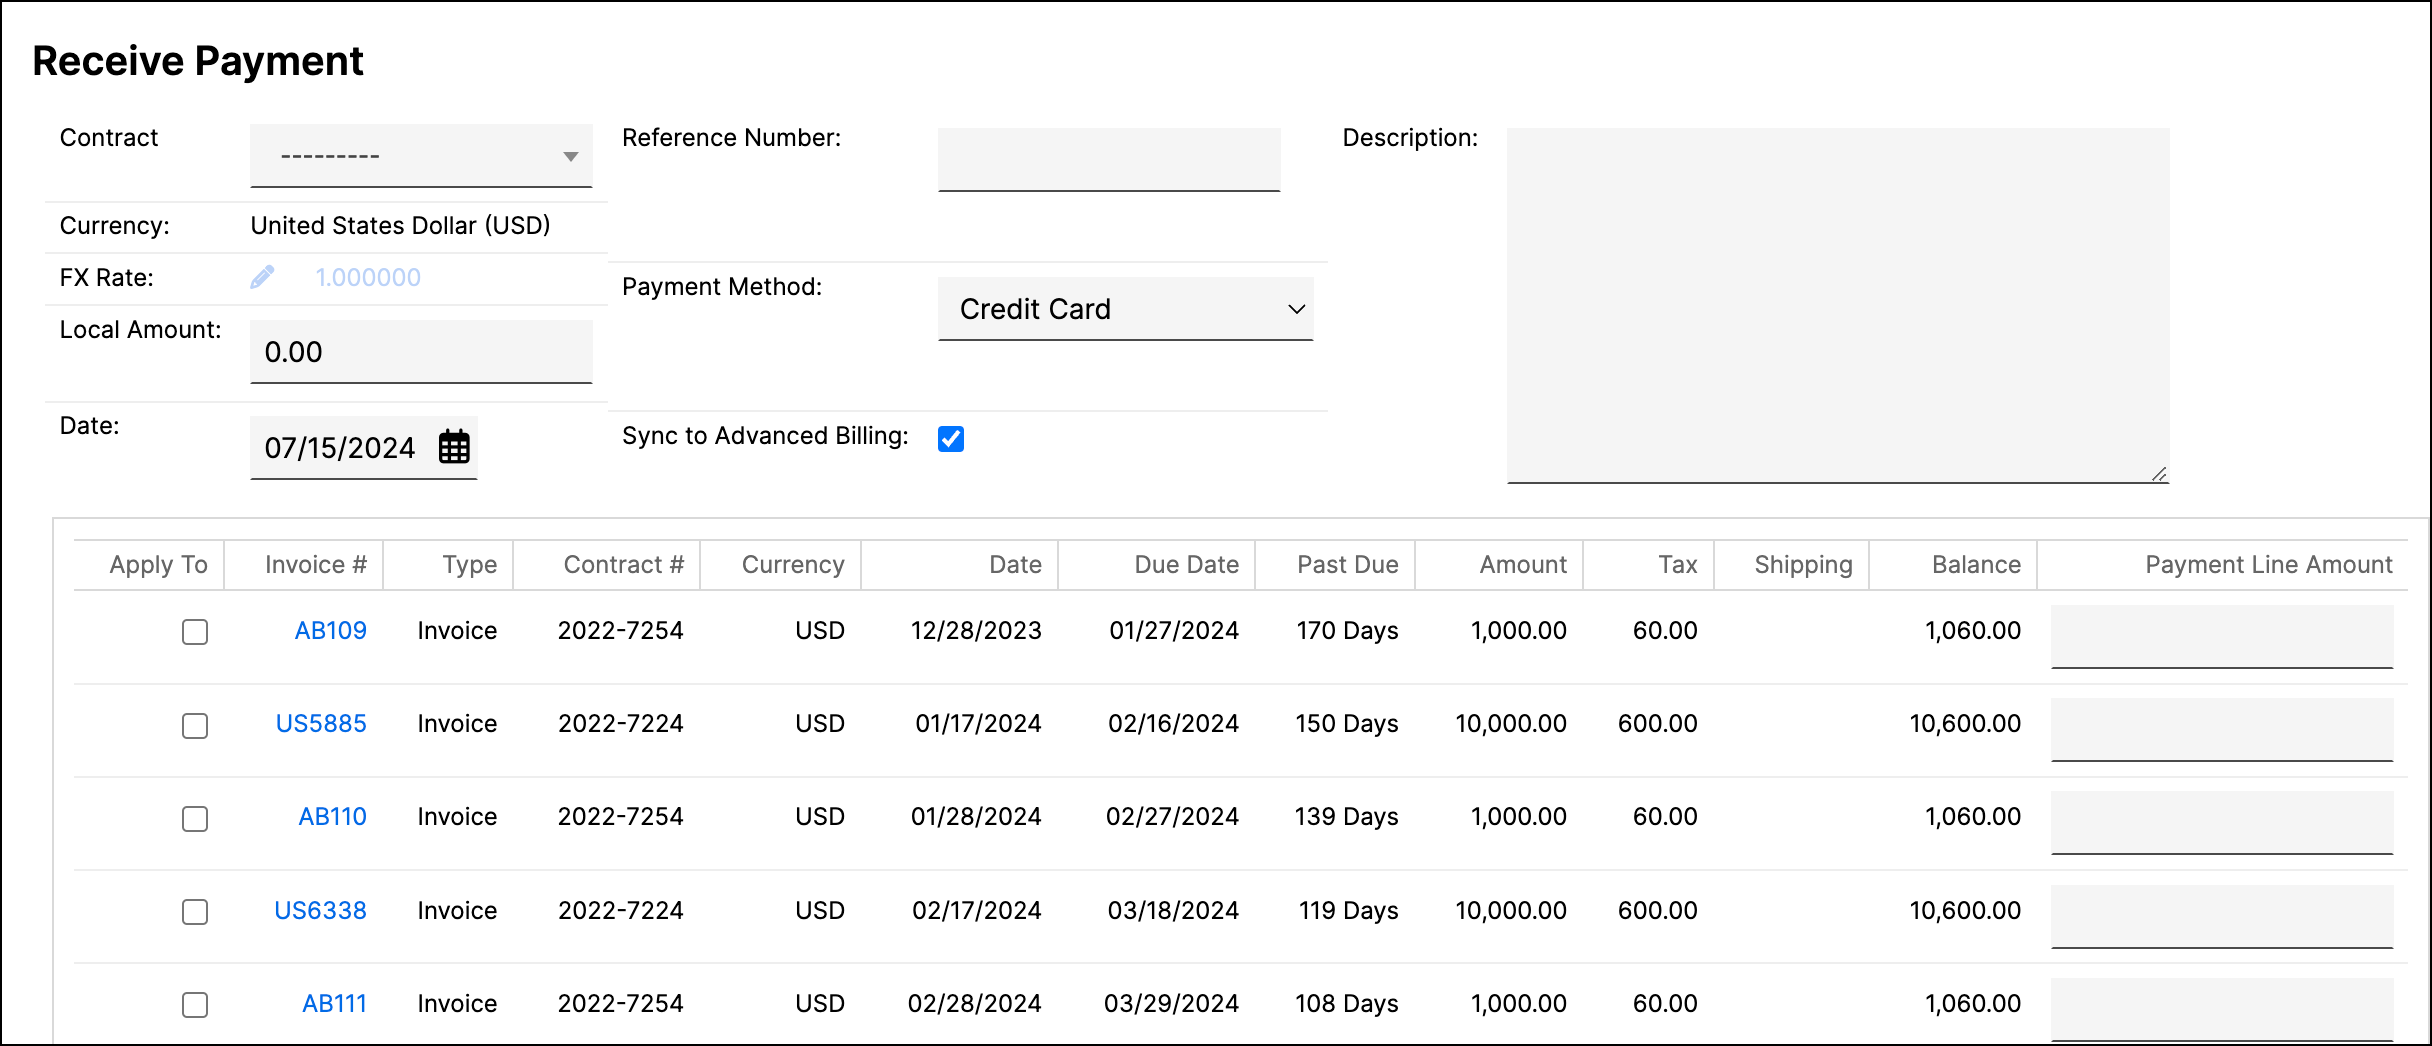
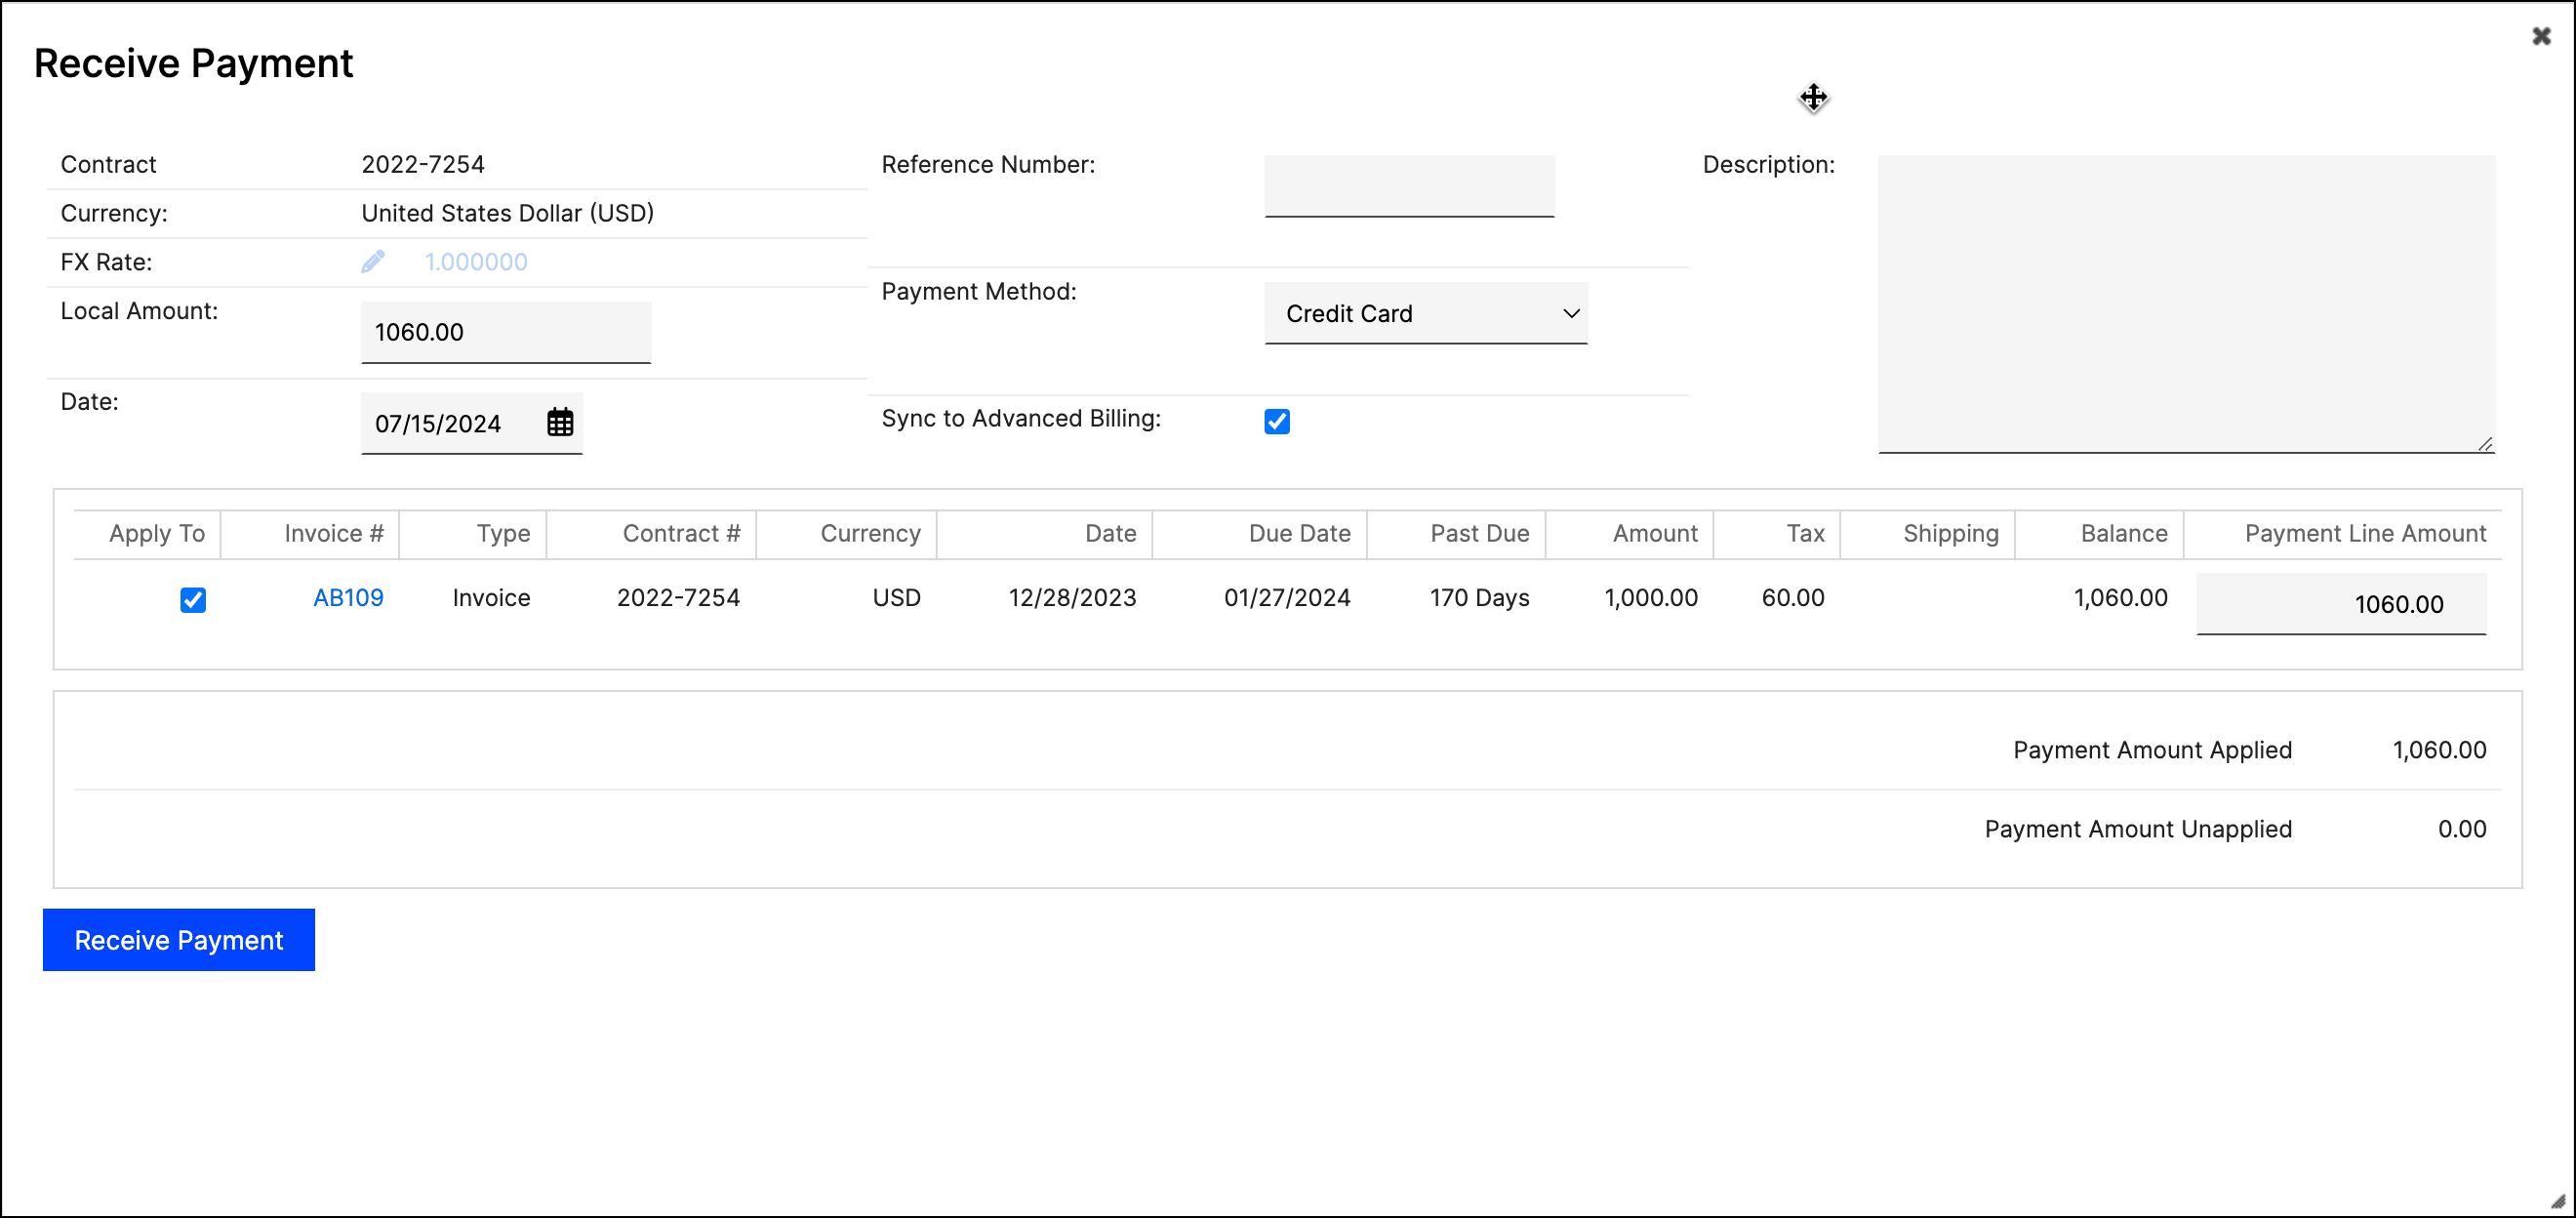
The full screen allows you to apply payments to all of the customer's invoices, while the pop-up limits you to applying payments to the selected invoice.
-
Complete the required fields at the top:
- Contract: (Optional) Switch to another contract if needed.
- Reference Number: Enter the check number or payment identifier.
- Amount: Enter the payment amount.
- Currency and FX Rate: Shown when multi-currency is enabled. See Payments in Foreign Currency below.
- Payment Method: Select the payment type.
- Date: Choose the payment date.
- Description: Add relevant notes.
- Sync: Shown when a general ledger integration is connected. Enable the payment to be synced to it.
- Sync to Advanced Billing: Shown when Advanced Billing is connected. Enable the payment to be synced to it.
-
Select invoices and adjust the payment amounts if necessary.
-
Review the payment details and click Receive Payment.
Additional Payments information
- Credits: If a payment exceeds the invoice amount, the extra amount is automatically recorded as an Unapplied payment line for the customer. Unapplied amounts appear on the Receive Payment screen and can be applied to other invoices.
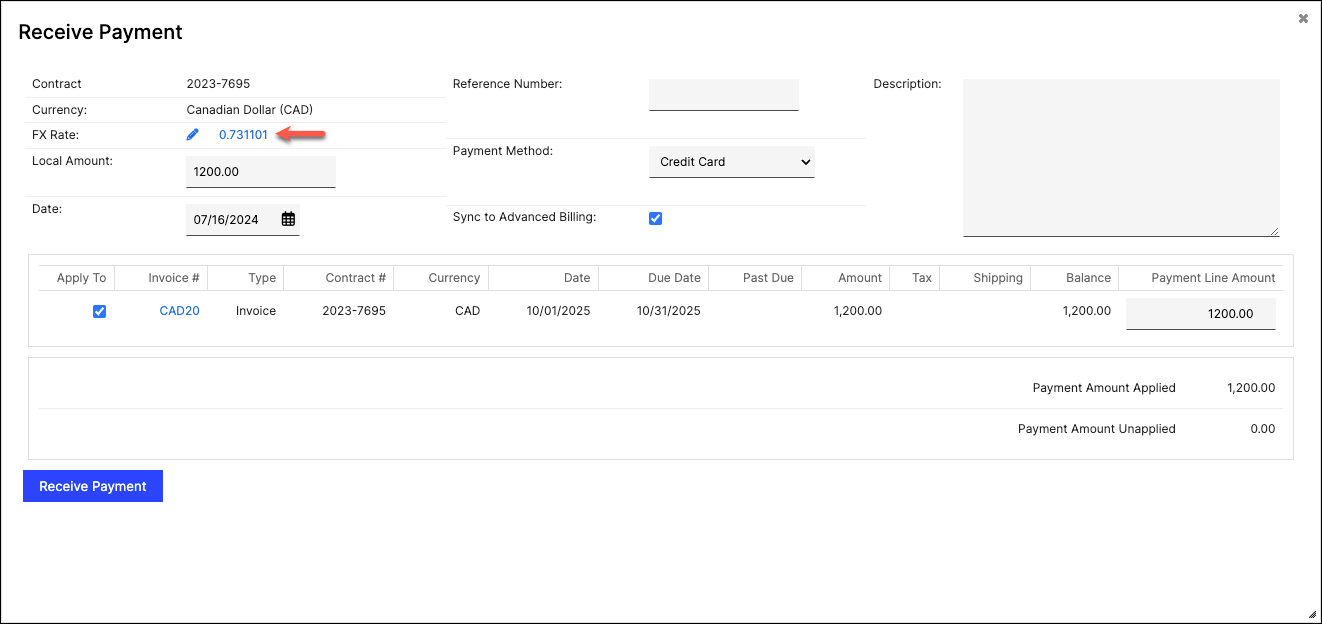
- Payments in Foreign Currency: Use Maxio's multi-currency functionality to record payments in foreign currencies. You can modify the exchange rate and date for foreign currency payments, which are also synced to your connected GL integration.
- Merge Payments: Duplicate payments may occur, such as when a payment received from Stripe is marked as Do Not Sync and another is added in QuickBooks. To merge duplicates, open the corresponding Invoice, hover over the Payments drop-down, and select Merge Payments.
Fraud-related disputes and Payment method deactivation
If a credit card payment is involved in a fraud-related chargeback, Maxio Payments may automatically deactivate the associated payment profile. For the specific conditions that trigger this and what happens when a profile is deactivated, see Understand Automatic Payment Profile Deactivation on High-Risk Events.
Related information
To learn more about applying a credit memo to an Invoice, see Create and Apply Credit Memos.
To learn more about Advanced A/R functionality, see Understand How A/R Management Works.
Still need help?
Reach out and our support team will take it from here.