
Create Refund Receipts in QuickBooks Online
Applies to: Maxio Core
Last updated on Aug 24, 2026
A Refund Receipt records a refund to a Customer for a previously paid balance on an Invoice. Refund Receipts are only available for QuickBooks Online accounts, not QuickBooks Desktop. They sync to QuickBooks Online and can use Maxio's direct AvaTax integration for tax calculations.
The preferred way to create a Refund Receipt is directly from the original Invoice in Maxio you want to refund against. You can also create one in QuickBooks Online and let it sync into Maxio. A Refund Receipt in Maxio is identified by its Record Type of Refund Receipt.
Create a Refund Receipt
You can create a Refund Receipt for any Invoice that's fully or partially paid.
-
Go to the Invoice list and find the Invoice you want to refund.
-
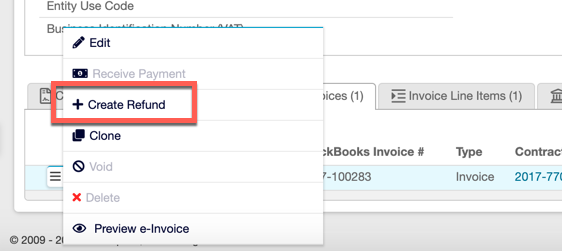
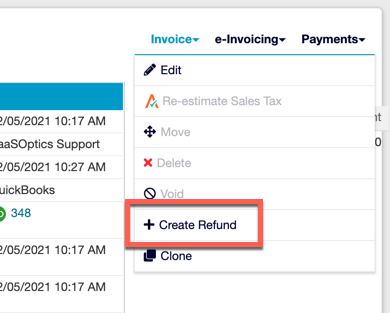
Select Create Refund from the action menu to the left of the Invoice, or from the Invoice drop-down menu on the Invoice's own view.
-
On the Create Refund Receipt confirmation screen, adjust the number, date, and amounts of the Invoice Line Items you're refunding. Maxio prefills the number field with the original Invoice's number, followed by a sequential .RR. suffix, such as
.RR.01, so the Refund Receipt sorts next to its Invoice in a list sorted by number.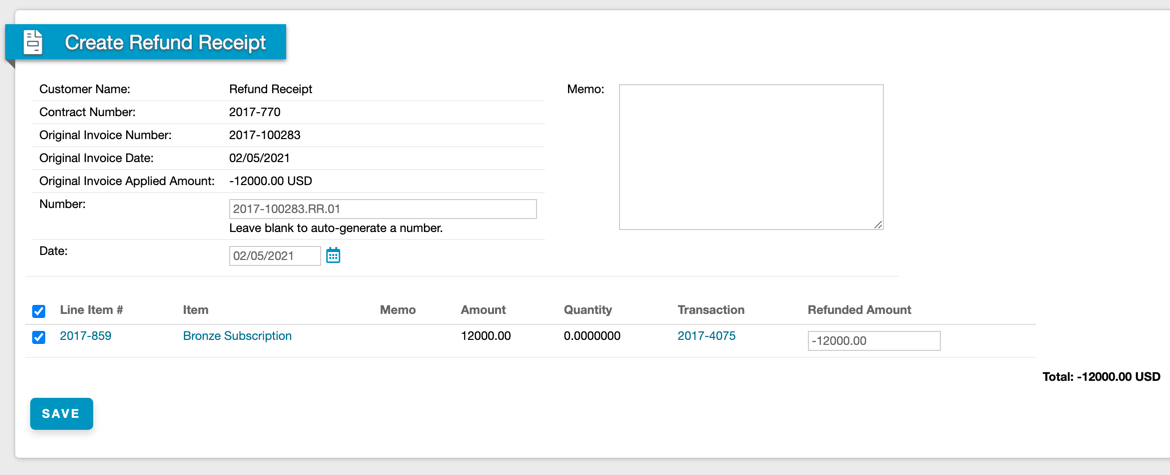
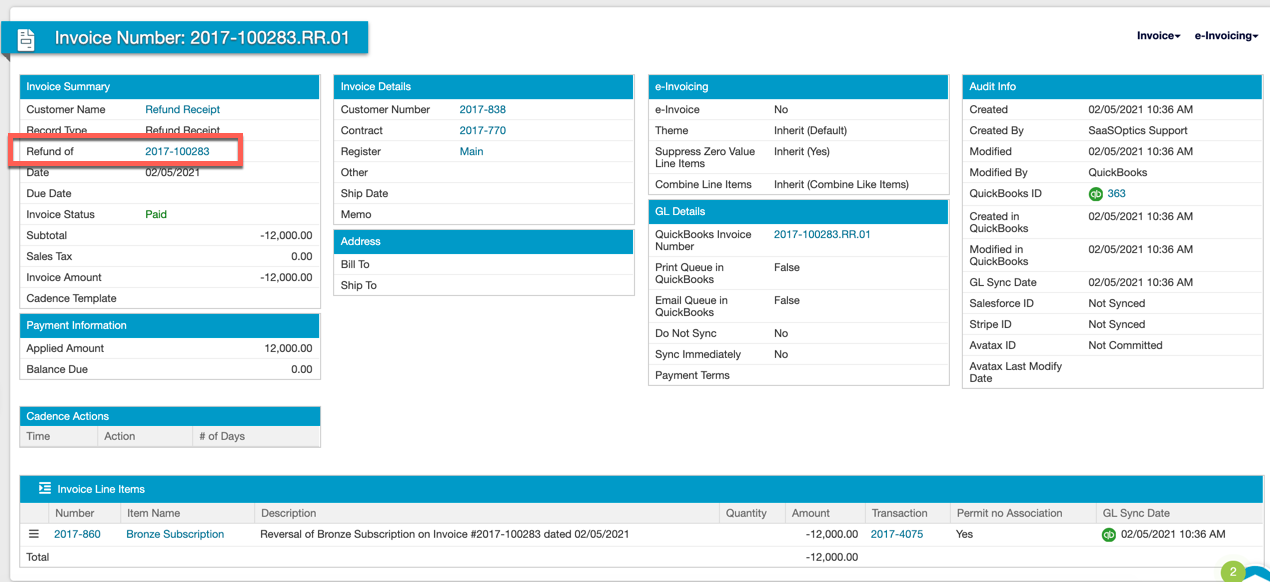
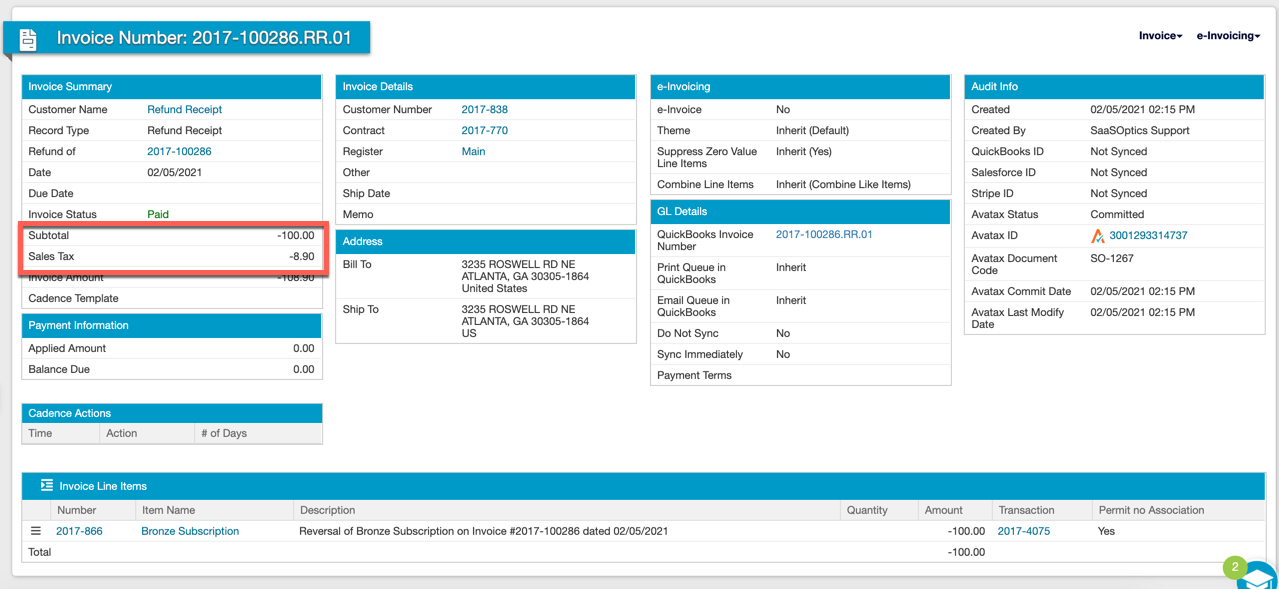
Once created, the Refund Receipt links back to the Invoice it's refunding via the Refunded of link in the Invoice Summary box. This link only appears for Refund Receipts created in Maxio using this method.
Refund Receipts and Credit Memos together
If an Invoice is only partially paid, you can create a Refund Receipt for the cash already received and a Credit Memo for the remaining balance due.
Example: A Customer was invoiced for $100 and has paid $25, leaving a $75 balance.
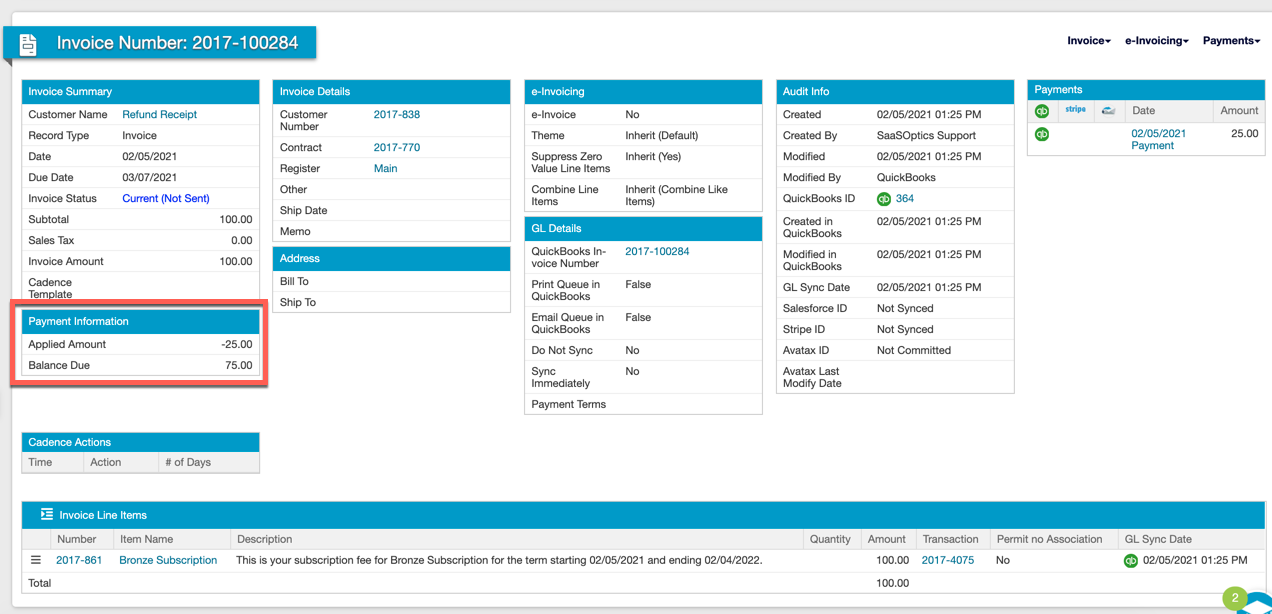
The Customer cancels and wants a refund for the $25 paid, plus a credit for the remaining $75.
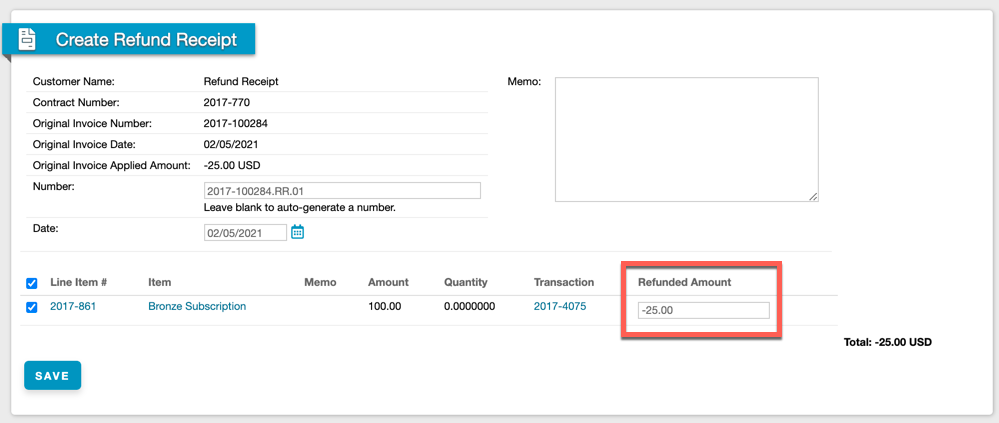
To refund the $25, go to the Invoice drop-down and select Create Refund. You can create a Refund Receipt for up to the amount available to refund, which is $25 here.
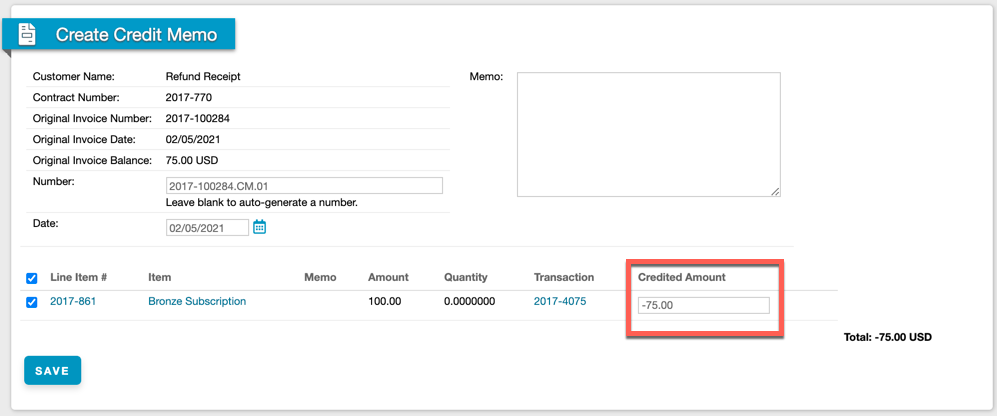
Once that's created, select Create Credit Memo from the same Invoice drop-down for the remaining balance. Maxio prefills the Credit Memo amount to the maximum creditable amount, $75 in this example.
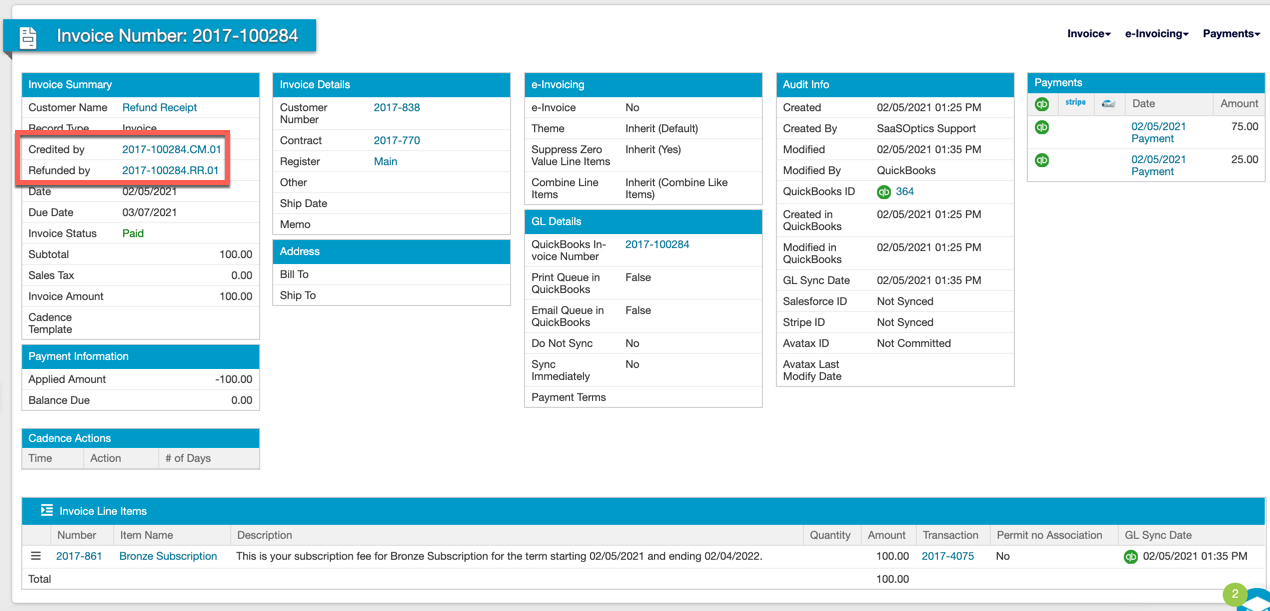
Once both are created, the original Invoice shows as paid, and both the Refund Receipt and Credit Memo are referenced in the Invoice Summary. A Refund Receipt or Credit Memo created any other way won't link back to the original Invoice.
How Refund Receipts handle AvaTax sales tax
If you use Maxio's direct AvaTax integration, Create Refund accounts for it: the prefilled Invoice Line Item amount excludes the tax portion, the same way Create Credit Memo already works.
Example: A fully paid $108.90 Invoice is made up of $100 in Invoice Line Items and $8.90 in tax.
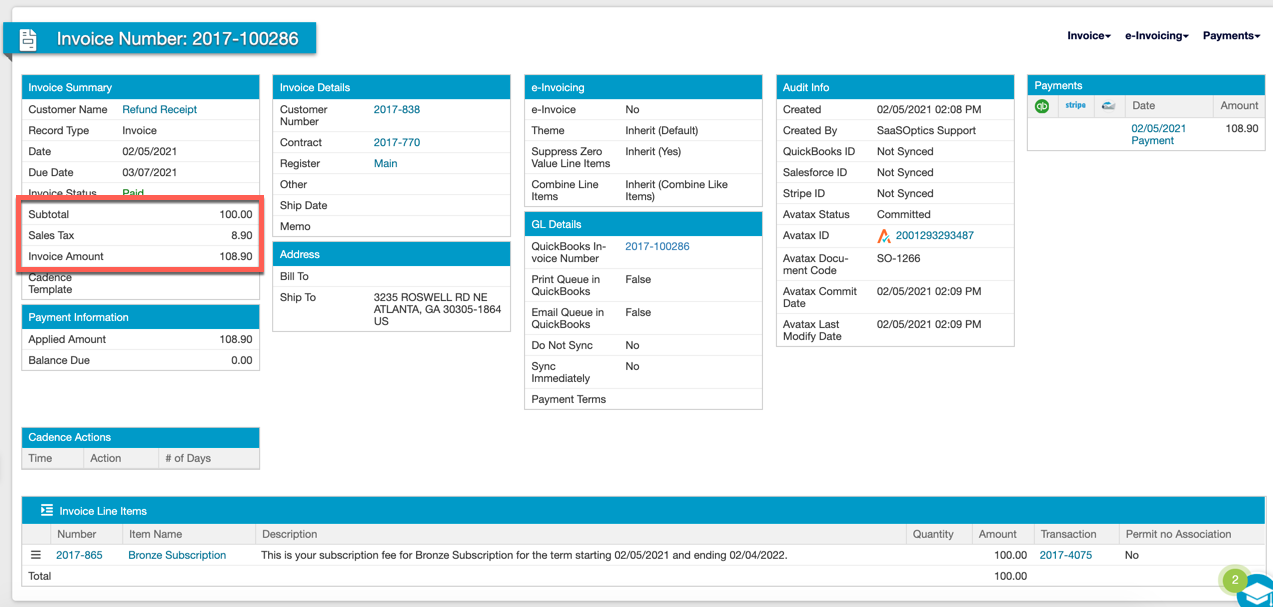
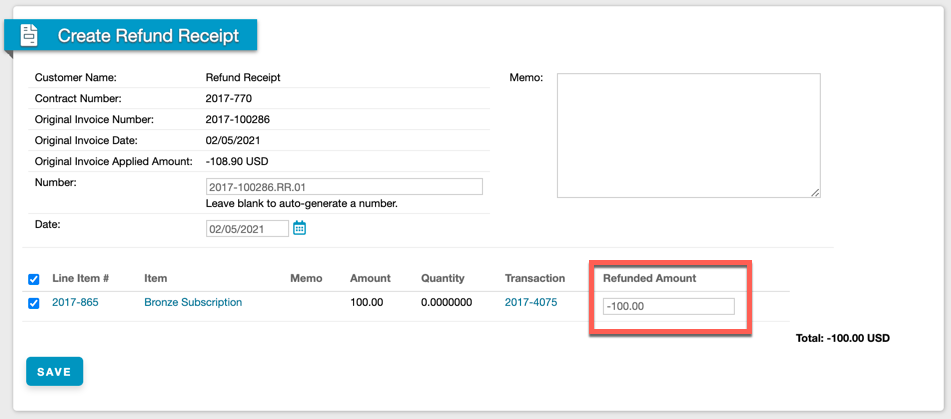
Selecting Create Refund prefills a Refund Receipt for the $100 Line Item amount.
Once created, you can commit the Refund Receipt to AvaTax, bringing its total to $108.90. Tax commits to AvaTax for Refund Receipts the same way it does for Invoices and Credit Memos. If your AvaTax settings are set to Automatic, tax commits when you sync to QuickBooks, send the Refund Receipt to the Customer, or commit it manually.
Related information
For the full Invoice sync conditions, see Sync QuickBooks Invoices.
For how Credit Memos sync, since you'll often create one alongside a Refund Receipt, see Sync QuickBooks Credit Memos.
Still need help?
Reach out and our support team will take it from here.