
Sync Items and Entity Use Codes with AvaTax
Applies to: Maxio Core
Last updated on Aug 26, 2026
Syncing Maxio with AvaTax keeps Items, tax codes, and Entity Use Codes aligned across both systems. This ensures accurate, up-to-date tax logic for invoicing, while giving you control over when data is pushed or pulled during your tax workflow.
Sync steps
Each sync step can be run independently. A Get step retrieves records from Avalara into Maxio; a Send step sends records from Maxio to Avalara.
To run these sync steps, go to Integrations > AvaTax, then select the Synchronization tab.
| Step | Description |
|---|---|
| Get Items | Fetches your existing Avalara Items and their corresponding tax codes. Links an Item that exists independently in both Avalara and Maxio, provided the Item name matches exactly across both systems. Doesn't create new Items in Maxio. |
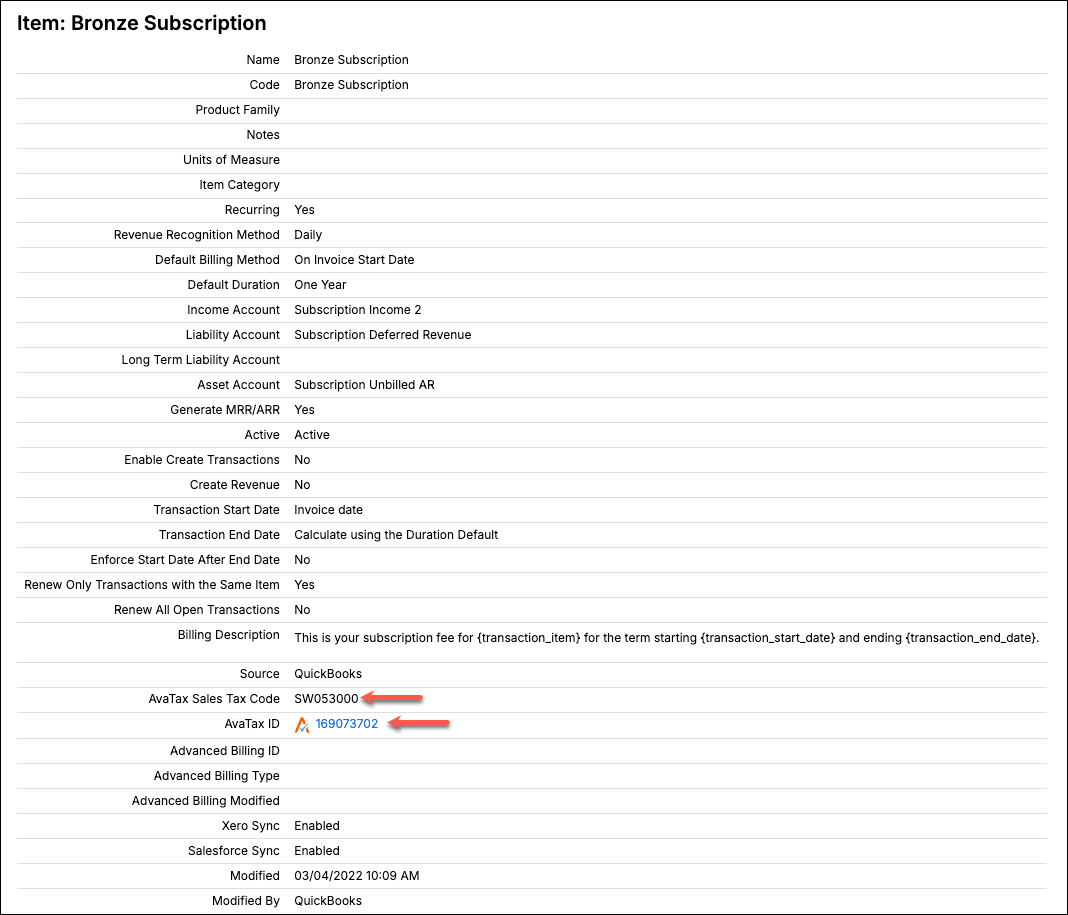
| Send Items | Sends your Items from Maxio to Avalara for tax code association. Items synced to Avalara are assigned the default Avalara Sales Tax Code, and any synced Item that requires a different tax code must be updated in Avalara. The Sales Tax Code and the Item's corresponding AvaTax ID are displayed in the Item Profile in Maxio. |
| Get Entity Use Codes | Fetches Avalara's global list of Entity Use Codes for use in Maxio. A custom Entity Use Code you add in Maxio isn't synced back to Avalara as a code definition. See Manage Entity Use Codes for Tax Exemptions for details. |
Actions
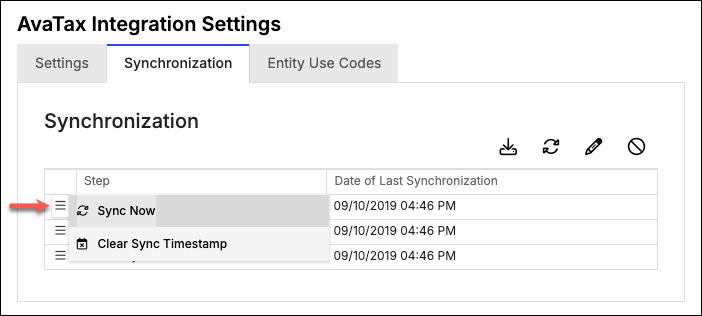
Hover over the hamburger menu to the left of each sync step to view actions you can take for that step individually. Click Sync Now to sync only that step, or Clear Sync Timestamp to clear the date of last synchronization for that step.
Important: Don't clear the Sync Timestamp unless Maxio Support instructs you to. This is typically only needed when converting your integration from Sandbox mode to Production.
Related information
To configure your Sync Schedule and other AvaTax settings, see Configure the AvaTax Integration.
Still need help?
Reach out and our support team will take it from here.