
Use the Maxio Billing Portal
Applies to: Advanced Billing
Last updated on Aug 28, 2026
The Maxio Billing Portal gives your Customers a self-service page to view Invoices and manage how they pay. Create Customer records with the right Billing Portal details, then invite Customers to start using it.
Create a Customer record
To create a complete Customer record, provide the right information from the Billing Portal.
To create a Customer record
-
From the left navigation panel of Maxio Core, go to Customers and click + to create a new Customer record.
-
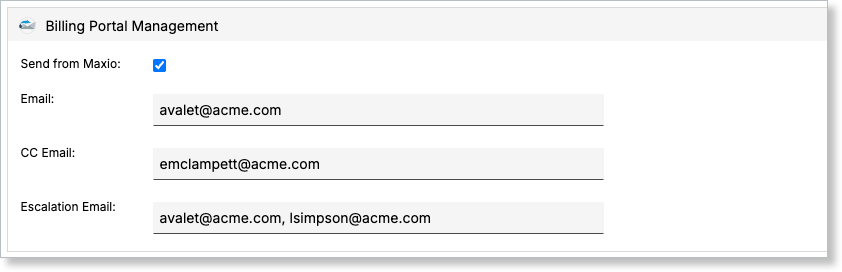
Scroll down to the Billing Portal Management section and fill out the given email fields.
Use a comma to separate multiple emails.
-
Complete the rest of the Customer record and click Save.
Enable access and invite Customers to use the Billing Portal
Once a Customer record exists, enable their Billing Portal access and send an invitation.
To enable access and invite a Customer
-
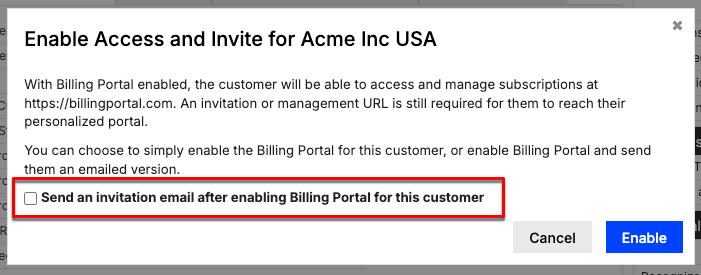
From the Customer view, click the Billing Portal action drop-down and select Enable Access and Invite.

This opens the Enable Access and Invite dialog.
-
Check the box to send an email invitation with a link to the Billing Portal, or leave it unchecked to enable access without sending one, then click Enable.
Maxio automatically sends the invitation to the email address you listed under Billing Portal Management when creating the Customer record.
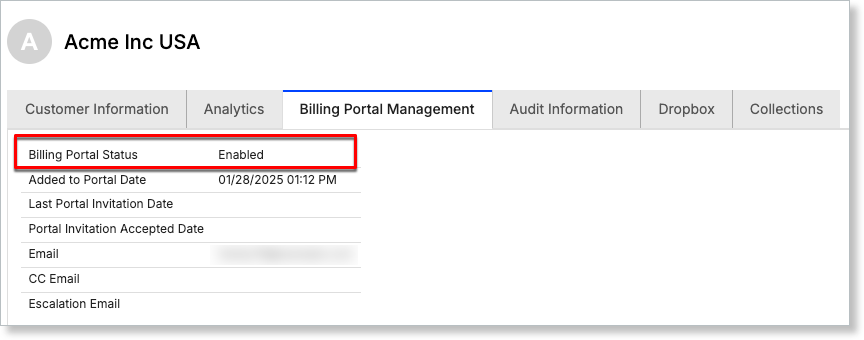
Once access is enabled, the Billing Portal drop-down includes additional actions on the Customer view.

The Billing Portal Management tab also now shows the status as Enabled.
| Option | Description |
|---|---|
| Enable Access and Invite via Email | Launches the Enable Access and Invite pop-up. |
| View Billing Portal Link | Renders and routes you to the Billing Portal Management page, where the Customer can:
|
| Resend Invitation | Triggers a new email invitation to the Customer for easy access to the Billing Portal. A confirmation banner appears. |
| Revoke Access | Revokes Billing Portal access for the selected Customer, preventing any self-service actions. A modal renders for confirmation. |
Send invoices from the invoice view
| Option | Description |
|---|---|
| Preview and Send | Launches the Preview and Send Invoice pop-up. |
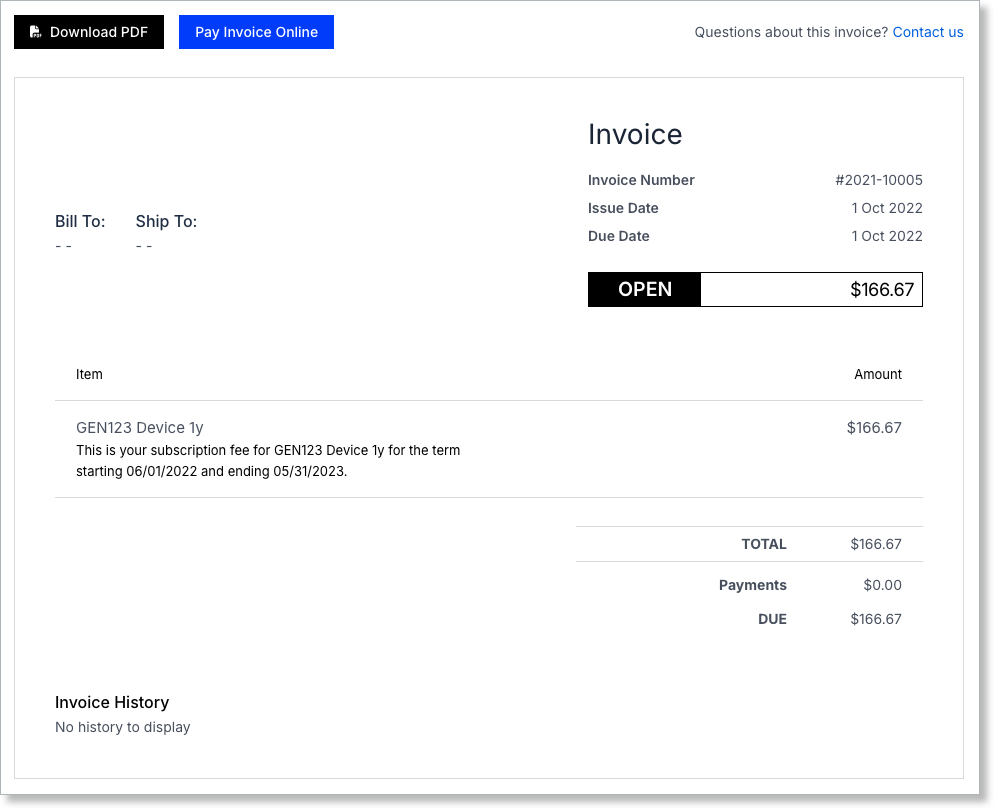
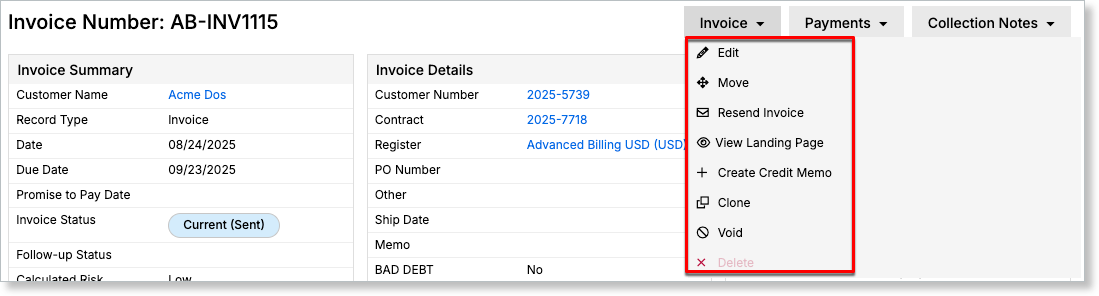
| View Landing Page | Routes you to the Invoice landing page, where the Customer can download a copy of the Invoice as a PDF or pay it online. |
Invoice landing page
To send an Invoice
-
From the Maxio Customer page, click the Invoices tab and select the Invoice to sync to Advanced Billing.
-
From the Invoice action drop-down, select Preview and Send.
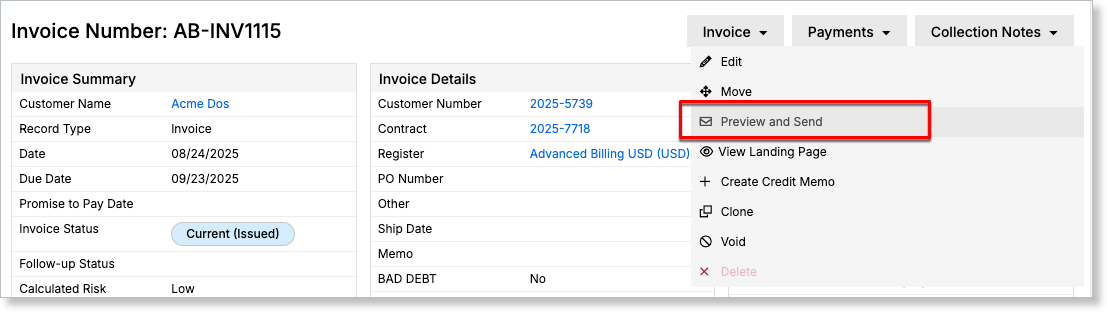
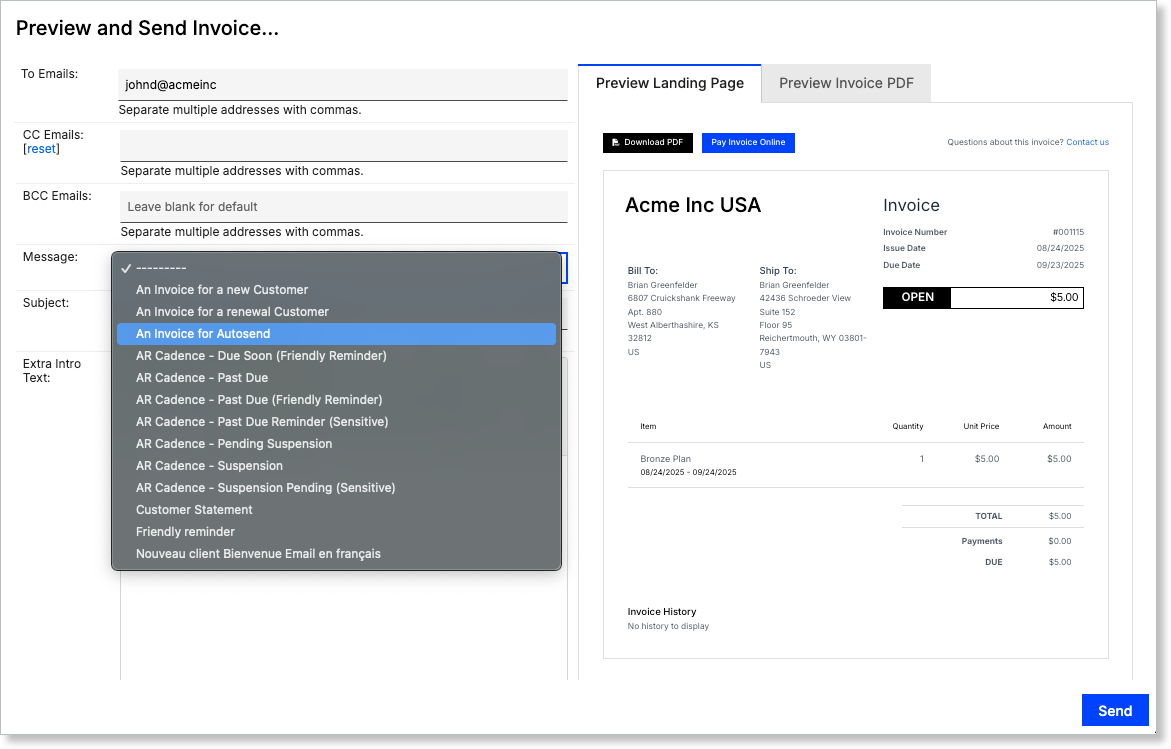
The Preview and Send Invoice pop-up appears.
-
For Message, select a template from the drop-down list.
If an error message appears in the Preview pane, contact Maxio Customer Support for early access to this feature.
-
Click Send.
Once the Invoice is sent, the Invoice action drop-down includes additional options.
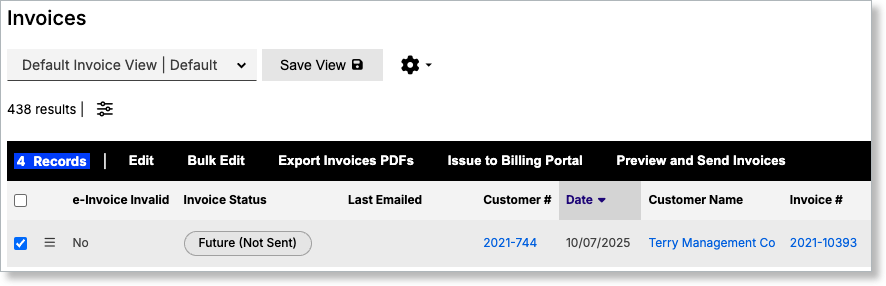
Issue invoices to the Billing Portal in bulk
From the Invoice List, select the Invoices you want to issue in bulk.
Receive payment from the Billing Portal
Advanced Billing sends the Invoice, and the Customer receives an email containing a link to the Billing Portal. From this link, the Customer can pay the Invoice directly.
To pay an Invoice from the Billing Portal
- From the portal, select the Invoice, then click the Pay Invoice Online button in the top-left corner.
- Select a given Payment Profile, or click Pay With Credit Card to enter the credit card information.
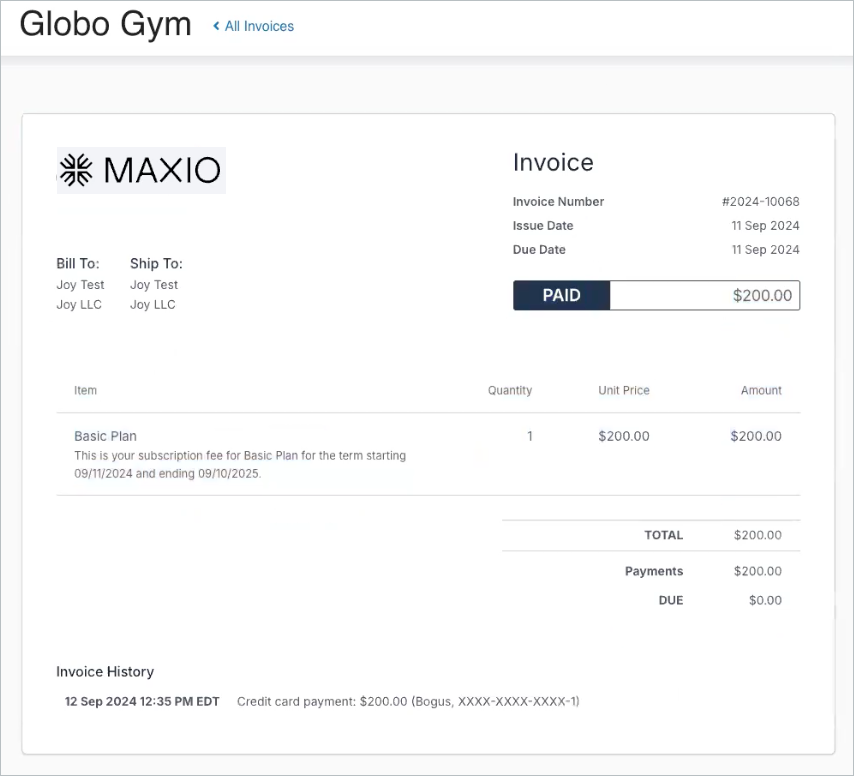
After the payment information is successfully submitted, the Invoice is marked Paid.
Manage payment methods
The Billing Portal includes a Payment section where you can view and manage the payment methods available for your account. From this section, you can review existing payment profiles and add a new payment method without opening or paying an Invoice.
To manage payment methods
- Log in to the Billing Portal.
- Select Payment from the header.
- Review the payment profiles currently available for your account.
- Select the option to add a new payment method.
- Follow the prompts to enter and save the new payment details.
After the payment method is saved, it can be used for future payments, depending on your account and Subscription settings.
Sync from Maxio Core
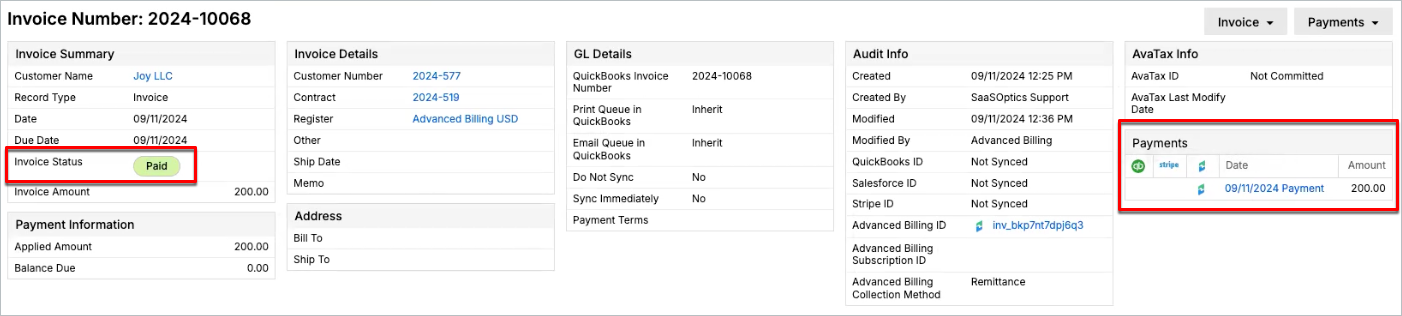
From Maxio Core, if the Invoice status still shows Current (Sent) after the Invoice has already been paid, sync with Advanced Billing to update the status to Paid.
Related information
See Understand the Billing Portal for an overview of what the Billing Portal does and who it's for.
See Explore Billing Portal Topics for the full set of Billing Portal setup, access, and support articles.
Still need help?
Reach out and our support team will take it from here.