
Set Up TaxJar in Maxio Invoicing Suite
Applies to: Advanced Billing
Last updated on Aug 27, 2026
BETA
This feature is currently in beta and may change over time. During the beta period, functionality, availability, and performance may vary.
To join the Beta program, request Beta access.
Connect TaxJar to a Maxio site, test the connection, update TaxJar credentials, or disable the integration.
Before you start
Review the prerequisites and limitations in TaxJar Integration Overview before enabling TaxJar.
Implementation order
Follow these steps in order so product tax codes, exemptions, and required addresses are in place before tax begins calculating on live invoices.
- Get a TaxJar API key.
- Enable the TaxJar integration in Maxio.
- Configure the tax origin address.
- Assign TaxJar product tax codes to products and components.
- Apply customer exemption categories where applicable.
- Test in Sandbox, then switch to Production.
Step 1: Get a TaxJar API key
In the TaxJar dashboard, go to Account > TaxJar API, then select Connect Integration. Generate a key for the environment you intend to connect.
- Sandbox key: Use with a Maxio test site for implementation validation.
- Production key: Use only with your Maxio production site.
Keep keys scoped to one environment. Pointing a Production key at a test site, or a Sandbox key at a production site, can produce confusing tax results and is not supported.
Step 2: Enable TaxJar in Maxio
Administrators can manage the integration from Settings > Taxes in Maxio.
- Go to Settings > Taxes.
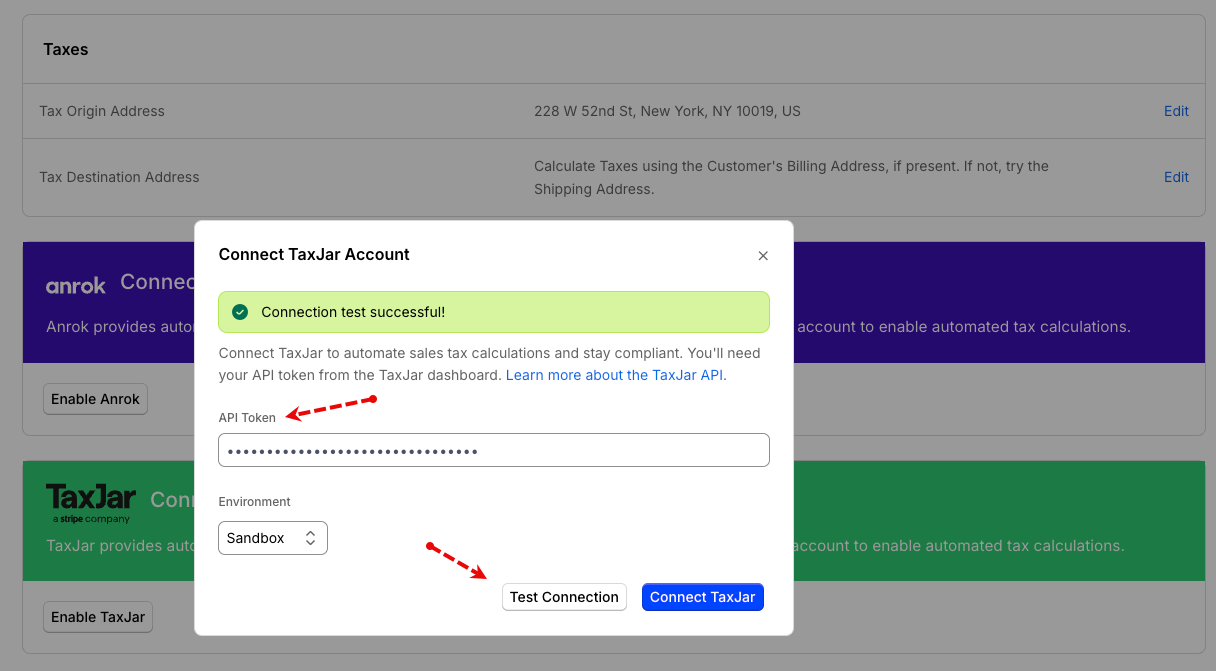
- Click Enable TaxJar.
- Enter your TaxJar API key.
- (Optional) Enter a Start syncing transactions from date. Invoices dated before this are taxed as usual but aren't sent to TaxJar. Changing the date later doesn't resend already-skipped invoices or remove already-synced ones. Leave it blank to sync every invoice.
- Click Save Configuration.
When you save, Maxio stores the credentials in gateway settings and switches the site's tax type to TaxJar. The UI validates the expected key format and links to TaxJar's API documentation.
Test the connection
Use Test Connection to verify your credentials without committing them. The test validates the key format and attempts a live call to TaxJar. If the test fails, Maxio displays an error so the issue can be corrected before going live.
Edit or rotate TaxJar keys
- Go to Settings > Taxes.
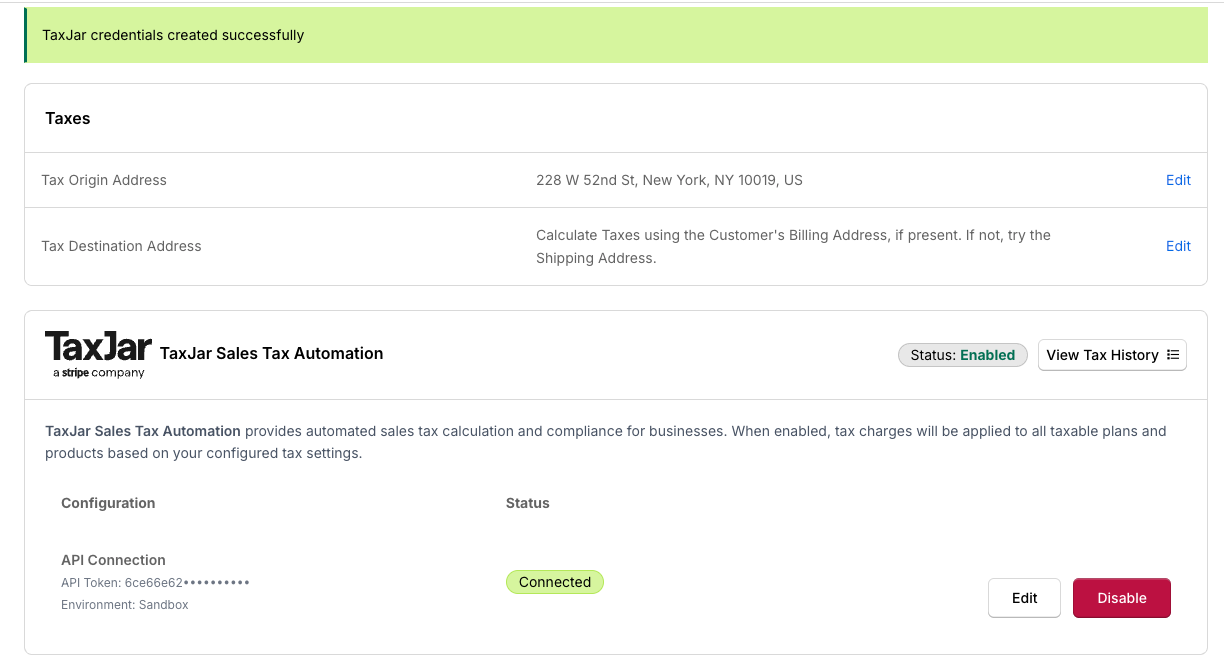
- In the TaxJar Sales Tax Automation card, click Edit.
- Enter the new API key, and update the Start syncing transactions from date if needed.
- Click Save Configuration.
Maxio re-validates the key and keeps the site marked as TaxJar-enabled after the update.
Disable TaxJar
- Go to Settings > Taxes.
- In the TaxJar Sales Tax Automation card, click Disable.
- Confirm by clicking Yes, Disable.
This removes the stored credentials, reverts the site's tax type to custom, and stops TaxJar tax calls. Any errors during disablement are logged and surfaced in the UI.
Still need help?
Reach out and our support team will take it from here.