
Configure and Test Webhooks
Last updated on Sep 19, 2026
Webhooks integrate with your systems by sending an HTTP POST notification whenever a specific Subscription, billing, or payment event occurs. Getting that integration right means knowing what the request body looks like, what happens when your endpoint does not answer, how to prove a request really came from Advanced Billing, and how to exercise the whole path before you depend on it.
What a webhook request looks like
Webhooks are sent as HTTP POST requests to your URL with a form-encoded body (content-type: application/x-www-form-urlencoded) for easy parsing in almost any programming language.
Keys present in every webhook
| Key | Description |
|---|---|
id | A unique, numeric identifier for the webhook. Use this value to record which webhooks you have already seen, recorded, or acted on. |
event | An identifier for the type of event that occurred. See the list of Review Webhook Events. |
payload | A "hash" of pertinent data about the event. Keys and sub-keys in the hash are denoted using square bracket notation in the key. For example, the product name is included as the following form-encoded key/value pair in the content body of a signup_success webhook: payload[subscription][product][name]=Basic |
Each request also carries three headers:
X-Chargify-Webhook-Id- The same unique identifier as theidkey, available before you parse the body.X-Chargify-Webhook-Signature-Hmac-Sha-256- The HMAC-SHA-256 signature described in Webhook verification.X-Chargify-Webhook-Signature- The deprecated MD5 signature, kept for backward compatibility.
Configuring webhooks
Configure webhooks in the Webhooks section of your site's settings. Enabling webhooks is a site-level switch, and each endpoint you add afterward carries its own list of subscribed events, so one destination can receive everything while another receives only what it needs.
Important: Advanced Billing accepts HTTP endpoints only while your site is in test mode. Switch your endpoints to HTTPS before you move to live mode. The target URL can only use ports 80 and 443, specified via
httporhttps.
To set up a webhook endpoint
-
Go to Config > Settings, then select Webhooks.
-
Select the Send webhooks to your webhook endpoints checkbox.
-
Click Add New Endpoint.
-
Enter the URL you want Advanced Billing to post data to.
-
Under Webhook Subscriptions, select each event you want delivered to this endpoint. All On and All Off select or clear the whole list at once.
-
Click Save.
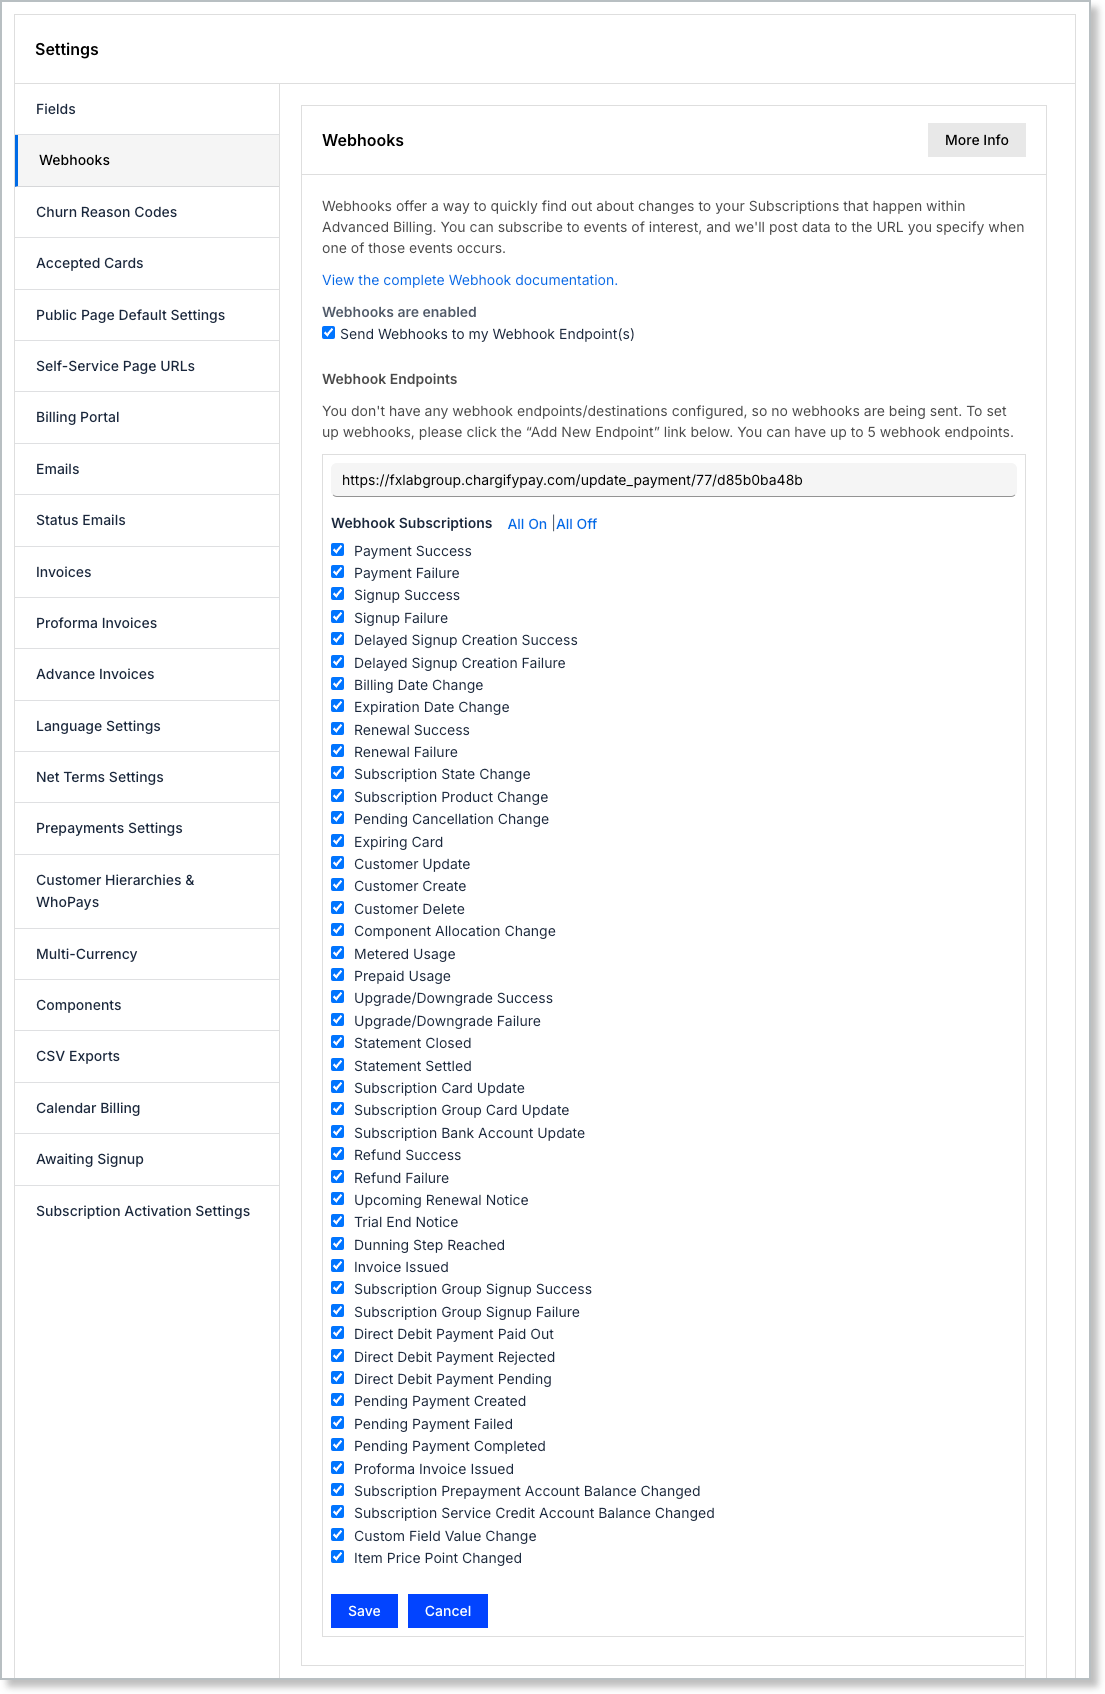
Each endpoint you add appears under Webhook Endpoints with its current status and the number of events it receives, for example enabled | 46 events. An endpoint that fails repeatedly is paused and eventually disabled. See Inoperative endpoints.
By default you can have up to 5 webhook endpoints per site. Once you reach that limit, the Add New Endpoint button changes to Maximum endpoints reached. See Webhooks in Understand Merchant Limits.
Edit or remove an endpoint
Every endpoint has an Actions drop-down holding three choices.
- Edit - Change the endpoint URL and which events are delivered to it. Click Update to keep your changes.
- Remove - Delete the endpoint. Advanced Billing stops sending webhooks to it.
- Test - Send a test payload to the endpoint to confirm it responds. See Webhook testing.
After a test, a message at the top of the page reports whether the test webhook was sent successfully, along with a link to the Webhooks Panel where you can see the delivery details.
Webhook limitations
Advanced Billing places two limitations on your site for how webhooks can be used: data retention, meaning the length of time old webhooks are stored, and the number of endpoints allowed per site. See Webhooks in Understand Merchant Limits.
Webhook timestamps
Timestamps in webhook payloads are rendered using the site's configured timezone. Some newer event types, such as component_allocation_change and metered_usage, use ISO 8601 format in UTC to standardize payload formatting across systems.
Webhook acknowledgment and automatic retries
Upon receiving a webhook, accept it by returning an HTTP 200 OK response as quickly as possible. Sending any other response, such as 500 Internal Server Error or 404 Not Found, or failing to respond within a short period, triggers automatic retries. While the system aims to retry promptly, timing is managed with a backoff schedule.
Advanced Billing attempts to send each webhook event up to six times before giving up: the original attempt plus five retries. The retries follow an approximate backoff schedule:
| Attempt | Approximate timing |
|---|---|
| 1 | As soon as possible after the original event |
| 2 | ~10 seconds after the most recent failure |
| 3 | ~15 seconds after the most recent failure |
| 4 | ~90 seconds after the most recent failure |
| 5 | ~180 seconds after the most recent failure |
| 6 | ~15 minutes after the most recent failure |
If you use the webhook replay feature through the webhook API or the Webhooks Panel, avoid duplicate actions by following these suggestions:
- Use the unique webhook ID to track which webhooks you have already processed.
- Do not replay webhooks until the
last_sent_attimestamp is well outside the automatic retry intervals.
Inoperative endpoints
Merchants often set up temporary webhook endpoints for testing and then forget to deactivate them. Inoperative endpoints cause significant system strain as Advanced Billing attempts to deliver webhooks to them.
If repeated failures occur, Advanced Billing pauses or disables the endpoint:
| Failure count | State | System behavior |
|---|---|---|
| 1 to 25 | Enabled | Retries proceed automatically |
| 26 to 50 | Paused | Webhooks are generated in a paused state and must be sent manually from the Webhooks Panel. No further delivery attempts happen while paused; the pause automatically expires 2 hours after the last failure, and the next event to fire a webhook for that endpoint re-enables it. |
| 51 and over | Disabled | Webhooks are no longer generated for this endpoint |
If you delete an endpoint from Advanced Billing, any paused webhooks referencing that endpoint cannot be resent and are effectively discarded.
Webhook metadata
Webhook records include metadata about their acceptance or rejection by your application, as well as details about errors encountered during delivery attempts. Metadata attributes include:
id- Unique identifier for the webhook, consistent across retries and replays.successful- Boolean indicating whether the webhook was accepted on its last attempt.created_at- Timestamp for when the webhook was created.accepted_at- Timestamp for when the webhook was successfully accepted.last_sent_at- Timestamp for the most recent delivery attempt.last_error_at- Timestamp for the last failed delivery attempt.last_error- Description of the error from the last failed attempt.
Webhooks retain their event and payload data. Once a webhook is accepted, the accepted_at timestamp is filled in. You can view this timestamp through the webhooks API or in the Webhooks Panel, if it is available for your plan.
Population of webhook data
Each event in Advanced Billing generates a unique webhook payload containing relevant subscriber data. However, not every value is populated in the payload. For instance, the reason_code data is not delivered in a signup_success webhook. Use discretion to determine whether the data is available and how to handle missing information.
Webhook verification
Using your Site shared key and a signature (signature_hmac_sha_256) that is calculated and sent with the webhook, you can verify the authenticity and integrity of a webhook.
Webhook signature
Webhooks are signed using an HMAC-SHA-256 hex digest of the raw HTTP body of the webhook post, with your shared key as the secret. In Ruby:
OpenSSL::HMAC.hexdigest(OpenSSL::Digest.new('sha256'), site.shared_key, webhook.body)For example, if your shared key is 123 and the webhook request body is payload[chargify]=testing&event=test, then the signature_hmac_sha_256 is: 19826d51b9f866b26eda1f154de192593360f8d0bcb63df8a28540a5dcf733f1.
This signature is sent with the webhook in the header X-Chargify-Webhook-Signature-Hmac-Sha-256. Alternatively, append it to your URL as a query parameter using {signature_hmac_sha_256}. The webhook {id} and the deprecated {signature} work the same way.
For instance, providing the URL http://example.com/?signature_hmac_sha_256={signature_hmac_sha_256} results in the following webhook being posted:
http://example.com/?signature_hmac_sha_256=19826d51b9f866b26eda1f154de192593360f8d0bcb63df8a28540a5dcf733f1When in doubt, verify webhook data by checking the current resource state using the API.
Deprecation
Webhooks previously used an MD5 hex digest for signature verification (signature). While still included for backward compatibility, this method is deprecated. Validate only the HMAC-SHA-256 signature (signature_hmac_sha_256). Removal of the MD5 signature may occur in a future update.
Finding your Site shared key
WARNING: Protect your site's shared key the same way you protect a password. A compromised shared key lets a malicious actor generate falsified webhooks that pass signature verification.
Your site's Shared Key is generated automatically when the site is created. To view or change it, open the site switcher at the top of the left navigation, select Edit Current Site, and find the Shared Key field.
Webhook testing
Advanced Billing offers two separate ways to send a test webhook, and they send different payloads.
Test a single endpoint
Use this to confirm an endpoint is reachable and returns a 200 OK. It sends a minimal payload that does not resemble a production webhook. From the endpoint's Actions drop-down, select Test.
The test payload is:
id=123456&event=test&payload[chargify]=testingTest a specific event type
Use this to see what a real event's payload looks like against your own parsing code. It sends dummy data shaped like the event you choose, so your integration receives the same structure a production webhook would carry.
To test a specific event type
- Go to Tools > Webhook Testing.
- Select the event type you want to send.
- Select the endpoint to send it to.
- Send the webhook, then review the result in the Webhooks Panel.
For comprehensive testing, use a sandbox account to create test Subscriptions and perform actions that trigger live webhooks.
Use a tool such as Webhook.site to inspect webhook content and headers during development.
Community sample code
A merchant contributed an example webhook client controller for Ruby on Rails as a public gist: Rails webhook client controller.
This is community-contributed sample code. Maxio does not maintain it and does not update it as the API changes, so treat it as a starting point to read rather than something to depend on.
Related information
To understand how webhook delivery behaves and how to design an integration around it, see the Understand Webhooks in Advanced Billing help article.
For a full sample payload for every event, see the Review Webhook Payload Examples help article.
To review delivery history and resend a failed webhook, see the Monitor and Resend Webhooks help article.
Still need help?
Reach out and our support team will take it from here.