
Run an Import
Last updated on Sep 19, 2026
An import writes your file's contents straight into your account, and it cannot be undone. Get the file and the account ready first, then run it and read the results.
Before you start
Three things need to be in place. The middle one is where most failed imports actually go wrong, so do not skip it.
- Confirm that importing is activated on your account. Contact support if you do not see the Import options in the Admin menu.
- Prepare the CSV file, save it with UTF-8 encoding, and clean it up.
- Take a backup of your account. Nothing in the importer offers an undo, so the backup is your only way back.
Expect the run to take longer on a busy account. Time scales with both the number of records you are importing and the number already in your account, so several thousand transaction records that import in a few minutes on an empty account can take three or four times as long against 100,000 existing records.
Perform an import
Every import follows the same path: choose an import type and object, upload the CSV, map its columns to Maxio fields, and submit. The screens differ slightly by object, but the sequence does not.
To run an import
-
Open the Admin menu and navigate to the Import options.
-
Click the type of import you want to complete.
-
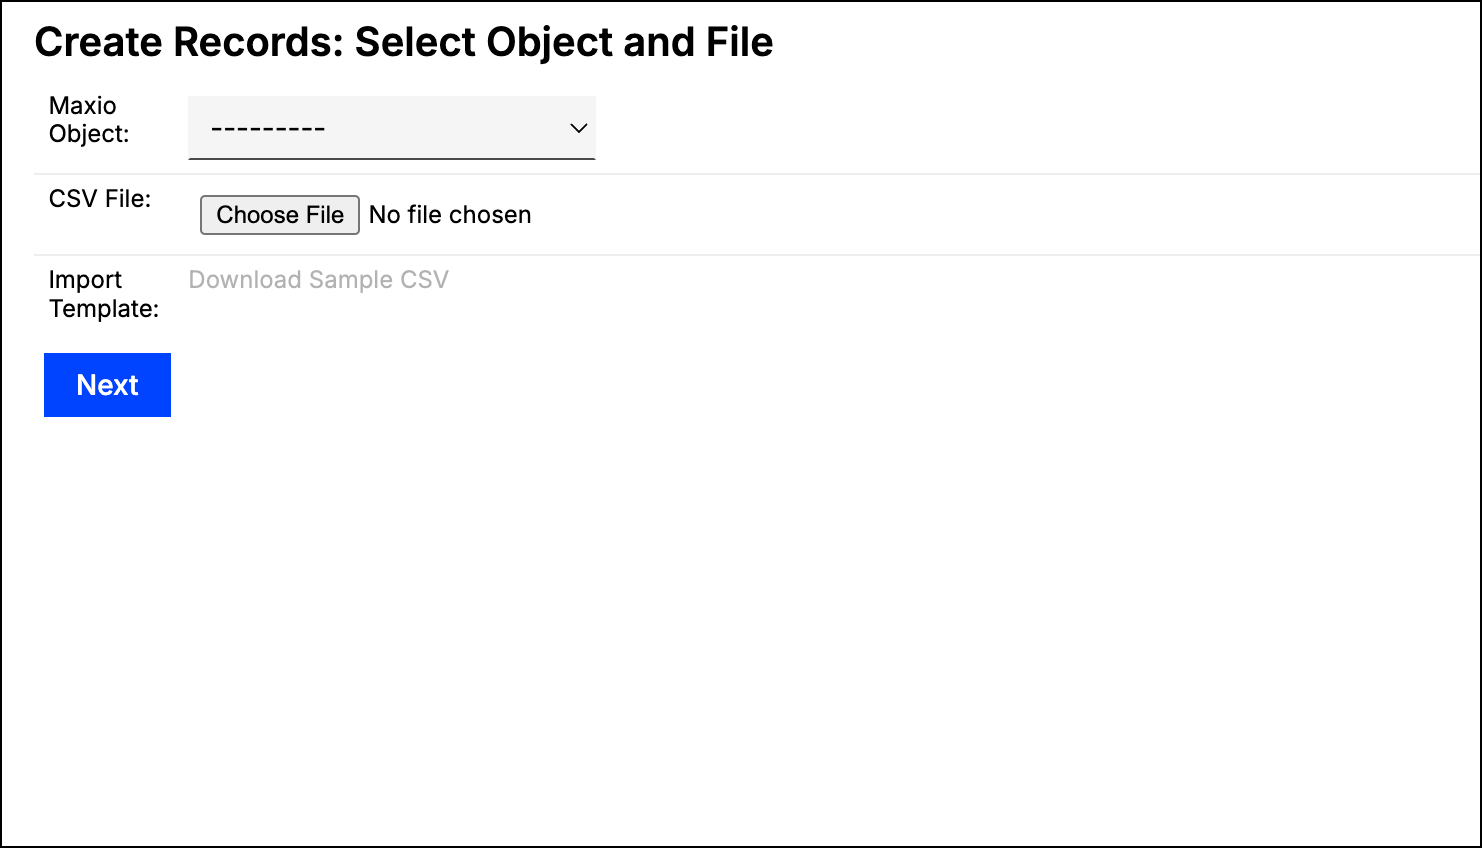
Select the Maxio Object you are importing from the drop-down menu.
-
Click the Choose File button and then select the appropriate CSV file. If you need a starting point, click Download Sample CSV next to Import Template to download a template for the object you selected.
-
Click the Next button.
-
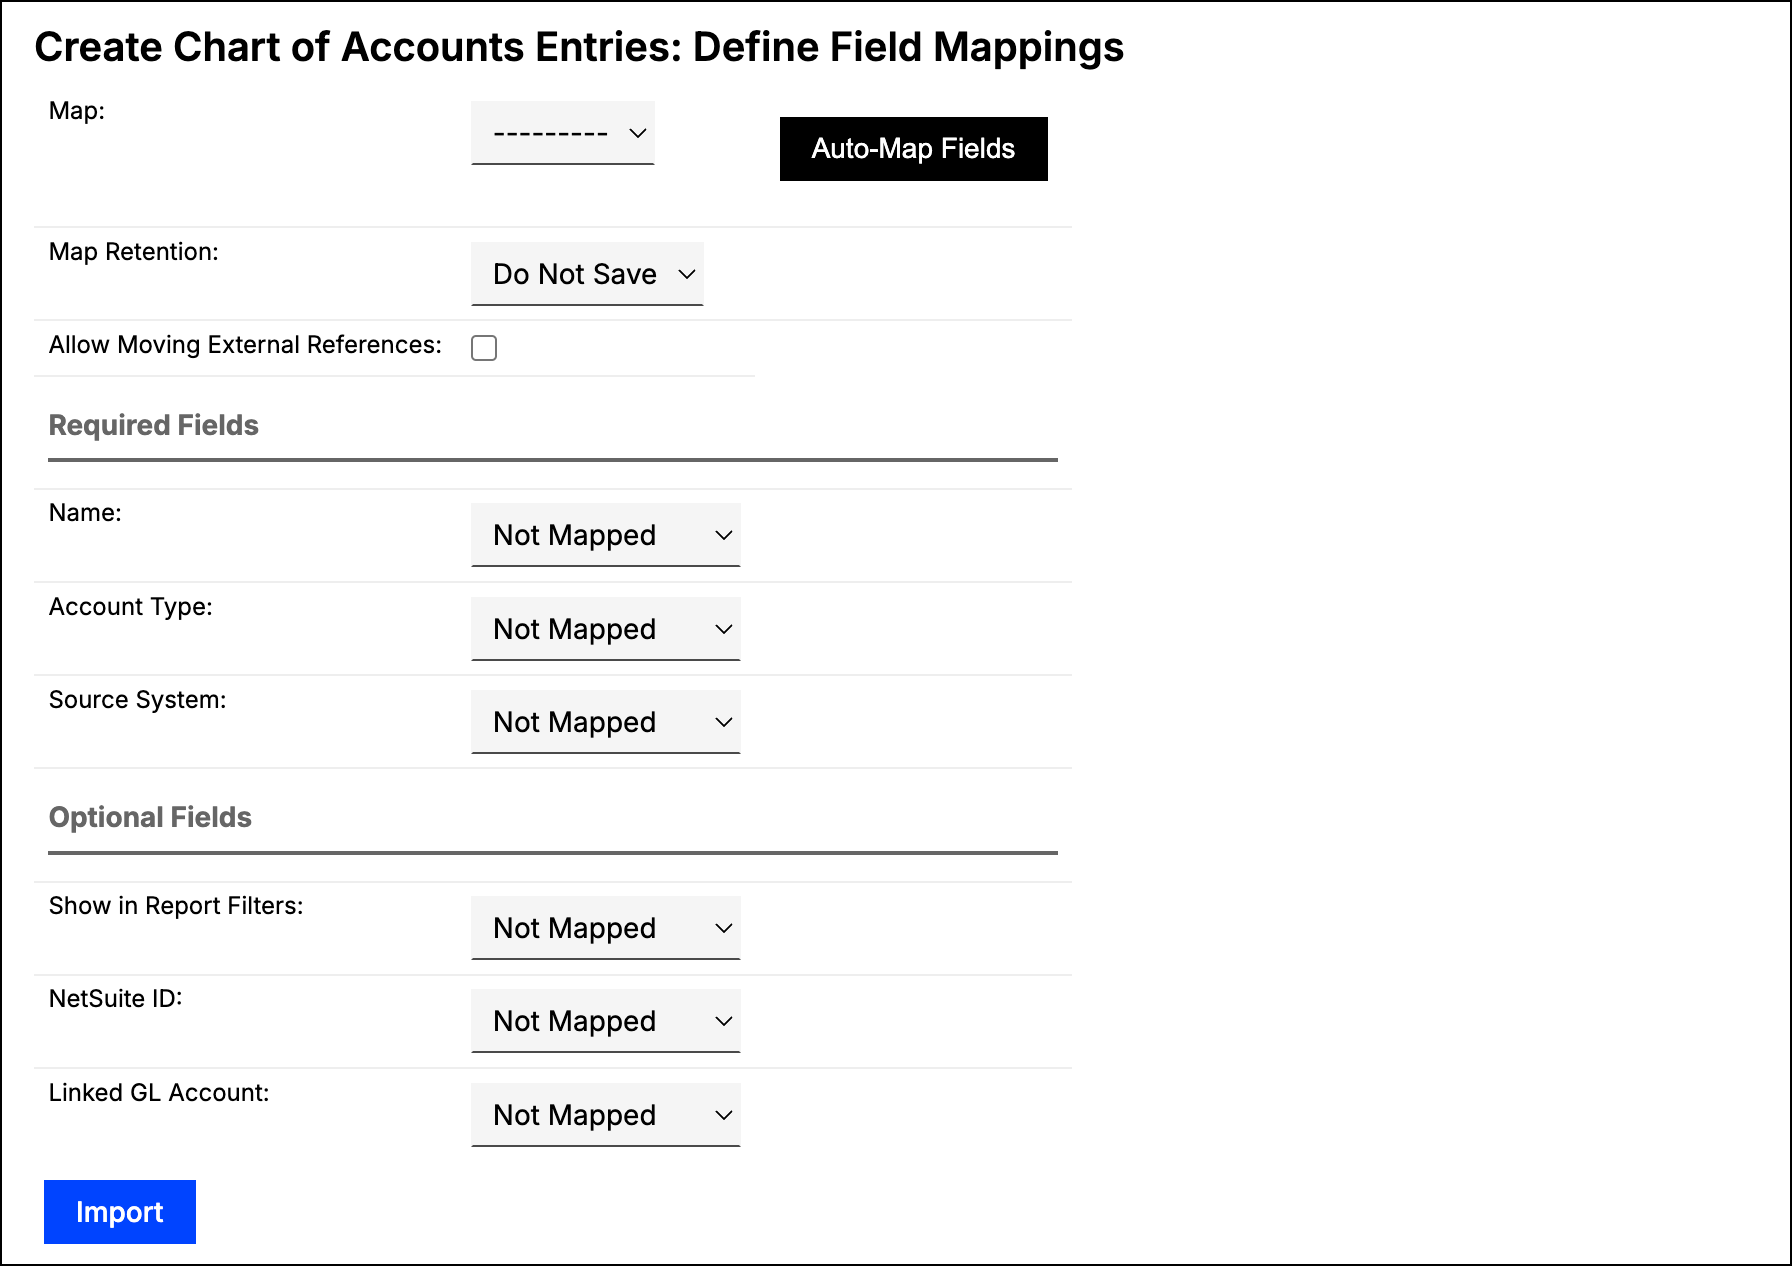
On the next page, determine the import's field mapping. You have three options:
-
Select an existing mapping from the Map drop-down.
-
Click the Auto-Map Fields button. When you do this, the system attempts to map the fields to the header names in the CSV file.
-
Configure the mapping manually. This option is explained further in the next section.
If your CSV includes a column named Errors, often left over from a previous import's failure export, Maxio shows a warning banner on this page noting that the column will carry through unchanged next to this run's own Import Status column, and recommending you remove it before proceeding. The warning doesn't block you; you can still submit the mapping and run the import with the column present.
-
-
Select a Map Retention option from the drop-down to determine whether or not to save the mapping for future imports. If you decide to save the map, you must also enter a descriptive name for it.
-
Configure any other options for the import, such as the Date Format or the Allow Moving External References checkbox. The options shown depend on the object you are importing.
-
Double-check the field mappings to make sure they are correct. Note that each required field must be mapped or have a value in order for the import to complete. Be aware that the import updates every mapped field, so make sure this step is completed correctly before continuing.
-
Click the Import button at the bottom of the screen.
-
The results of the import now display. If the import succeeded or partially succeeded, navigate to the appropriate area in Maxio to confirm which records were added, updated, or removed from the system.
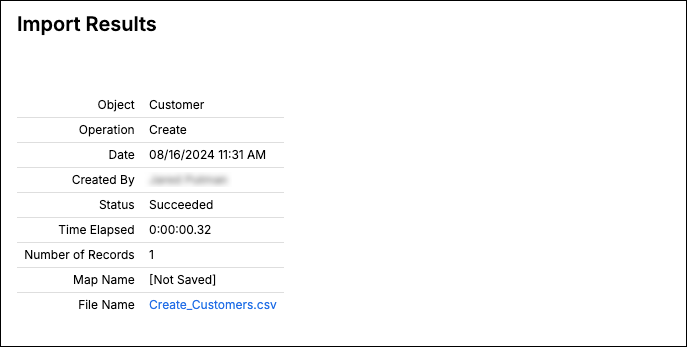
If the import failed or only partially succeeded, review the error messages on this screen, edit your CSV file appropriately, and attempt the import again for the rows that didn't import.
Manual field mapping
For each import's required and optional fields, you can choose to map to a column in the CSV or manually input a value. Mapping to a column automatically populates the field with the data found in each corresponding row. For example, if you map the Name field to a column in the CSV file during a customer import, then the customer names are populated based on the rows of the selected column.
If you decide to input a value and the system only allows certain values, then the available options appear in a drop-down menu. If any value is permitted, then a text box displays allowing you to type in anything you'd like.
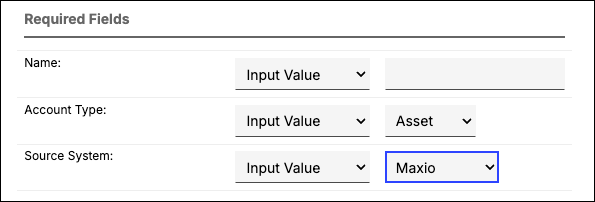
The values you enter/select populate for the corresponding field for each imported record. For example, if you enter Georgia (or GA) for the State field during a customer import, then every customer record has that as its state.
Helpful notes
The import process is generally the same for each available type. However, certain imports have specific characteristics that you should be aware of to avoid issues. The notes below explain these items for each import type.
| Type | Notes |
|---|---|
| Create | The import fails if you attempt to import any records that already exist in the system. Certain Create imports can create other objects in addition to the one you select. For example, if a transaction import CSV contains any customers that do not already exist in your system, Maxio automatically creates new customer records. |
| Update | The import fails if you attempt to import any records that do not already exist in the system. |
| Create and/or Update | Certain Create and/or Update imports can create other objects in addition to the one you select. For example, if a transaction import CSV contains any customers that do not already exist in your system, Maxio automatically creates new customer records. |
| Renumber | Changes the number field on records that already exist, which the Create and Update imports cannot do. It is available for Customers, Contracts, Transactions, Invoices, Invoice Line Items, Payments, Deposits, Expenses, Vendors, Bills, Bill Line Items, and Bill Payments. The CSV holds exactly two columns, Original <Object> Number and New <Object> Number, so this type does not require you to designate a field mapping. Each value in the New column must be unique and must not duplicate any value in the Original column. |
| Transaction Renewal Linkages | Requires you to select a renewal import mode (add or replace) and to designate a delimiter. Does not require field mapping. |
| Delete | Permanently deletes existing records matched by the CSV. Some objects, such as Registers, cascade the deletion to their related records (see Delete Registers below). Deletions performed this way cannot be undone from within Maxio. |
Delete registers
A Register deletion is the most destructive import Maxio offers, because it cascades well beyond the rows in your CSV.
WARNING: Deleting a Register also deletes every Contract, Transaction, Revenue Entry, Invoice, and Payment linked to it. This cannot be undone from within Maxio; if you need the data back, you must restore your account from a backup.
Match the CSV to existing Registers using a Register Name column. You can't delete a Register if either of the following is true:
- QuickBooks integration is enabled for your account.
- Your account has a closing date set.
Import results
Every import carries one of five statuses, shown both on the confirmation screen and in the Results log.
- Succeeded: Rows imported and none failed.
- Partially Succeeded: Some rows imported and others did not. This also covers a background import that crashed partway through after already creating records, so an import that created anything is never reported as an outright failure.
- Failed: No rows imported. Either the file itself was rejected, or every row failed. Check the results and data against the CSV and try again.
- Background Started: The import is running as a background job. Refresh the Results screen to see the outcome once it finishes.
- Pending: The import is queued as a background job but has not begun processing yet.
A running background job keeps its status until it finishes, so Background Started takes precedence over any row counts already recorded.
The system reports the specific line numbers in your CSV file that had issues and, where possible, the cause of each error. Errors display on screen, and you can also download them as a CSV file. Correcting the errors in that file and re-uploading it fills in the import with the corrected data.
If you receive an unexpected error screen with no specific feedback, confirm your CSV file uses UTF-8 encoding, contains no unusual characters, and conforms to the formatting rules. If you are unable to identify the issue, contact support@maxio.com.
If the confirmation screen does not appear after an import, it is likely because your browser connection to the server was lost. However, since the import runs through to completion once you start it, you can still check the status of the import by viewing the import results log. You can view a log of import results by clicking the Results option in the Admin menu, and filter the list by status, including Partially Succeeded, to narrow it down.
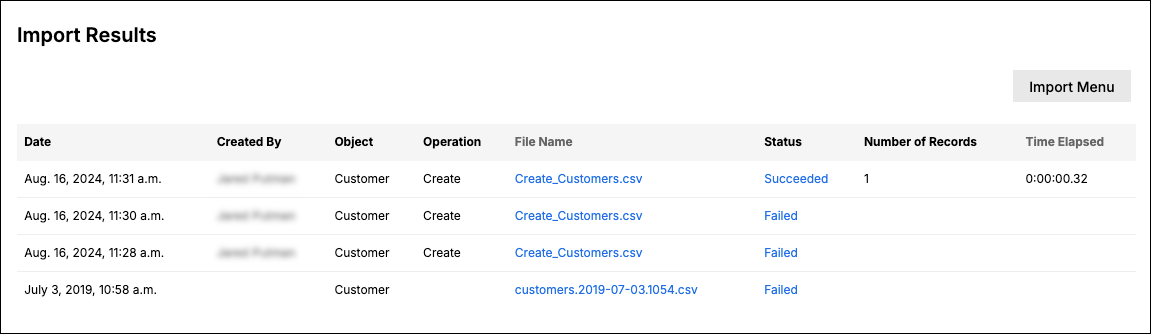
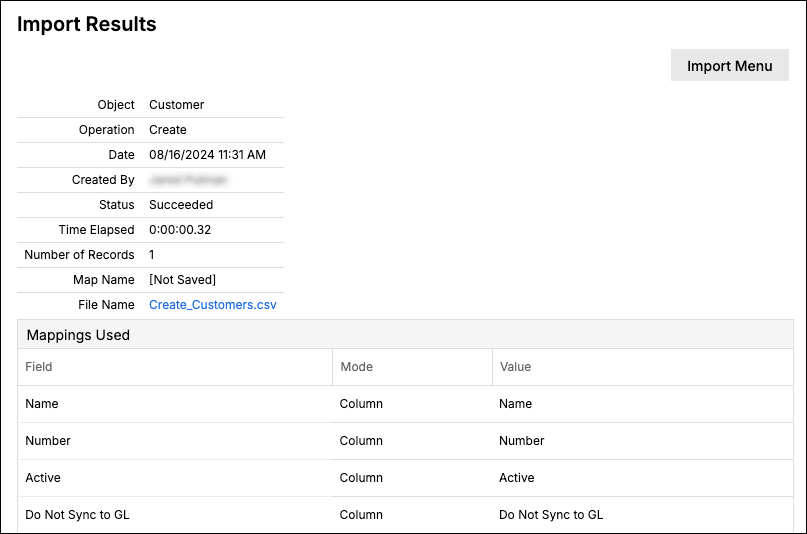
You can click the status to view the field mapping used for the import, along with a summary of the total, successful, and failed row counts wherever that information is available, including for an import that only partially succeeded or failed outright.
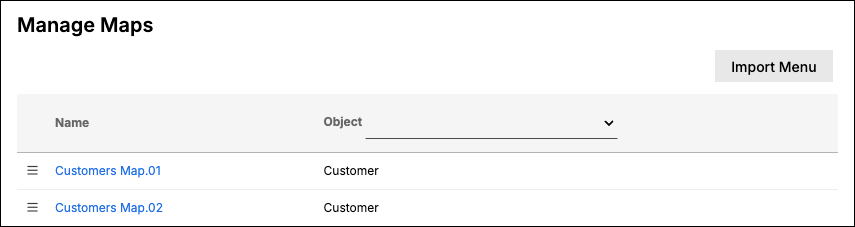
Manage maps
Any field mapping that you save during an import can be viewed in the Admin menu by clicking the Manage Maps option. Use the Object filter in the column header to narrow the list.
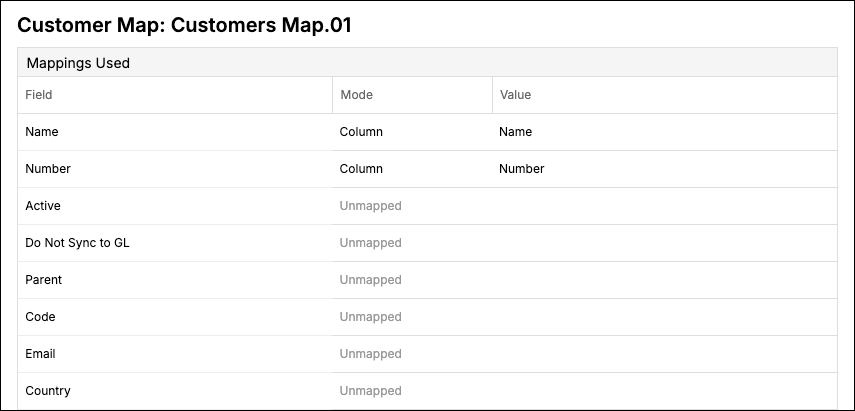
From here, click on a map's name to view a list of every field and how each one is mapped. Fields that were not mapped are listed as Unmapped.
You can also delete a map on this screen. Hover the mouse over the action menu next to the name and select the Delete option.
Background imports
Maxio queues an import as a background job based on the size of the file you upload rather than the number of rows in it, so most real import files run in the background. This lets you continue to use the system while the import completes. You can view the current progress of background imports from the Results screen of the Admin menu, where they show as Pending until processing begins and then Background Started while they run.
Related information
Before you run any import, see Understand Imports for which import types exist and what each one can change.
To prepare a file the importer accepts, see Format a CSV File for Import.
To send metered usage records to Advanced Billing from a CSV, which reports its results differently from the imports described here, see Import Metered Usage.
Still need help?
Reach out and our support team will take it from here.