
Consolidate Multiple Invoices into One
Applies to: Maxio Core
Last updated on Aug 20, 2026
Consolidated invoicing in Maxio lets you combine multiple invoices into one, simplifying billing and financial reporting for complex billing scenarios.
Setting up a consolidated invoice
Building a consolidated invoice walks you through selecting a register, a destination contract, and a date range of invoices to combine, then lets you review and adjust the combined invoice before saving.
Important: Setting up consolidated invoices requires special permissions and isn't available by default. For access, contact your Implementation Consultant, Customer Success Manager, or support@maxio.com.
Important: Only open, unpaid invoices with no payments applied and an invoice date in your selected range are consolidated. You can't choose individual invoices. The date range determines what's included.
To create a consolidated invoice
-
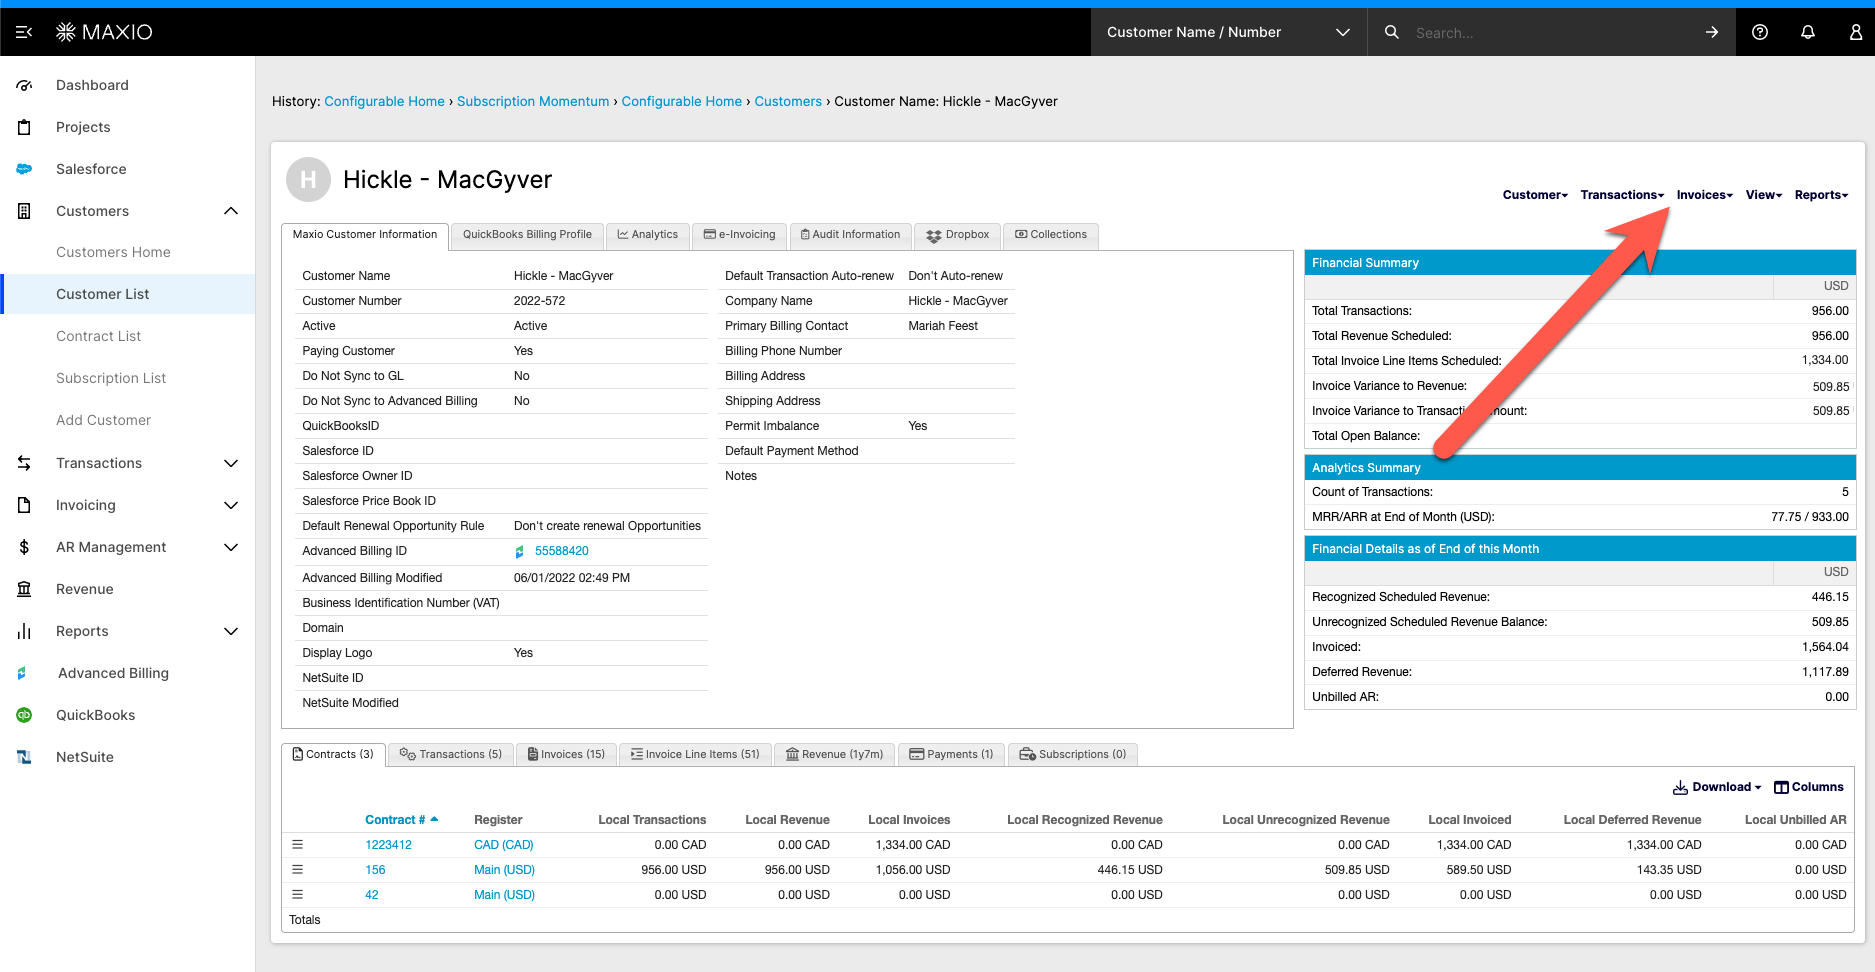
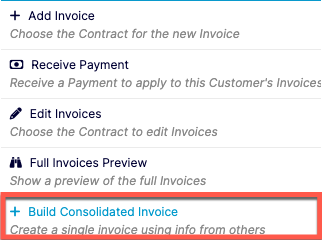
Go to the Invoices menu on the Customer page and select Build Consolidated Invoice at the bottom.
-
Select the designated Register.

-
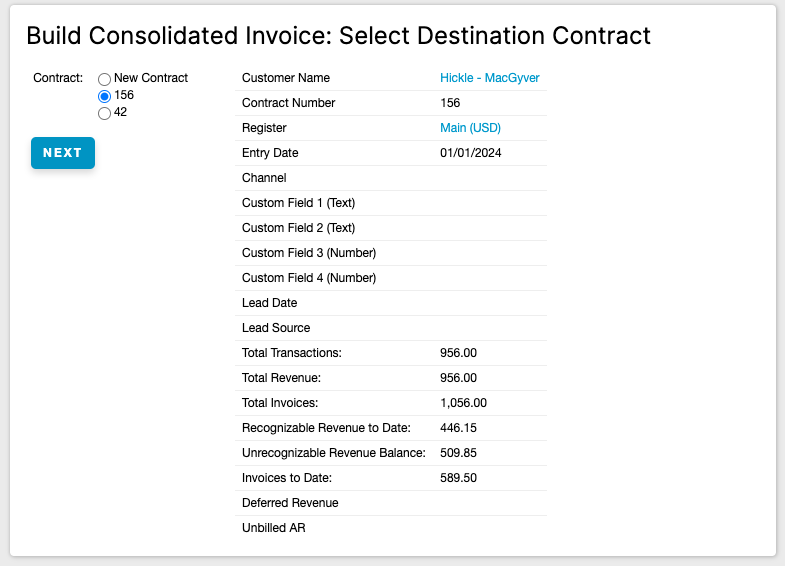
Select the destination Contract for the consolidated invoice. You can select a pre-existing Contract or create a new Contract.
-
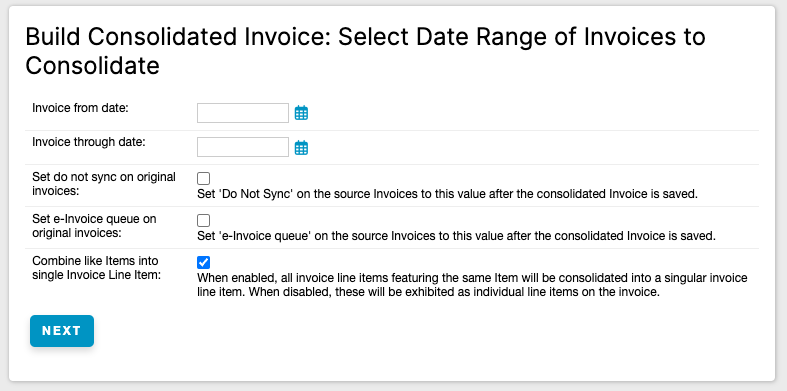
Set the date range for the invoices you want to combine. Check the boxes that apply, then click Next:
- Set do not sync on original invoices: After saving the consolidated invoice, set Do Not Sync on the source Invoices to this value.
- Set e-Bill queue on original invoices: After saving the consolidated invoice, set the e-Bill queue on the source Invoices to this value.
- Combine like Items into single Invoice Line Item: When enabled, all invoice line items featuring the same Item are consolidated into a single invoice line item. When disabled, they're shown as individual line items on the invoice. This is checked by default.
-
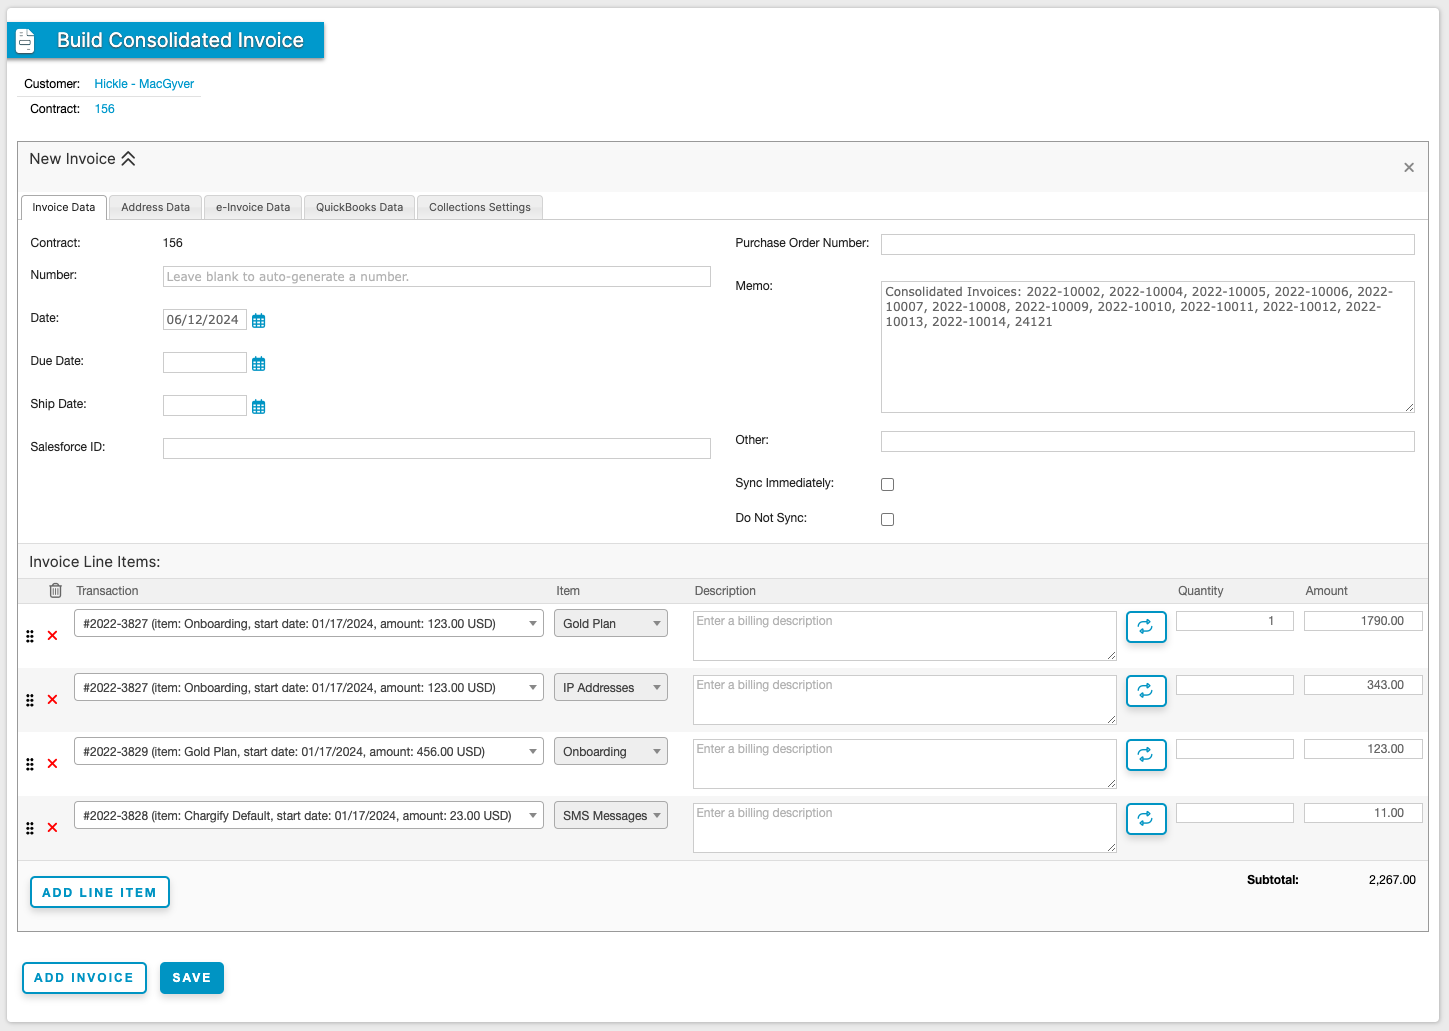
Review the invoice line items, now rolled up onto a single invoice. This roll-up combines the quantities (if applicable) and amounts for all like line items into a single line.
The consolidated invoice references the rolled-up invoices in the Memo field. You can customize or edit each line item's description as needed, and click Add Invoice if you want to build another invoice in the same session. Once complete, click Save.
Related information
For more information on Invoice fields, see How Invoices Work.
Still need help?
Reach out and our support team will take it from here.