
Billing Portal FAQ
Applies to: Advanced Billing
Last updated on Aug 28, 2026
Find quick answers about the Maxio Billing Portal: what your subscribers can do inside it, how your settings constrain those actions, and what happens to a Subscription when a Customer makes a change from the portal.
General setup
Questions about turning the Billing Portal on and connecting to it programmatically.
How do I enable the Billing Portal?
Locate the Settings tab of your account. From there, select the Billing Portal tab on the left side, then select Enabled for this site. See Related information for the full settings list.
Can I embed the Billing Portal into my website?
Maxio doesn't allow you to embed the portal on your website. Our security measures protect your subscriber's credit card and contact information as it's entered, so secure information must be processed on Maxio's own servers.
Can I administer the Billing Portal via API?
Yes. See Developer Portal for details.
Access and invitations
Questions about getting subscribers into the Billing Portal and what their access links do.
How do I share the Billing Portal with my customer?
You have a few options within Advanced Billing. Enable the option to automatically email the Billing Portal link to all Customers by selecting Automatic invitation emails for new subscribers in your Billing Portal settings.
Alternatively, select Manual invitation emails only to individually invite each Subscription. Once enabled, visit the Subscription and select Send Invite in the Billing Portal Status section.
How can my subscribers access the Billing Portal if they have not accepted the invitation?
Your portal Customers can access the Billing Portal even if they haven't accepted their invitation email. The exact process depends on whether further email verification is required in your settings.
All you have to do is give them a management URL. These links can be fetched by you, the merchant, from our application or API. They're also available on the statement emails sent to Customers.
If the Customer hasn't yet accepted their invitation, they still need to click a link sent to their email address on file to fully access the portal. This security measure ensures management links are only usable by the Customer. That said, this verification can be triggered from the management link itself, so the Customer can effectively self-invite using only a management link.
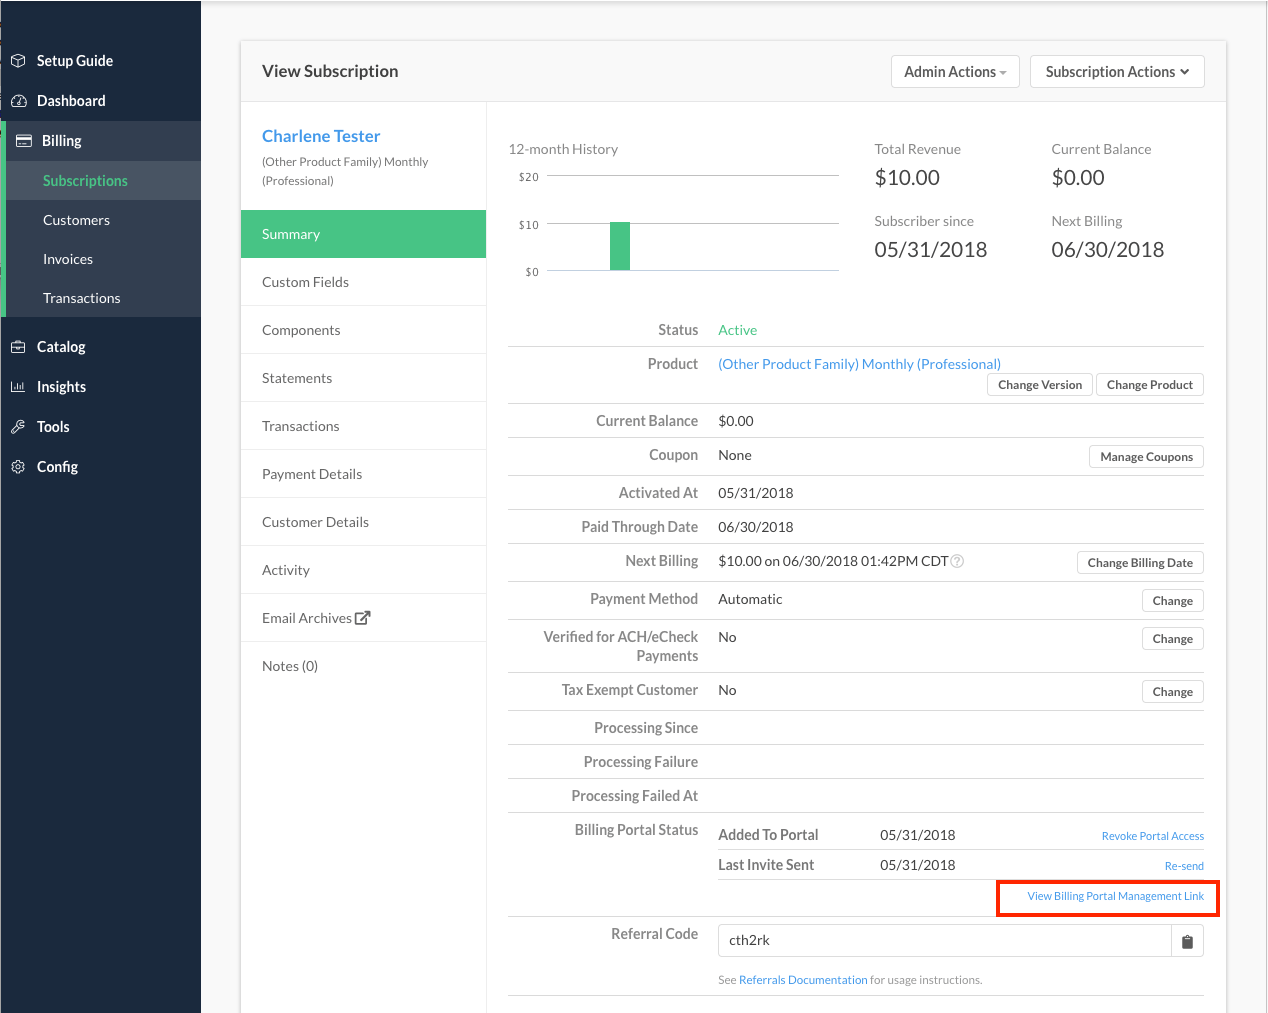
A Customer's personal management URL appears at the bottom of their Subscription within the app.
What does the Billing Portal management link allow my customer to do?
This link allows your Customer to access their Subscription on the Billing Portal. It's automatically included at the bottom of their statements, invoices, and receipts if they've been invited to the Billing Portal.
Maxio only generates a new link once every 15 days, so there's no need to check back more often than that.
Your Customer must have already accepted their invite and logged in to the Billing Portal. If they haven't, they're prompted to generate a new login link, similar to a password reset.
Plans and products
Questions about controlling and previewing plan and Product changes subscribers make from the portal.
How can I control what actions my subscribers can perform?
A merchant can easily control actions by fine-tuning the Configuring Billing Portal Options. Select or deselect the options you want to enable or disable; changes apply across all Products on your site.
What happens when my customer changes their plan?
If you've enabled Allow Plan Changes in the Billing Portal settings, your subscribers can switch to a new plan by launching their Billing Portal management link and clicking Change Plan from the portal.
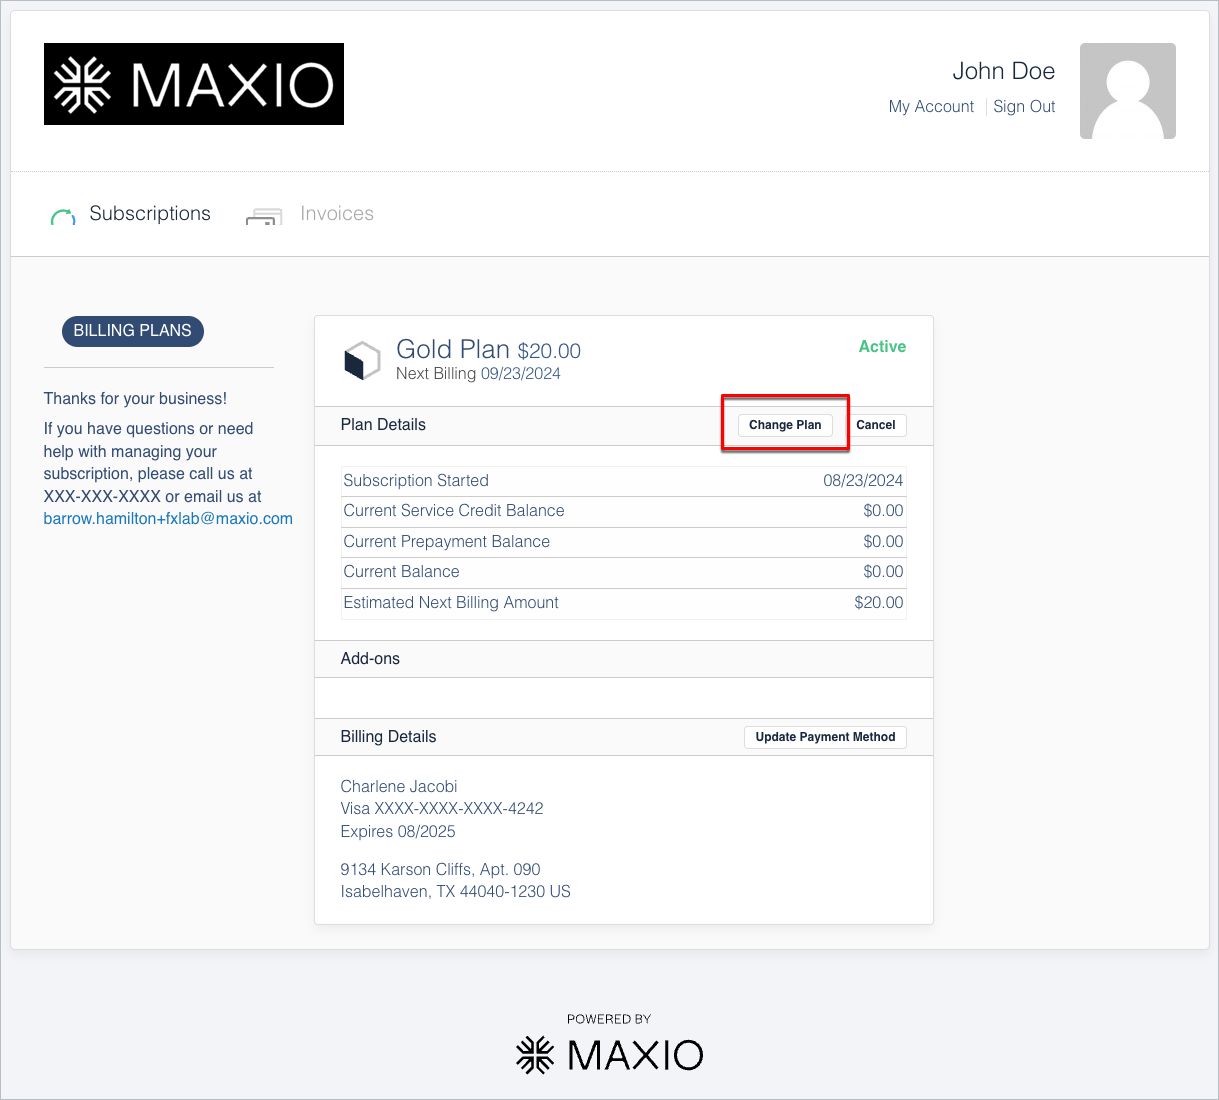
All plans within the same Product Family appear in the Billing Portal.
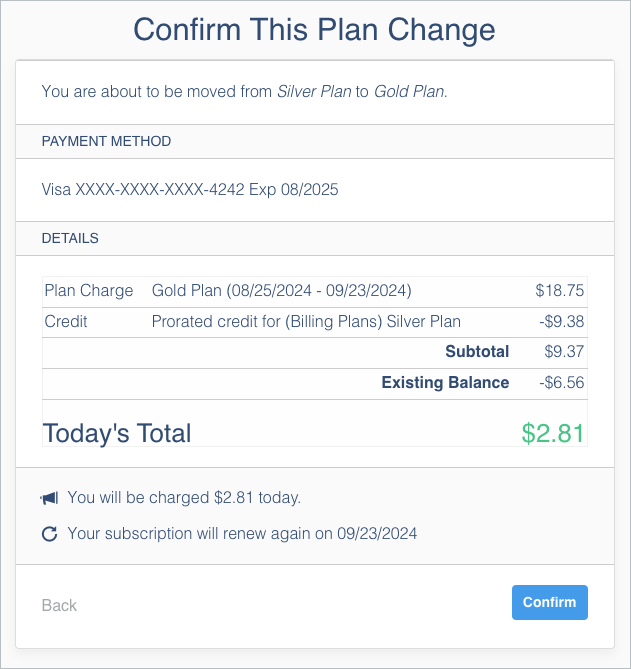
The subscriber is presented with the following information about their change:
- Payment Method: Invoice or automatic.
- Details: Your subscriber sees the charges, changes, and any proration credits.
The subtotal, existing balance, and new charges are also assessed. Any outstanding balance on the Subscription is due at this time if there's a plan change.
Can I configure the Billing Portal to allow only upgrades but not downgrades?
No, you may not. The Billing Portal allows your Customers to upgrade or downgrade their plans.
How do I let my customers self-manage their products in the Billing Portal?
Step 1 - Enable customer updates for a product
When creating your Product and you've filled in the Product Details, scroll down to the Advanced Options grouping and set the Billing Portal toggle to Allow customer updates in Billing Portal. This is available for quantity-based and on/off Products (not metered) when creating or editing your Product.
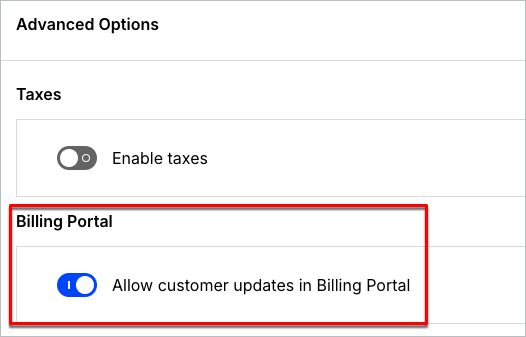
Step 2 - Enable allow product changes in the Billing Portal
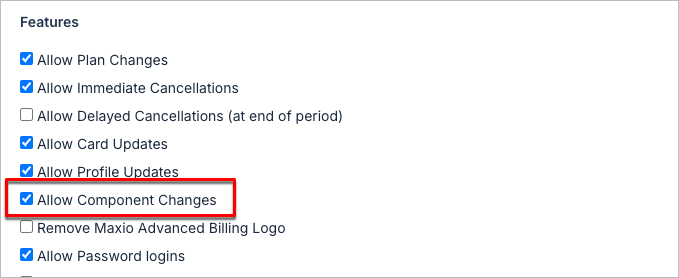
Under the Billing Portal settings, ensure Allow Product Changes is enabled. Depending on your site's catalog terminology, this option may still display as Allow Component Changes.
Step 3 - Self-manage from the portal
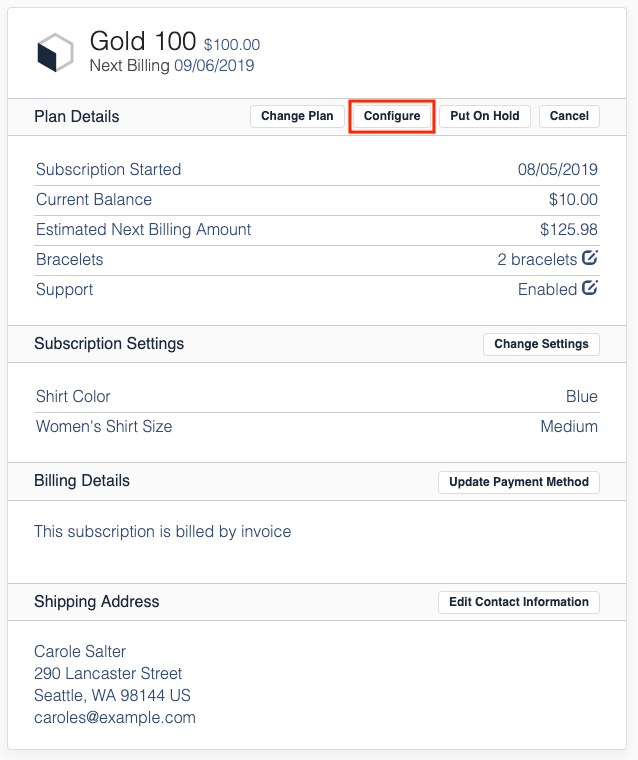
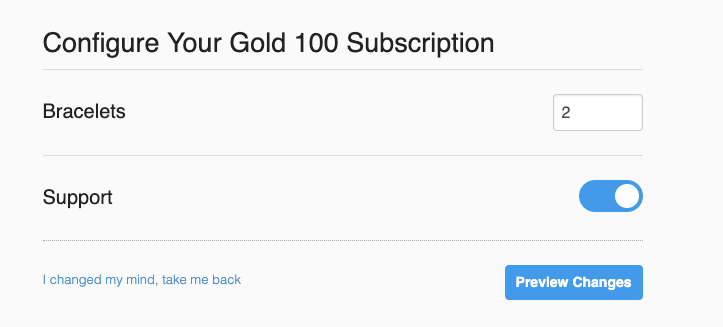
Inside the Billing Portal, when a subscriber clicks Configure, they see Products enabled for user access, which they can then self-manage.
Can a customer reactivate a canceled subscription via the Billing Portal?
No, reactivation can only be done through the application or automated via API.
Customization and branding
Questions about matching the Billing Portal's look to your own brand.
How do I add a logo to the Billing Portal?
This can be done within your Billing Portal settings. Navigate to the Settings tab, then select the Billing Portal tab on the left side. See Related information for where to find the logo upload option.
Can I add custom JavaScript and CSS to modify and style the Billing Portal?
Custom CSS can be added to the Billing Portal to modify its appearance, but JavaScript isn't supported. You can modify the custom CSS by going to Config > Settings > Billing Portal > Custom CSS. Maxio also supports custom JavaScript and CSS on the Public Signup Pages, receipt pages, and Self-Service Pages.
Custom CSS access isn't available to all users by default. If you'd like this functionality, contact our support team, Implementation Consultant, or CSM.
Related information
See Configuring Billing Portal Options for the full settings list, including the logo upload option and how to enable the Billing Portal.
See Understand Billing Portal Invitations for more on automatic and manual invitations.
See Fix a Subscriber's Wrong Billing Portal Email if a subscriber's Billing Portal is showing an old email address.
See Understand the Billing Portal for an overview of what the Billing Portal does and who it's for.
See Explore Billing Portal Topics for the full set of Billing Portal setup, access, and support articles.
Still need help?
Reach out and our support team will take it from here.