
Loading article…
Loading article…
Last updated on Aug 29, 2026
Complete the steps below to import data into Maxio. The length of time needed to complete an import is proportional to the number of imported records and the number of records already in your account. Importing several thousand transaction records into an empty account may take only a few minutes. However, the same import may take three or four times the duration if imported into an account with 100,000 existing records.
Make sure you have fulfilled the following prerequisites before performing an import:
Open the Admin menu and navigate to the Import options.
Click the type of import you would like to complete.
Select the Maxio Object you are importing from the drop-down menu.
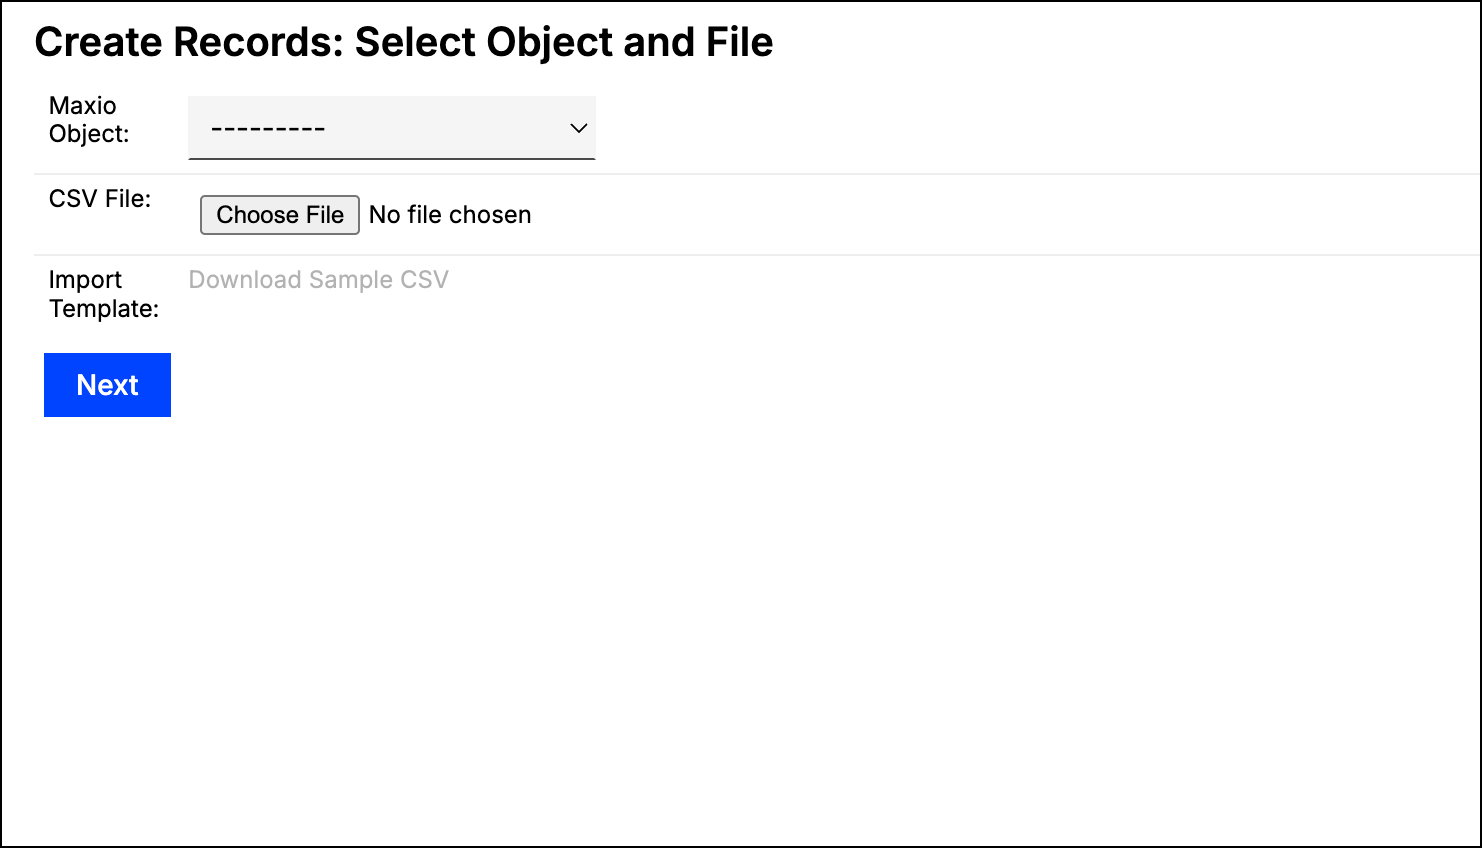
Click the Choose File button and then select the appropriate CSV file. If you need a starting point, click Download Sample CSV next to Import Template to download a template for the object you selected.
Click the Next button.
On the next page, determine the import's field mapping. You have three options:
Select an existing mapping from the Map drop-down.
Click the Auto-Map Fields button. When you do this, the system attempts to map the fields to the header names in the CSV file.
Configure the mapping manually. This option is explained further in the next section.
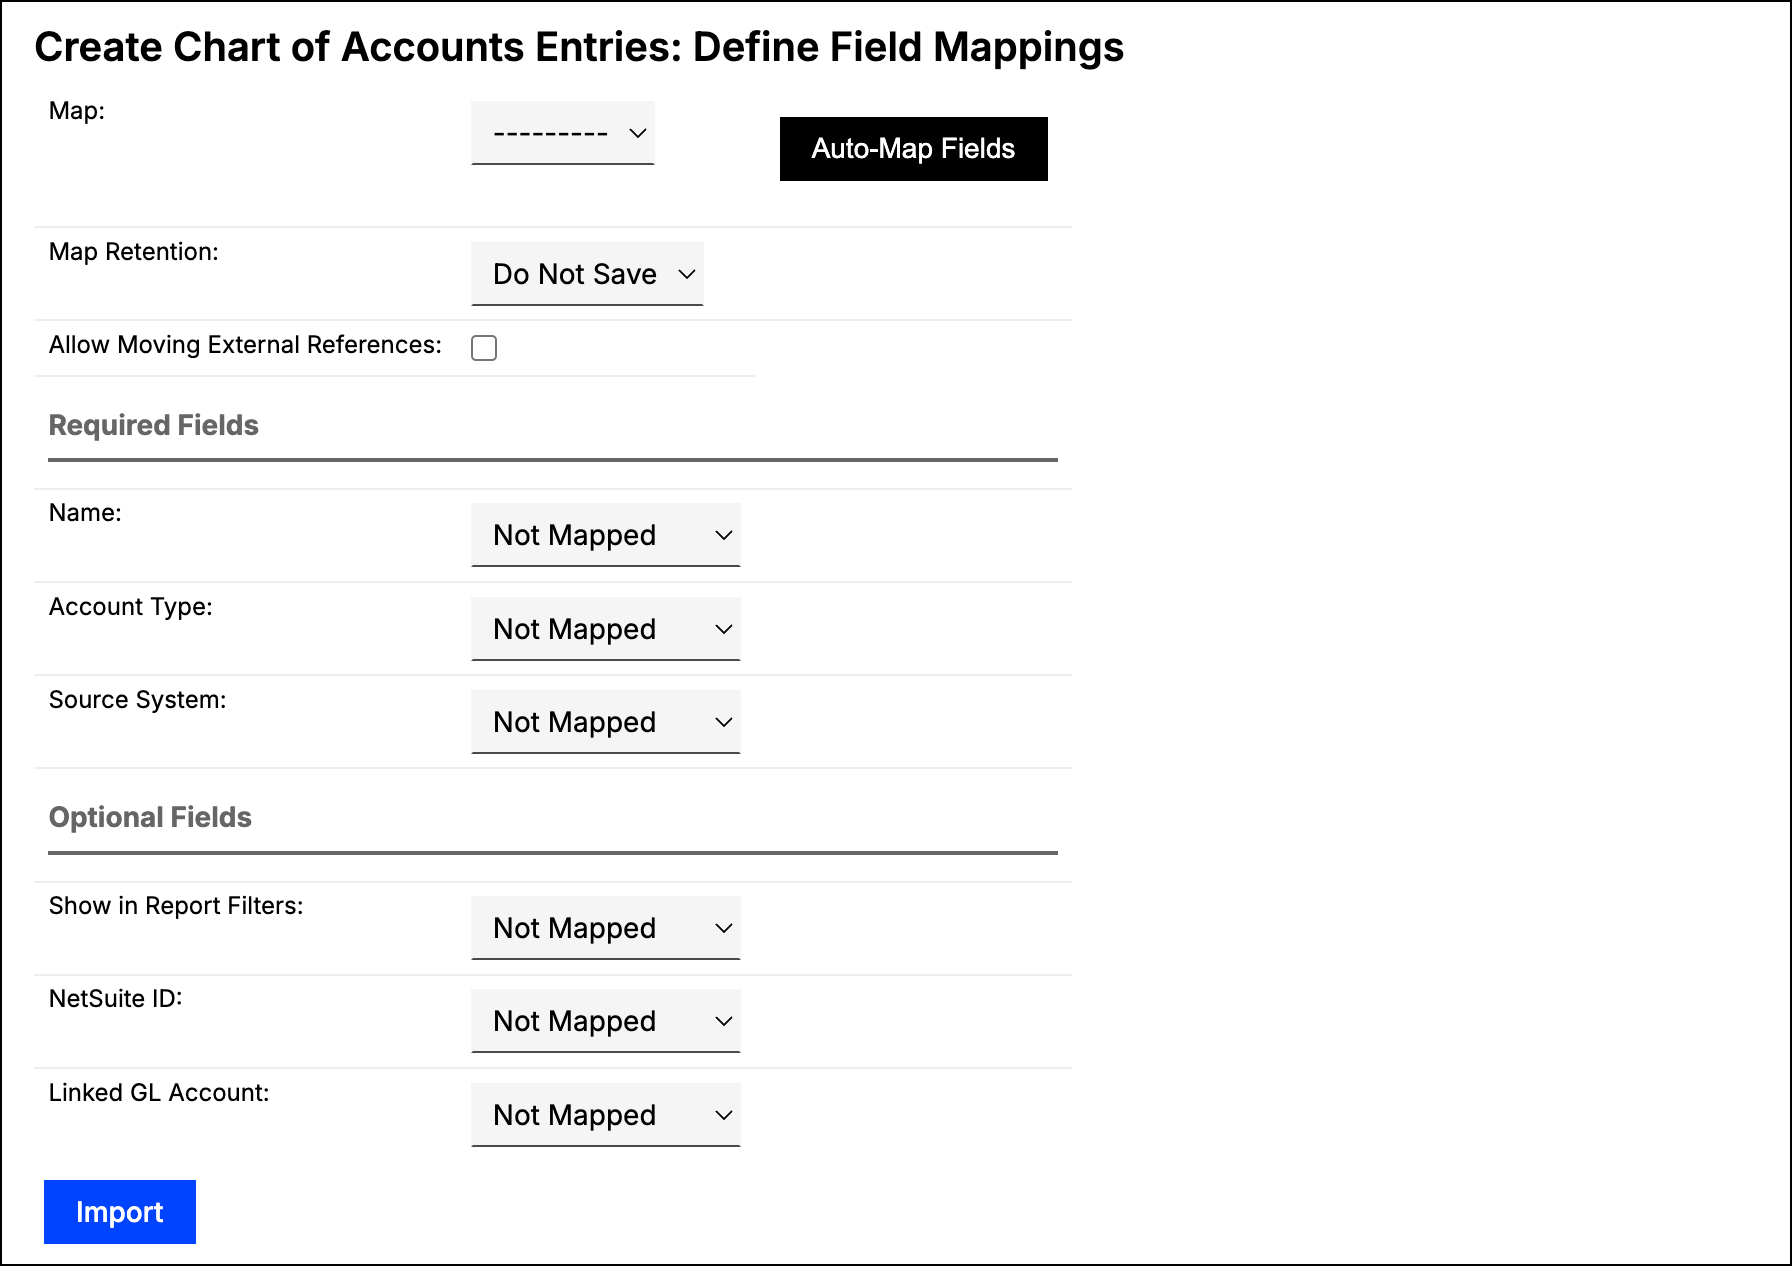
Select a Map Retention option from the drop-down to determine whether or not to save the mapping for future imports. If you decide to save the map, you must also enter a descriptive name for it.
Configure any other options for the import, such as the Date Format or the Allow Moving External References checkbox. The options shown depend on the object you are importing.
Double-check the field mappings to make sure they are correct. Note that each required field must be mapped or have a value in order for the import to complete. You should also be aware that any mapped field will be updated by the import, so make sure this step is completed correctly before continuing.
Click the Import button at the bottom of the screen.
The results of the import now display. If the import was successful, navigate to the appropriate area in Maxio to confirm the correct records were added, updated, or removed from the system.
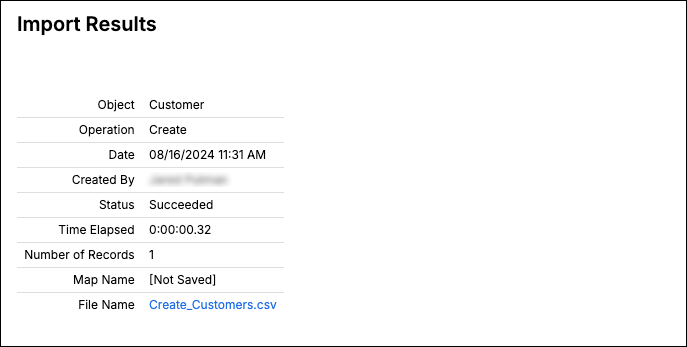
If the import failed, review the error messages on this screen, edit your CSV file appropriately, and attempt the import again.
For each import's required and optional fields, you can choose to map to a column in the CSV or manually input a value. Mapping to a column automatically populates the field with the data found in each corresponding row. For example, if you map the Name field to a column in the CSV file during a customer import, then the customer names are populated based on the rows of the selected column.
If you decide to input a value and the system only allows certain values, then the available options appear in a drop-down menu. If any value is permitted, then a text box displays allowing you to type in anything you'd like.
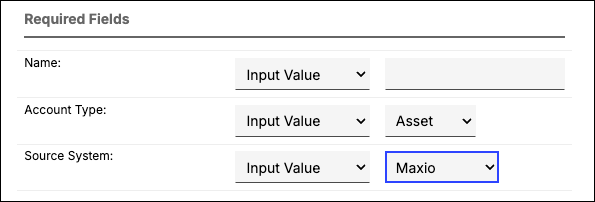
The values you enter/select populate for the corresponding field for each imported record. For example, if you enter Georgia (or GA) for the State field during a customer import, then every customer record will have that as their state.
The import process is generally the same for each available type. However, certain imports have specific characteristics that you should be aware of to avoid issues. The notes below explain these items for each import type.
| Type | Notes |
|---|---|
| Create | The import will fail if you attempt to import any records that already exist in the system. Certain Create imports can create other objects in addition to the one you select. For example, if a transaction import CSV contains any customers that do not already exist in your system, then Maxio will automatically create new customer records. |
| Update | The import will fail if you attempt to import any records that do not already exist in the system. |
| Create & Update | Certain Create & Update imports can create other objects in addition to the one you select. For example, if a transaction import CSV contains any customers that do not already exist in your system, then Maxio will automatically create new customer records. |
| Renumber | The CSV file must be in a specific format depending on the object you are renumbering. This type does not require you to designate a field mapping. Use it to bulk update the line numbers of invoice line items, grouped by invoice. It produces gapless number sequences, checks for conflicts, provides a preview and an error CSV, and logs the run in Import History. |
| Transaction Renewal Linkages | Requires you to select a renewal import mode (add or replace) and to designate a delimiter. Does not require field mapping. |
| Delete | Permanently deletes existing records matched by the CSV. Some objects, such as Registers, cascade the deletion to their related records (see Delete Registers below). Deletions performed this way cannot be undone from within Maxio. |
WARNING: Deleting a Register also deletes every Contract, Transaction, Revenue Entry, Invoice, and Payment linked to it. This cannot be undone from within Maxio; if you need the data back, you must restore your account from a backup.
Match the CSV to existing Registers using a Register Name column. You can't delete a Register if either of the following is true:
The import process completes with one of the following results:
If there are any errors with your import, they will be displayed; however, you can also download them in a CSV file. Taking this file, correcting the errors, and reuploading it will fill in the import with the corrected data.
If the confirmation screen does not appear after an import, it is likely because your browser connection to the server was lost. However, since the import runs through to completion once you start it, you can still check the status of the import by viewing the import results log. You can view a log of import results by clicking the Results option in the Admin menu.
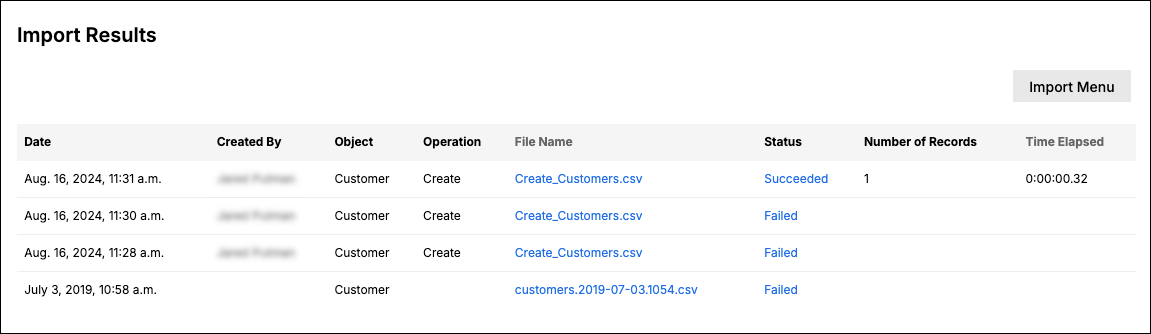
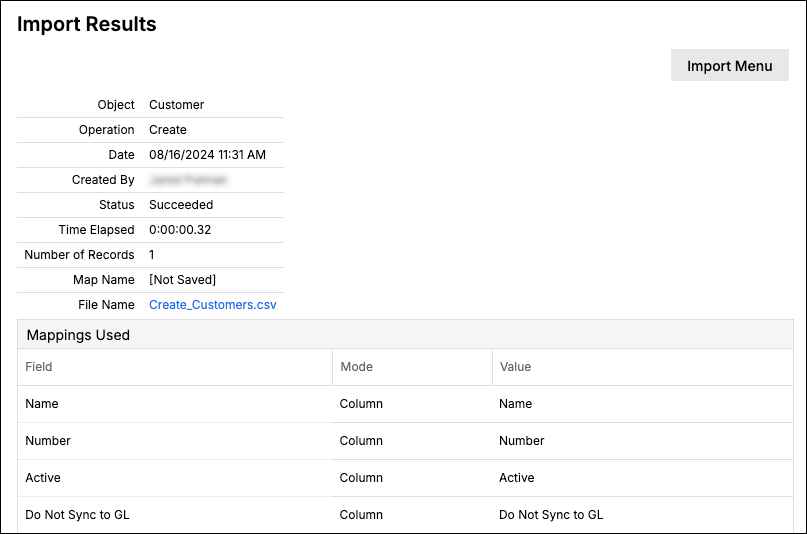
You can click on the status to view the field mapping that was used for the import.
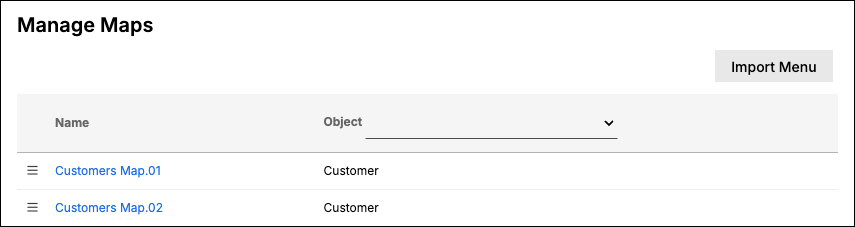
Any field mapping that you save during an import can be viewed in the Admin menu by clicking the Manage Maps option. Use the Object filter in the column header to narrow the list.
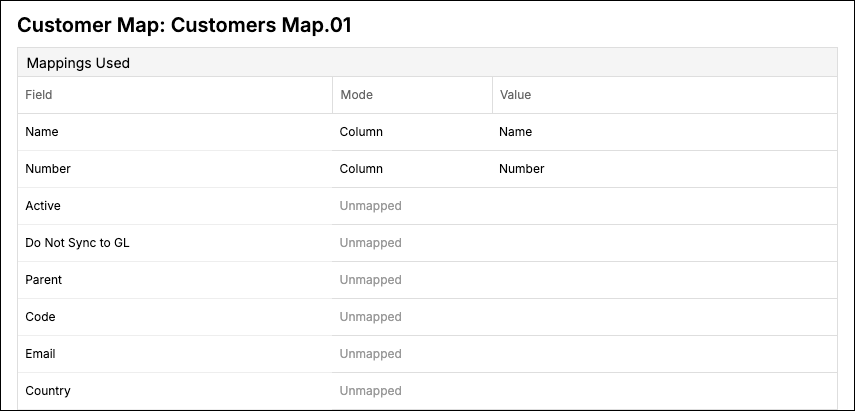
From here, click on a map's name to view a list of every field and how each one is mapped. Fields that were not mapped are listed as Unmapped.
You can also delete a map on this screen. Hover the mouse over the action menu next to the name and select the Delete option.
Large imports may run in the background so that you may continue to use the system while it completes. You can view the current progress of background imports from the Results screen of the Admin menu.
Still need help?
Reach out and our support team will take it from here.