
Implement Billing Portal Login for your Customers
Applies to: Advanced Billing
Last updated on Sep 19, 2026
A configured Billing Portal is no use until your customers can get into it. Three login methods are available, and they differ mostly in how much code you write: an automatic email invite needs none, a link from your website needs a line of HTML, and one-click sign-on needs a backend script. Pick the one that matches how your customers already reach you.
Login methods compared
| Method | Code required | Best for |
|---|---|---|
| Email invite | None | Getting started quickly, with no website or app changes |
| Link from your website | Basic HTML | Businesses whose website has no user login of its own |
| One-click sign-on | Backend and frontend | Web apps whose users are already signed in |
All three methods need the Billing Portal enabled and a test Subscription before you start. To configure the portal itself, see Configure the Billing Portal.
Configure an invite via email
This method is the easiest to implement. Your customers receive an invitation email containing a login link when they sign up for your service.
1. Enable the settings
Some or all of these may be configured already.
- Go to Config > Settings > Billing Portal. Under Subscriber Invitations, select Automatic invitation emails for new subscribers. This is typically enabled by default.
- On the same page, under Management Links, select Require customers to verify their email before logging in. This is typically enabled by default.
2. Decide whether to require a password
Under Config > Settings > Billing Portal, the Allow Password Logins feature controls whether the customer sets and enters a password.
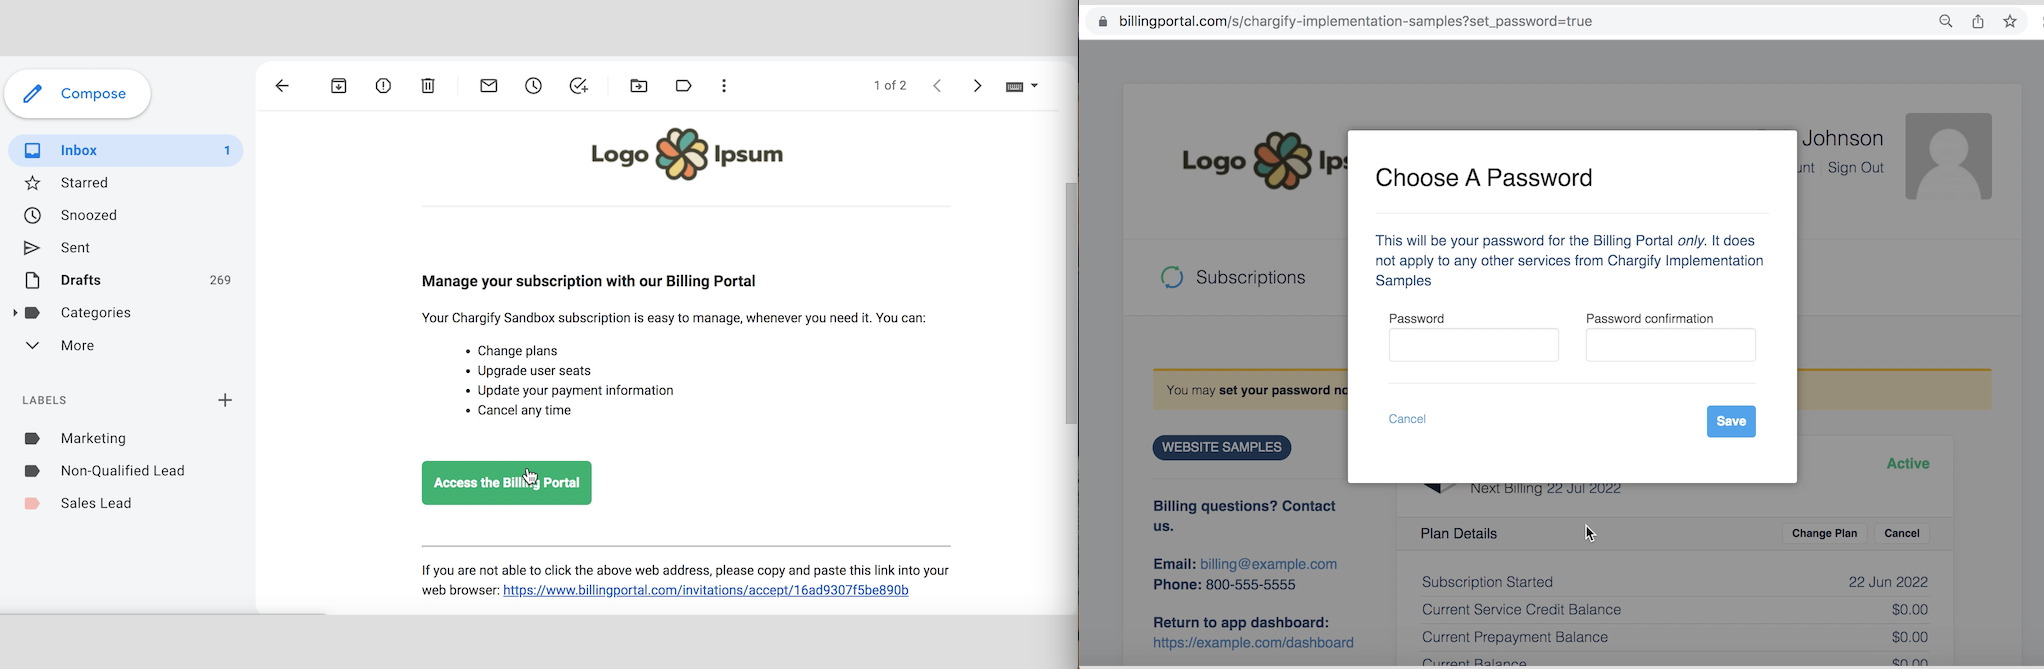
- Select Allow Password Logins for the flow shown in the first image below, where the customer is asked to set a password.
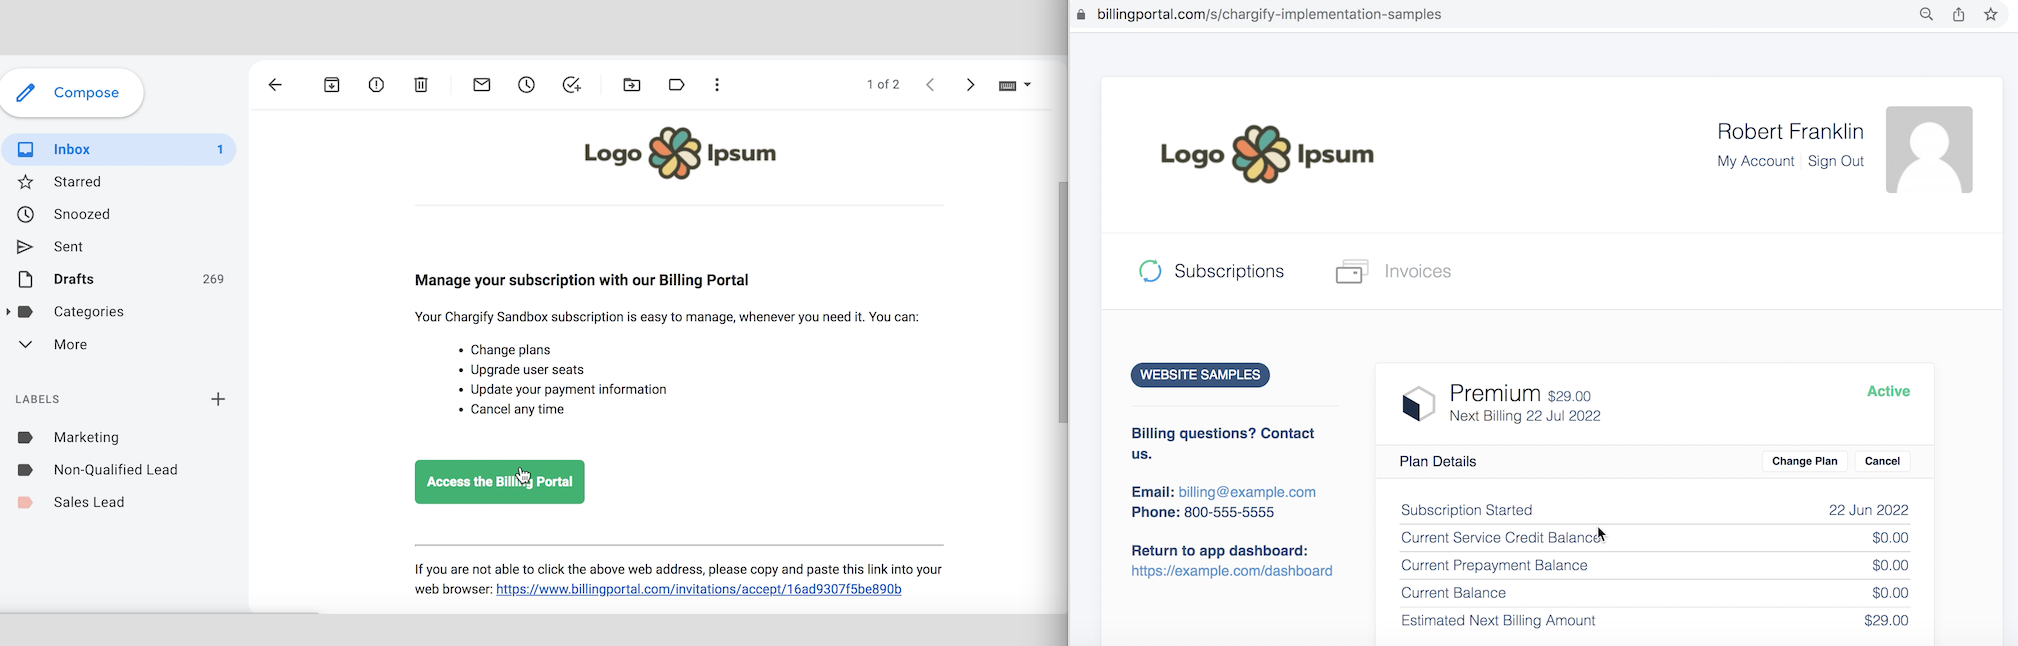
- Leave it cleared for the flow shown in the second image, where the portal opens directly.
3. Configure the email template
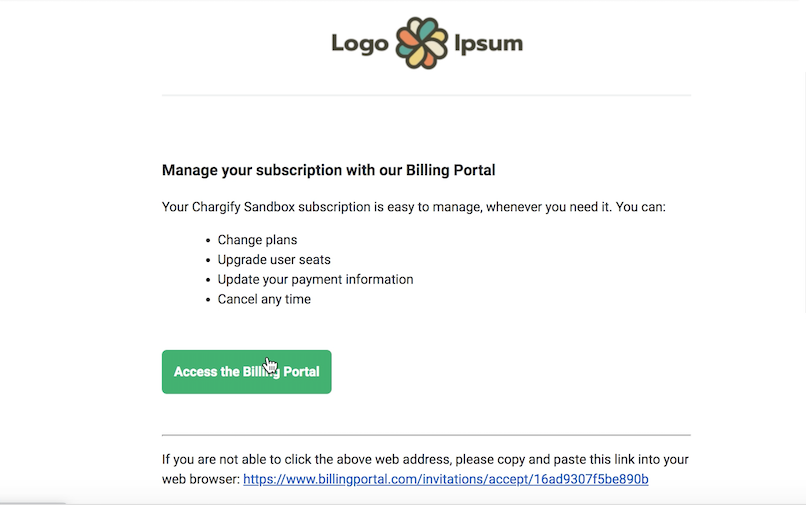
Go to Config > Settings > Billing Portal, find the invitation email settings, and select Edit Template. Customize the email as needed. For a template you can start from, see the Billing Portal email template on GitHub.
4. Test the flow
Create a Subscription using an email address you can access, then review the email and work through the login flow. Adjust your settings as needed.
Implement a link from your website
This method suits businesses that have no user login on their own website but still want to send customers to the Billing Portal from it.
1. Determine your portal URL
The portal URL is built from your Site's subdomain, so find that first.
-
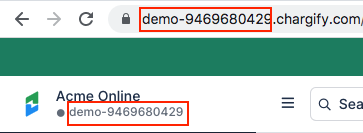
Sign in to Advanced Billing and open your Site dashboard. The subdomain appears in the browser address bar, outlined in the image below.
-
Build the URL, which takes the form
https://www.billingportal.com/s/SUBDOMAIN. With a real subdomain in place, it looks likehttps://www.billingportal.com/s/demo-9469680429. -
Choose which page to link to.
- To link to the main login page, use
https://www.billingportal.com/s/SUBDOMAIN/login/password. - To link to the page where a customer requests a login link, use
https://www.billingportal.com/s/SUBDOMAIN/login/magic.
If you are unsure, build both links with your own subdomain and try them.
- To link to the main login page, use
2. Add the link to your website
Add an HTML link wherever your customers expect to find account management.
-
Write the HTML. This example links to the main login page.
html<a href="https://www.billingportal.com/s/SUBDOMAIN/login/password" target="_blank">Manage Your Subscription</a>This example links to the request-a-login page with the email address prefilled.
html<a href="https://www.billingportal.com/s/SUBDOMAIN/login/magic?email=EMAILHERE" target="_blank">Manage Your Subscription</a> -
Change the call to action from Manage Your Subscription to whatever suits your site.
-
Deploy your code.
3. Test the flow
Go to your website, select the link, and work through the flow. Adjust as needed.
Implement one-click sign-on
This method suits a web app whose users are already signed in, and who should reach their Billing Portal by selecting a button rather than logging in again.
1. Review the prerequisites
Confirm you have each of the following before you start.
- A unique user ID for each user, stored in your own database. Most applications already have this.
- That same unique user ID stored in Advanced Billing as the Customer Reference.
- The Portal Link Expiration Time setting enabled for your Site, which lets you create links that expire quickly, such as after 30 seconds. Contact Maxio Support to have it enabled.
2. Create your frontend URL
The frontend URL points at a page on your own servers, which runs the backend script from the next step. Make sure the user ID it carries is safe to expose in the browser.
-
Create the frontend URL.
html<a href="https://www.yourapp.com/path?user_id=DYNAMIC-USER-ID" target="_blank">Manage Your Subscription</a> -
Place the URL in your app, typically inside a My Account section.
-
(Optional) Style the link as a button using your existing button CSS.
3. Create a backend script
The script queries the Advanced Billing API for the Customer's unique Billing Portal URL, then redirects the user to it.
-
Read the Customer by their reference and parse the Customer ID from the response. Perform a
GETusing your dynamic user ID, then read the Customer ID, such as123456789. See Read Customer by Reference. -
Read the Billing Portal link for that Customer ID. Perform a
GETand parse theurlfrom the response. See Read Billing Portal Link.json{ "url": "https://www.billingportal.com/manage/19804639/1517596469/bd16498719a7d3e6" } -
Redirect the user to the
urlfrom the API response.
Frequently asked questions
Can the Billing Portal be placed in an iframe, given a CNAME, or white-labeled?
No.
Related information
To configure the portal before implementing a login method, see Configure the Billing Portal.
To build your own subscription management experience against the API instead of using the Billing Portal, see Build your own Billing Portal with the Advanced Billing API.
Still need help?
Reach out and our support team will take it from here.