
Setup the Salesforce Integration
Applies to: Advanced Billing
Last updated on Aug 29, 2026
Install Maxio's Salesforce managed package, connect it to an Advanced Billing site, and turn on the integration. Salesforce System Administrator permissions are required throughout.
Make sure you're using a supported browser before you start.
Install the Salesforce package
Installing the package is the first step in connecting Advanced Billing to Salesforce.
To install the Salesforce package
-
Click the correct installation URL below, log in to the target environment, and select Install for Admins Only.
- Production installation: https://login.salesforce.com/packaging/installPackage.apexp?p0=04tKf000000olyO
- Sandbox installation: https://test.salesforce.com/packaging/installPackage.apexp?p0=04tKf000000olyO
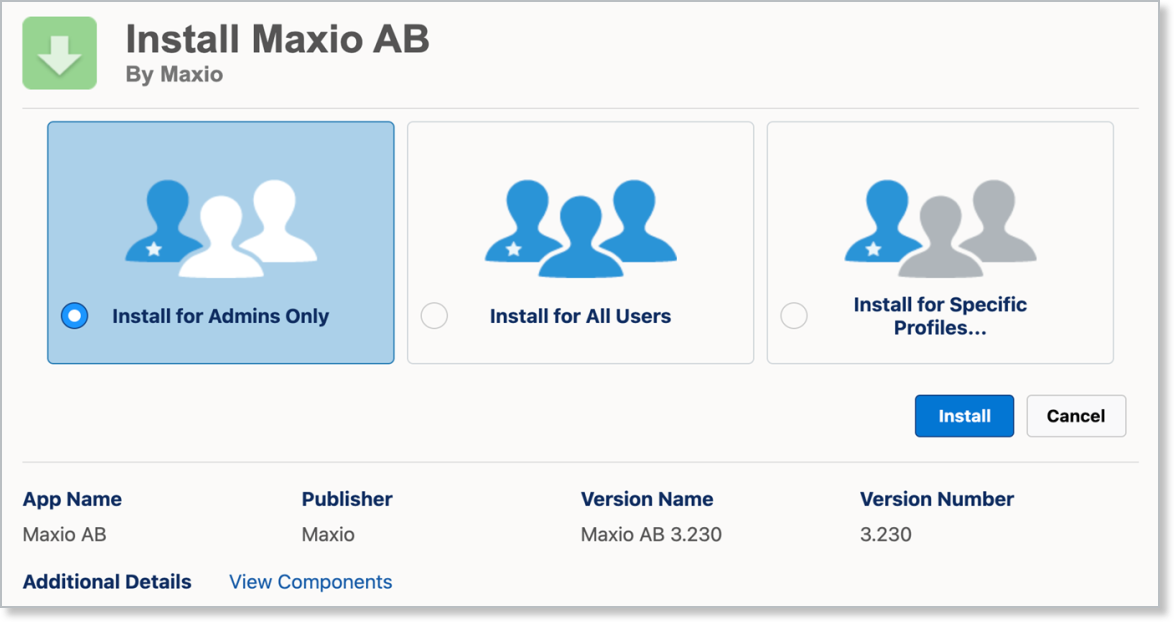
-
Click Install to start the installation.
The app takes some time to install. You'll get an email once the installation is complete.
-
When installation finishes, confirm the package is installed by navigating to Setup > Installed Packages.
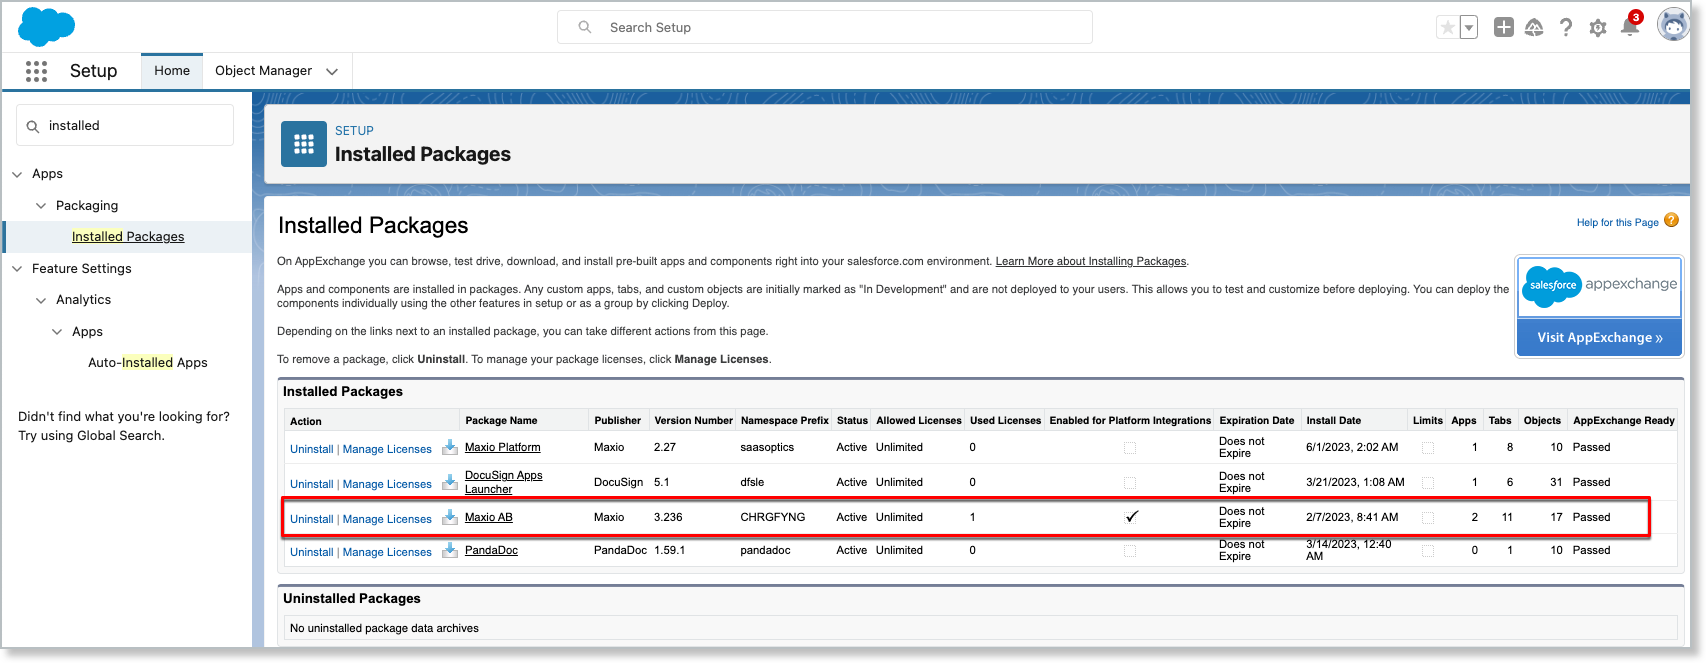
Assign licenses to users
Once the package is installed, assign it to the users who need it.
To assign licenses to users
-
Navigate to Setup > Installed Packages.
-
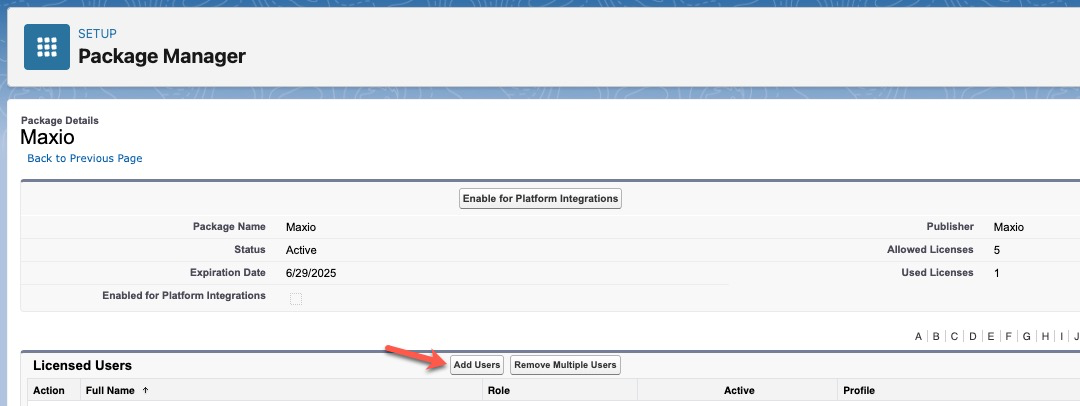
Locate the Maxio package and click Manage Licenses.
-
Click Add Users, select the users who need access, and click Add.
Assign permission sets
Give each licensed user the right level of access. There are two permission sets, assignable through Setup > Users:

-
Maxio AB Admin - Assign only to users who will change the integration's configuration. It already includes every permission in Maxio AB User, so don't assign both to the same admin.
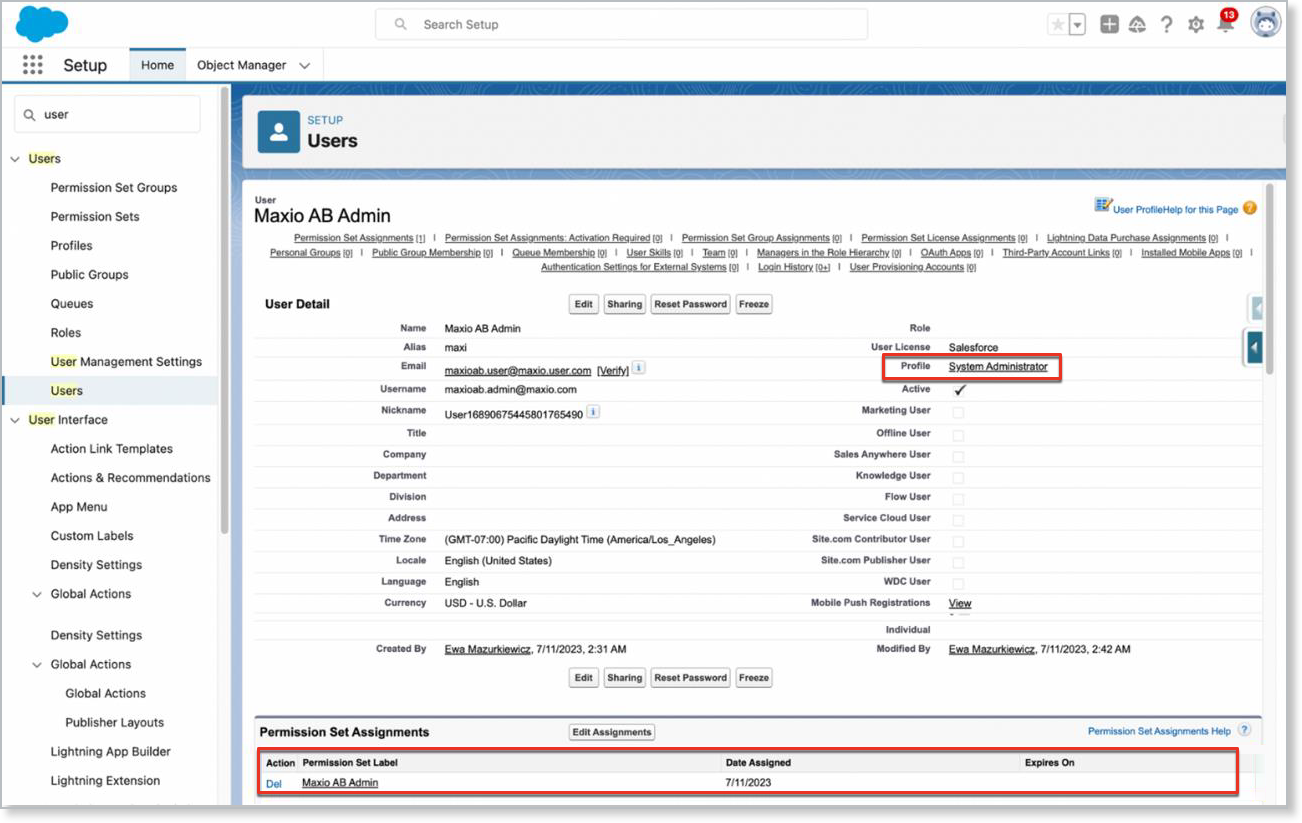
-
Maxio AB User - Assign to everyone else who uses the integration.
Add Remote Site Settings for your Advanced Billing sites
Salesforce needs a Remote Site Setting for every Advanced Billing site you want this integration to connect to.
To add a Remote Site Setting for each Advanced Billing site you want to connect
-
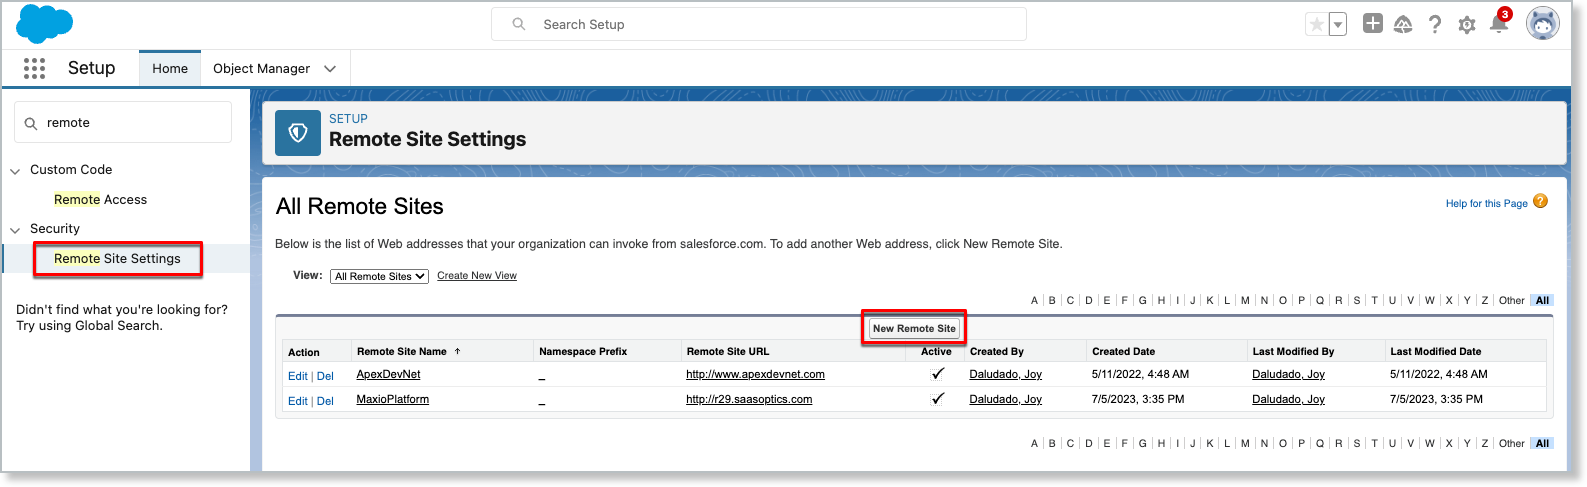
Navigate to Setup > Remote Site Settings.
-
Click New Remote Site.
-
Enter a Remote Site Name (for example, "MaxioAdvancedBilling") and a Remote Site URL.
A Remote Site Name can only contain letters, numbers, and underscores. It must be unique, start with a letter, contain no spaces, and can't end with or double up an underscore.
Your Remote Site URL depends on where your Advanced Billing site is hosted:
https://<subdomain>.chargify.com/for most US sites,https://<subdomain>.ebilling.maxio.com/for EU-hosted sites, orhttps://<subdomain>.billing.maxio.com/for some rebranded instances. Check your site's own URL in Advanced Billing if you're unsure which domain applies.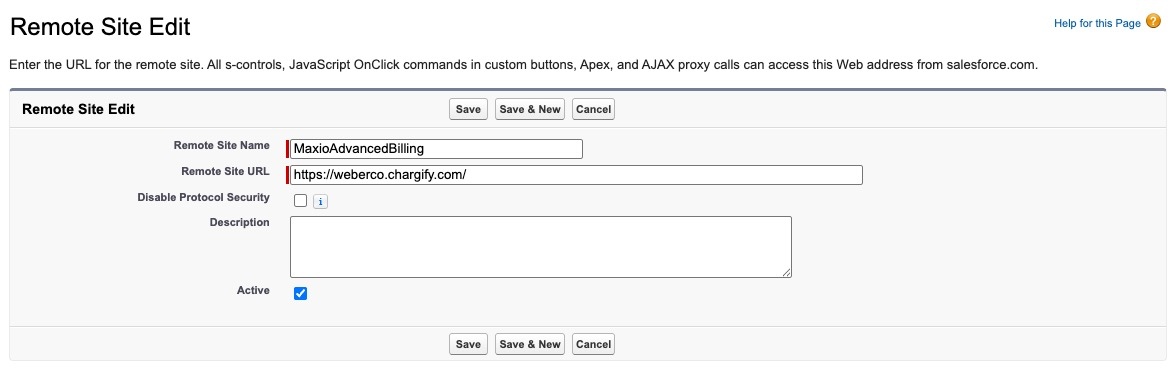
-
Check Active and click Save.
Connect the integration to an Advanced Billing site
You'll need the domain of the Advanced Billing site you're connecting, and its API key.
To connect the integration to an Advanced Billing site
-
Log in to your Salesforce environment as the Admin user (the one with the Maxio AB Admin permission set).
-
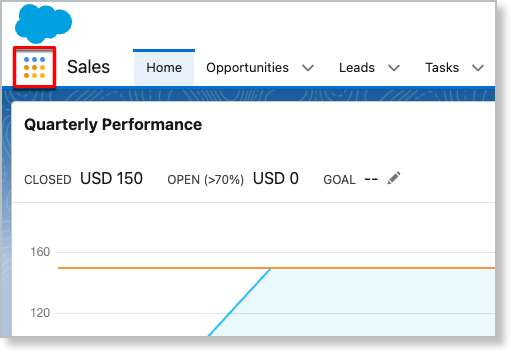
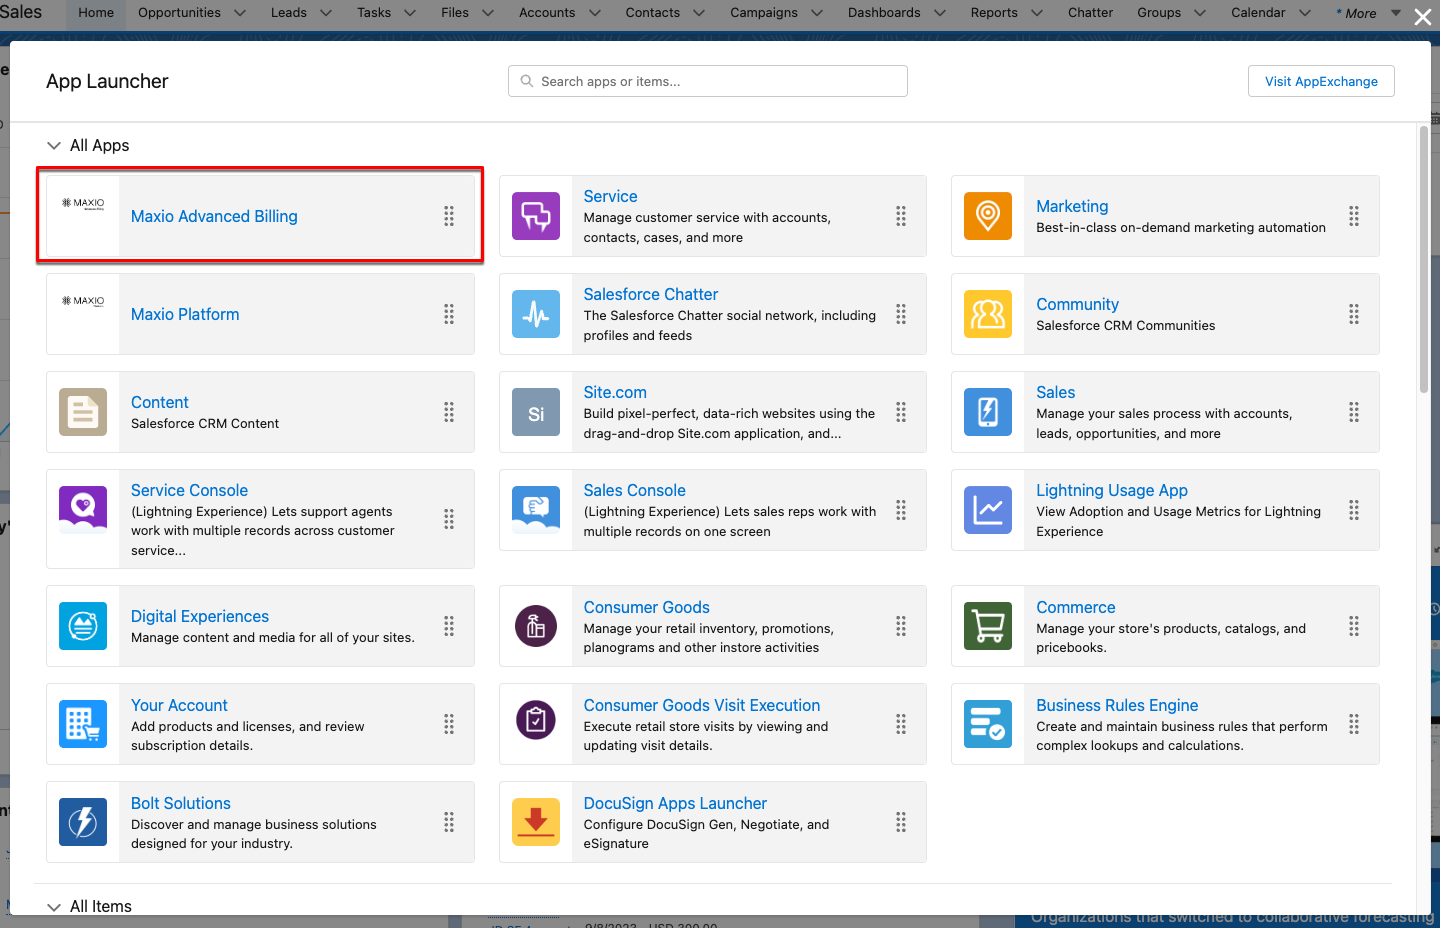
Navigate to the Salesforce App Launcher.
-
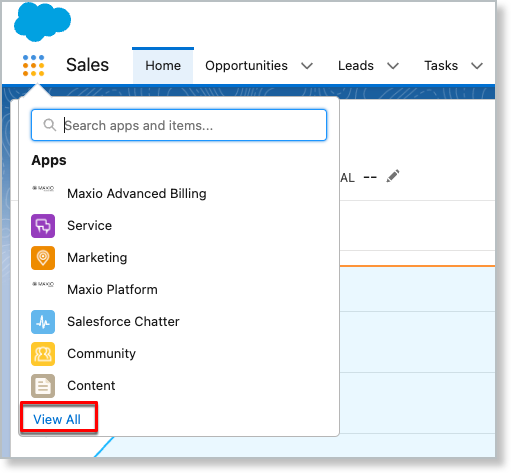
Select the Maxio Advanced Billing app.
If you don't see it in the dropdown, select View All.
-
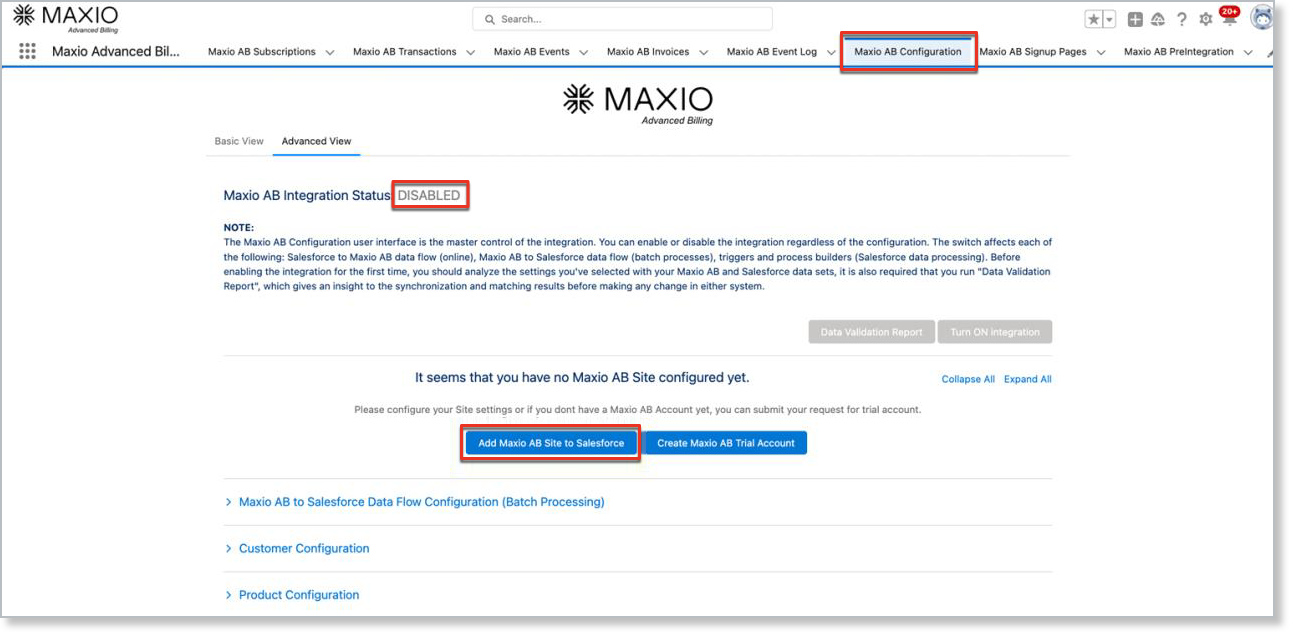
Click the Maxio AB Configuration tab.
The integration is disabled by default. Complete the remaining steps below before enabling it.
-
Click Add Maxio AB Site to Salesforce.
-
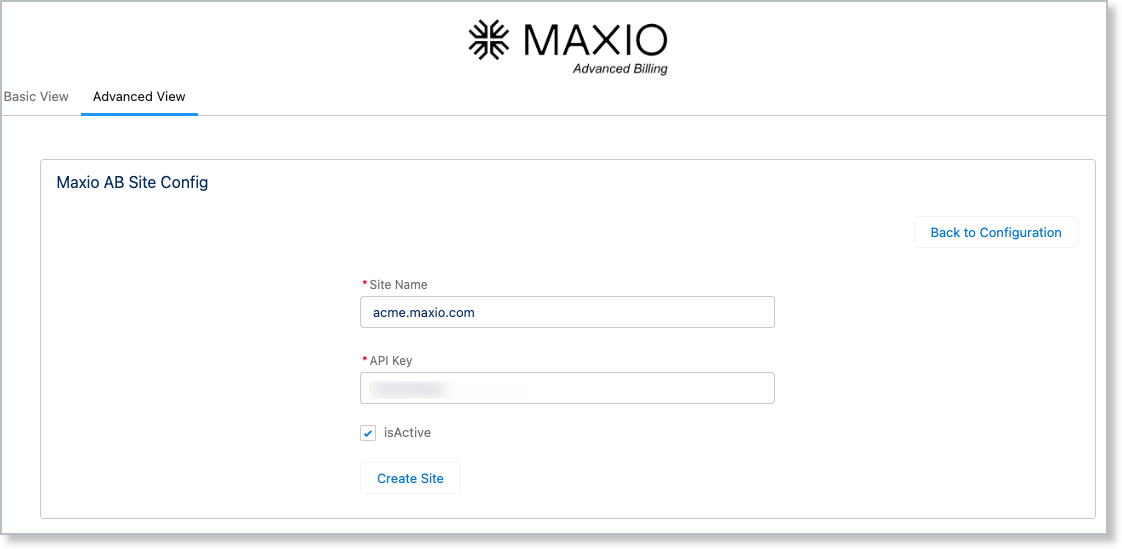
On the Maxio AB Site Config page, enter the Site Name: the domain of your Advanced Billing site.
Enter only the subdomain and domain (for example,
subdomain.chargify.com), without the leadinghttps://. -
Add your API Key. In Advanced Billing, find it by navigating to Config > Integrations > Salesforce.
-
Check isActive and click Create Site to save the configuration.
Review your sync settings
Before you validate and enable the integration, review your Customer, Product, Subscription, and Transaction sync settings. They determine what gets created, updated, or left alone in each system, and the Data Validation Report in the next section previews results based on whatever you've set here. See Configure the Salesforce Integration Sync Settings.
Run a Data Validation Report
Important: Salesforce requires you to run a Data Validation Report before you enable the integration for the first time.
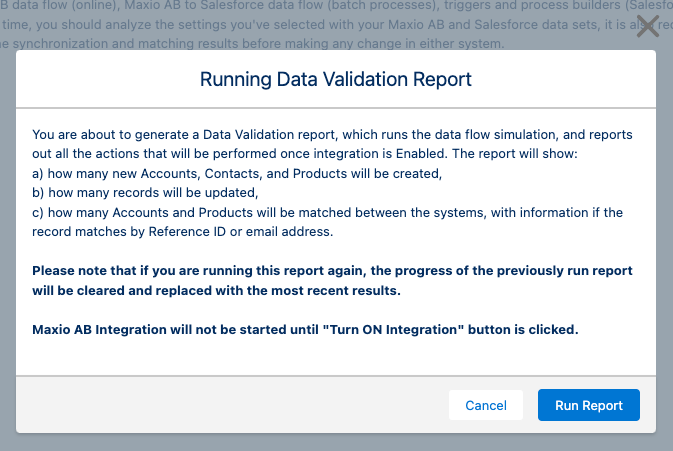
The report previews what will match between Advanced Billing and Salesforce, based on your current sync settings and before either system's data changes. From the Maxio AB Configuration tab, click Data Validation Report.
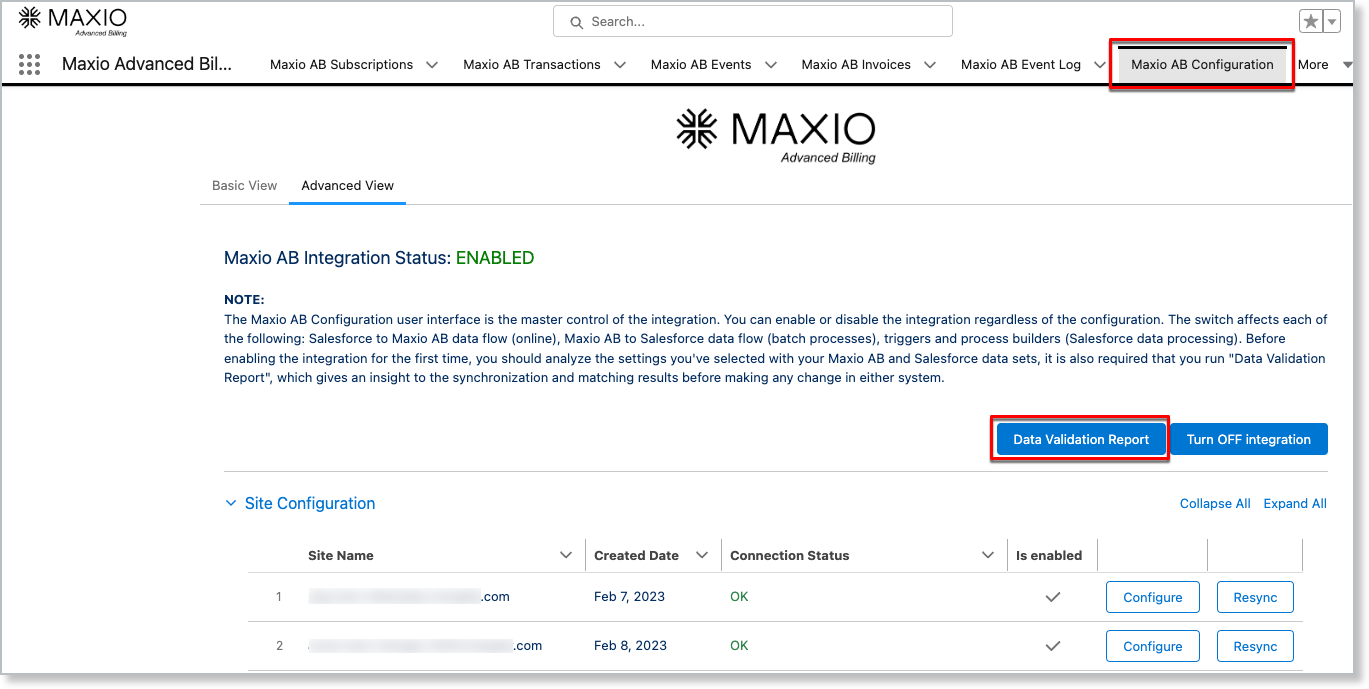
From the Running Data Validation Report popup, click Run Report, then click OK to confirm.
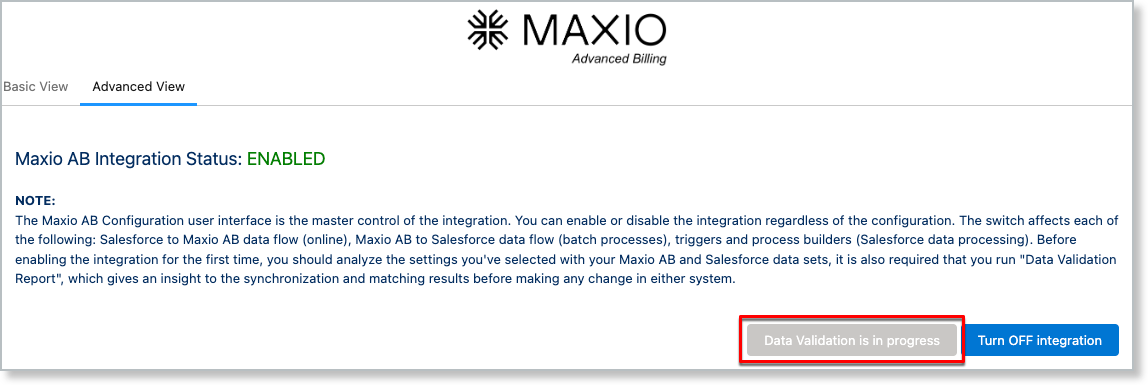
The report can take a while to generate, depending on your Advanced Billing site's data volume. You'll get an email when it's ready. While it's running, the Data Validation Report button shows an in-progress state and is grayed out.
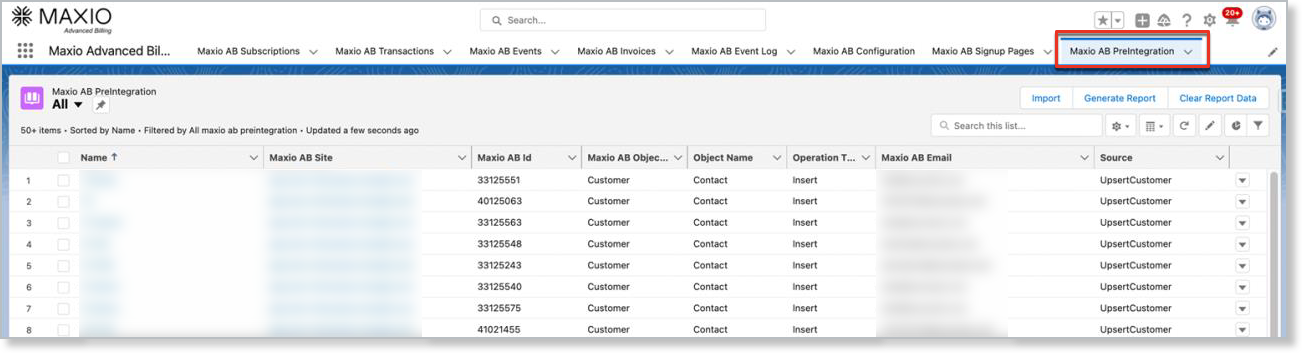
To view the results, click the Advanced Billing PreIntegration tab. It shows a breakdown of everything that currently matches between Advanced Billing and Salesforce, covering Customers, Products, Components, and Coupons, so you can preview how records will sync before you turn the integration on.
Enable the integration
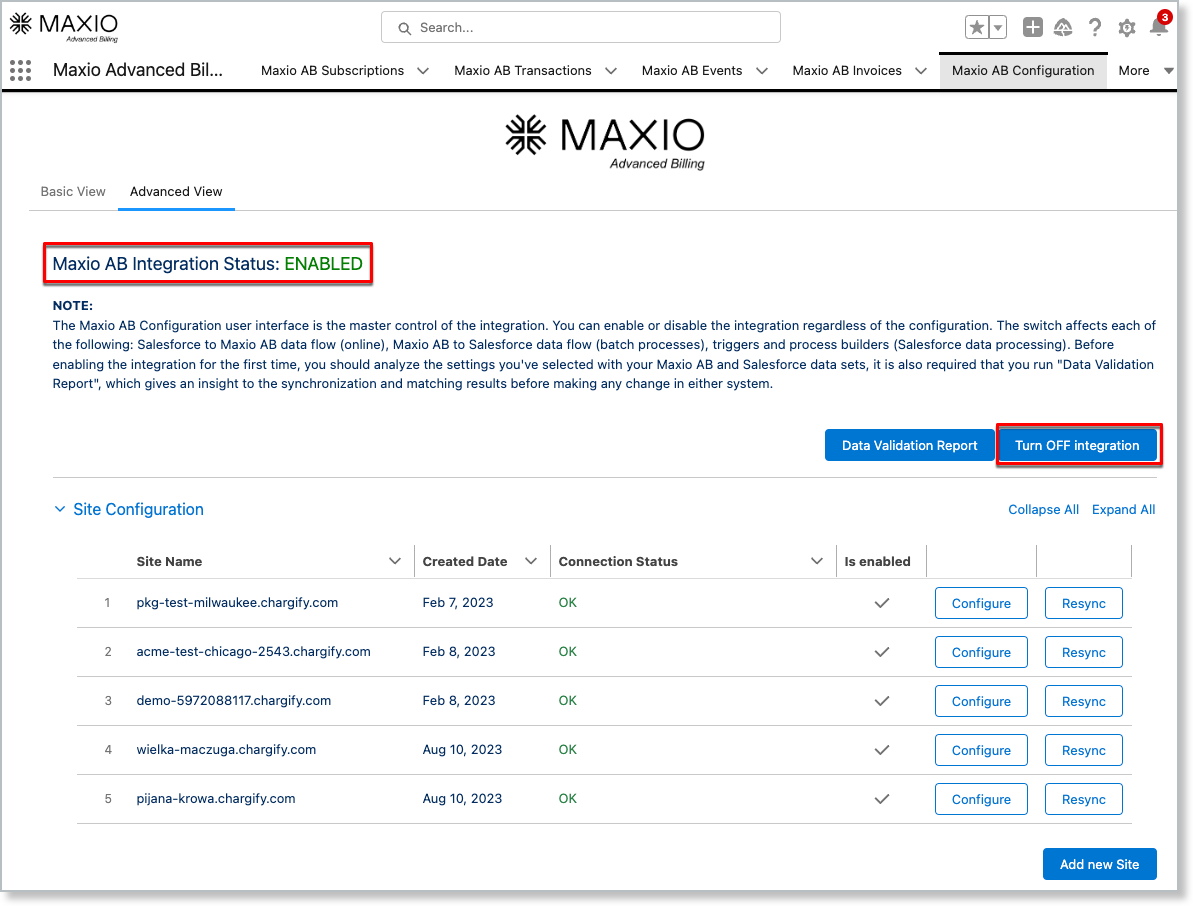
Once you're satisfied with your sync settings and validation results, click Turn ON integration at the top of the Maxio AB Configuration tab. The status changes to ENABLED, and the button becomes Turn OFF integration, which you can use to disable the integration later if needed.
Next steps
To add Advanced Billing action buttons and fields to your Salesforce page layouts, continue to Configure Salesforce Layouts for Advanced Billing.
If you use Salesforce CPQ, continue to Configure Salesforce CPQ for Advanced Billing.
If you want to offer self-service Subscription signup, continue to Configure Custom Offer Signup Pages.
Related information
To map custom fields between Salesforce and Advanced Billing, see Configure Custom Field Mapping for Salesforce.
Before installing or upgrading the managed package, check the Salesforce Managed Package Change Log to confirm which behavior your target version has.
Still need help?
Reach out and our support team will take it from here.