
Manage Open Invoices
Applies to: Maxio Core
Last updated on Aug 24, 2026
Use the Open Invoices list to review all outstanding A/R, sort balances into aging buckets, and quickly send collection emails to customers. Flexible filters and saved list views help you focus on invoices by status, date range, or custom columns so you can prioritize follow-up. The Open Invoices List allows you to filter the list by user-defined day ranges based on your collections cycle.
Go to Accounts Receivable > Open Invoices to open the page.
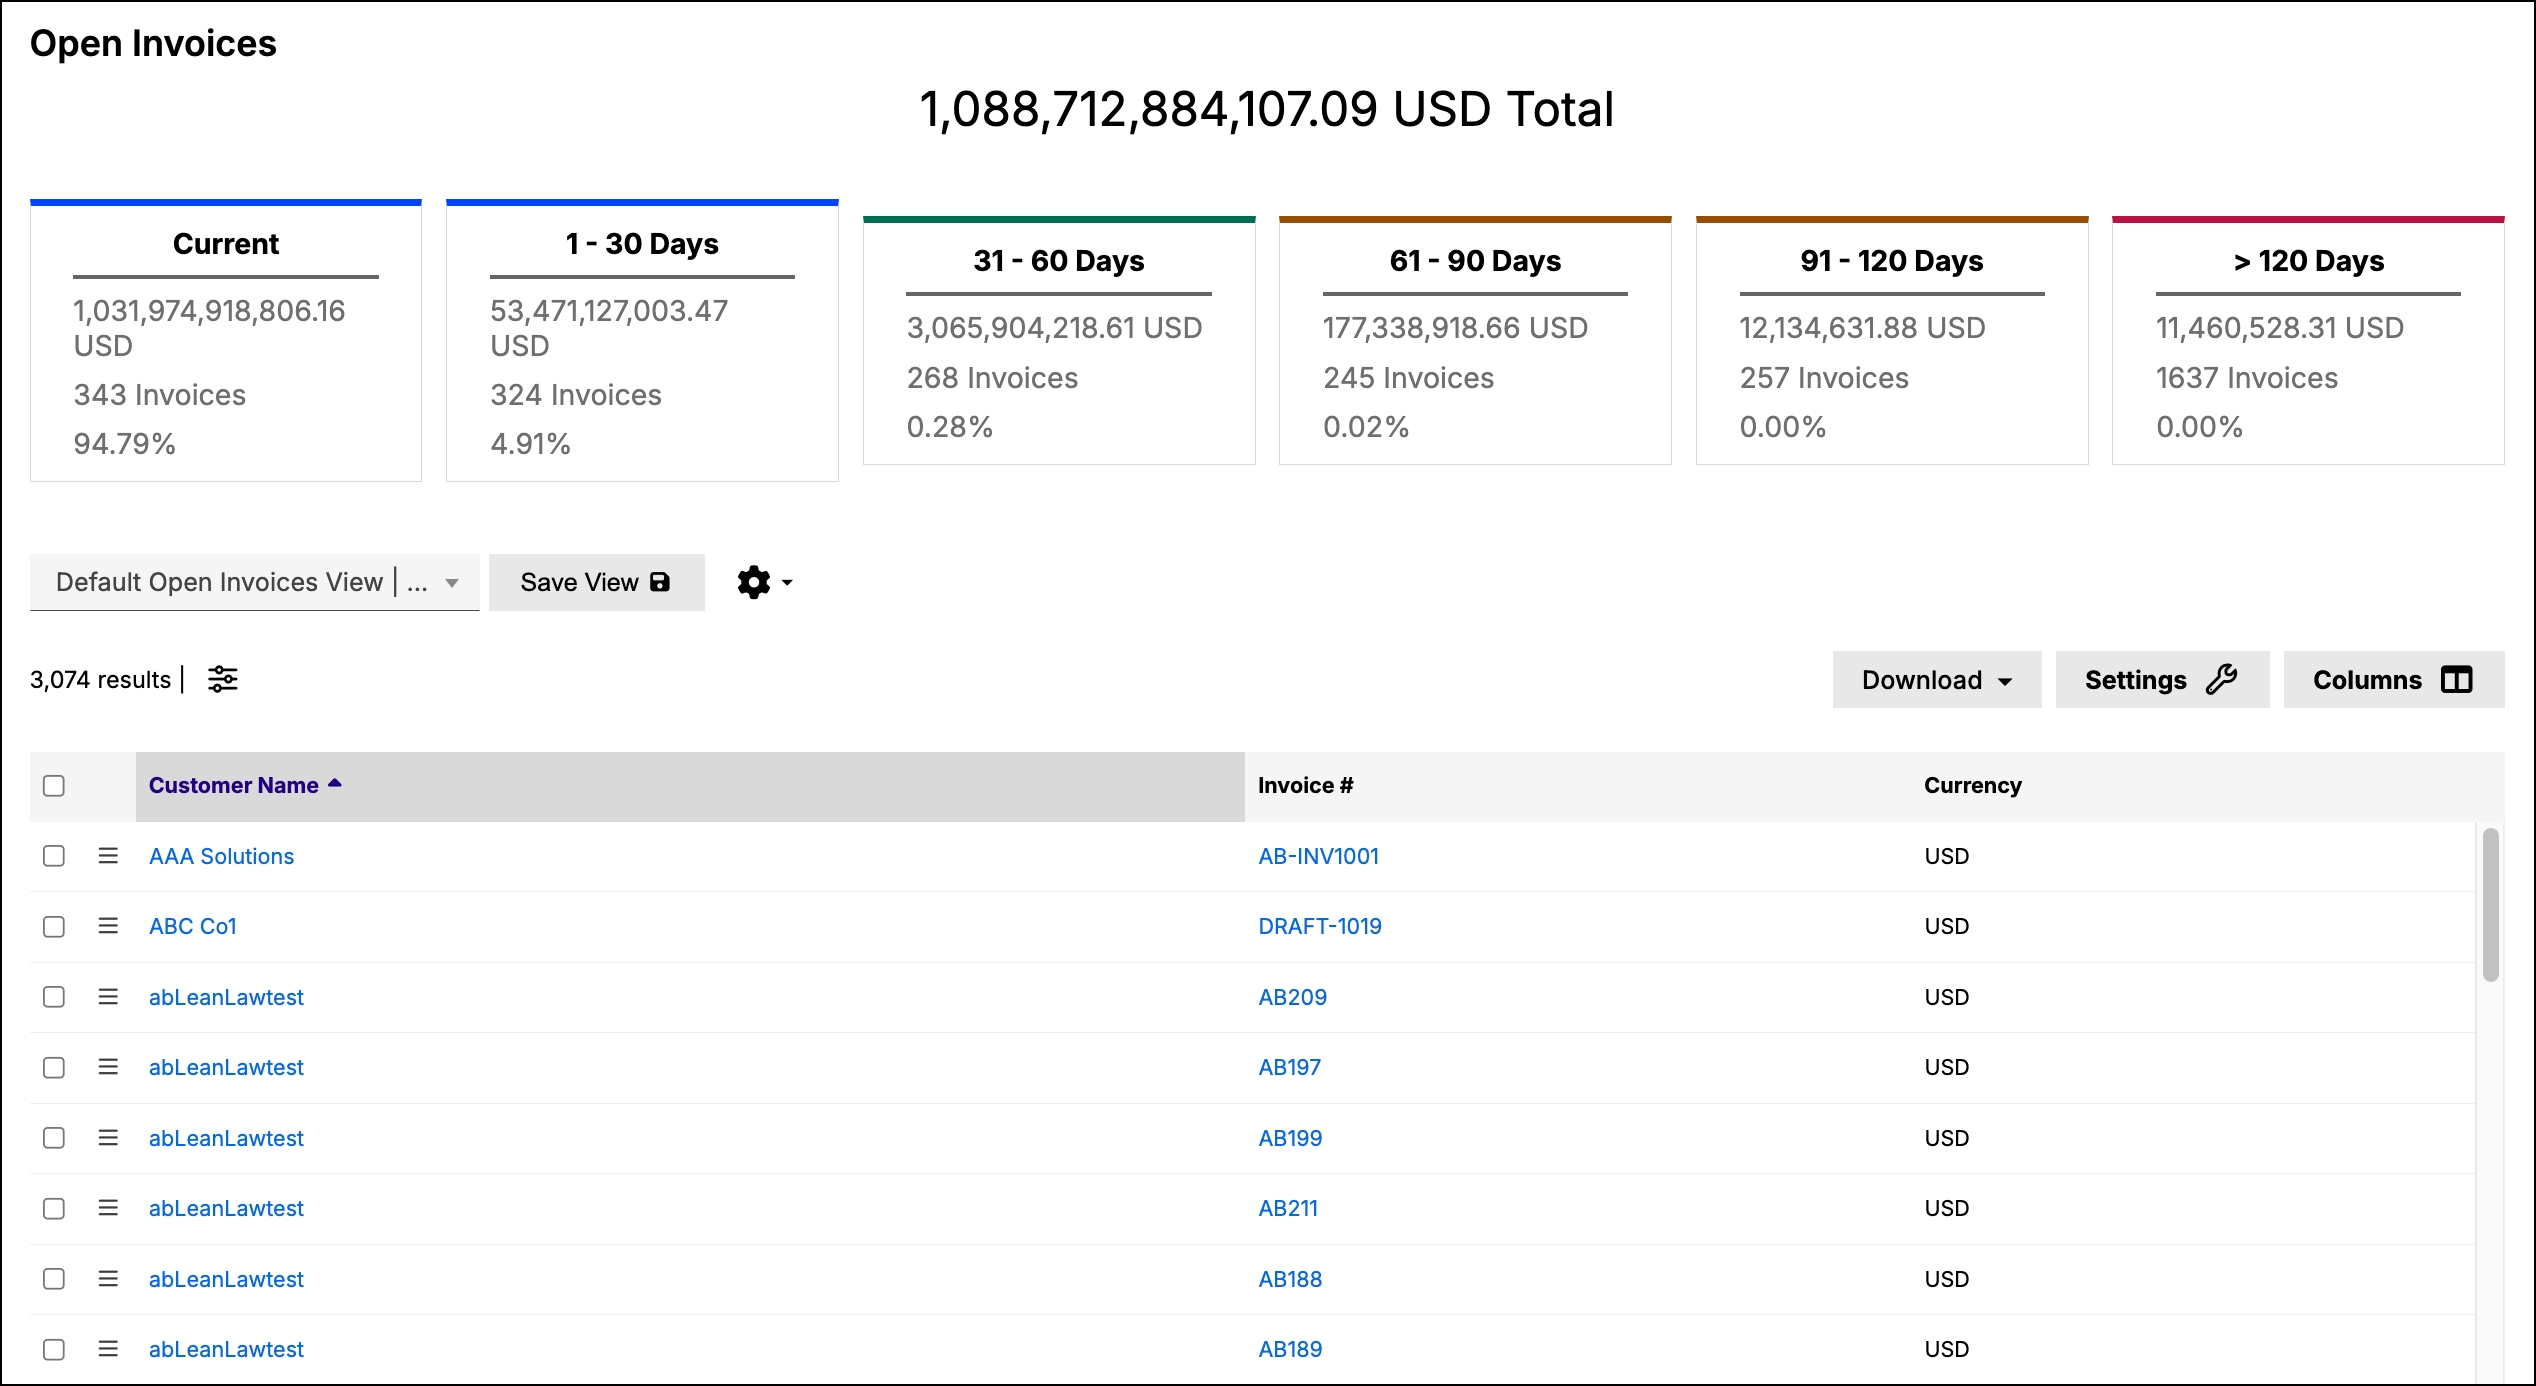
Get a quick snapshot of what customers owe
At the top of the page you will find:
- Total open balance for currently visible invoices.
- Aging cards (date ranges) showing:
- Total balance in that bucket
- Invoice count
- Percent of total
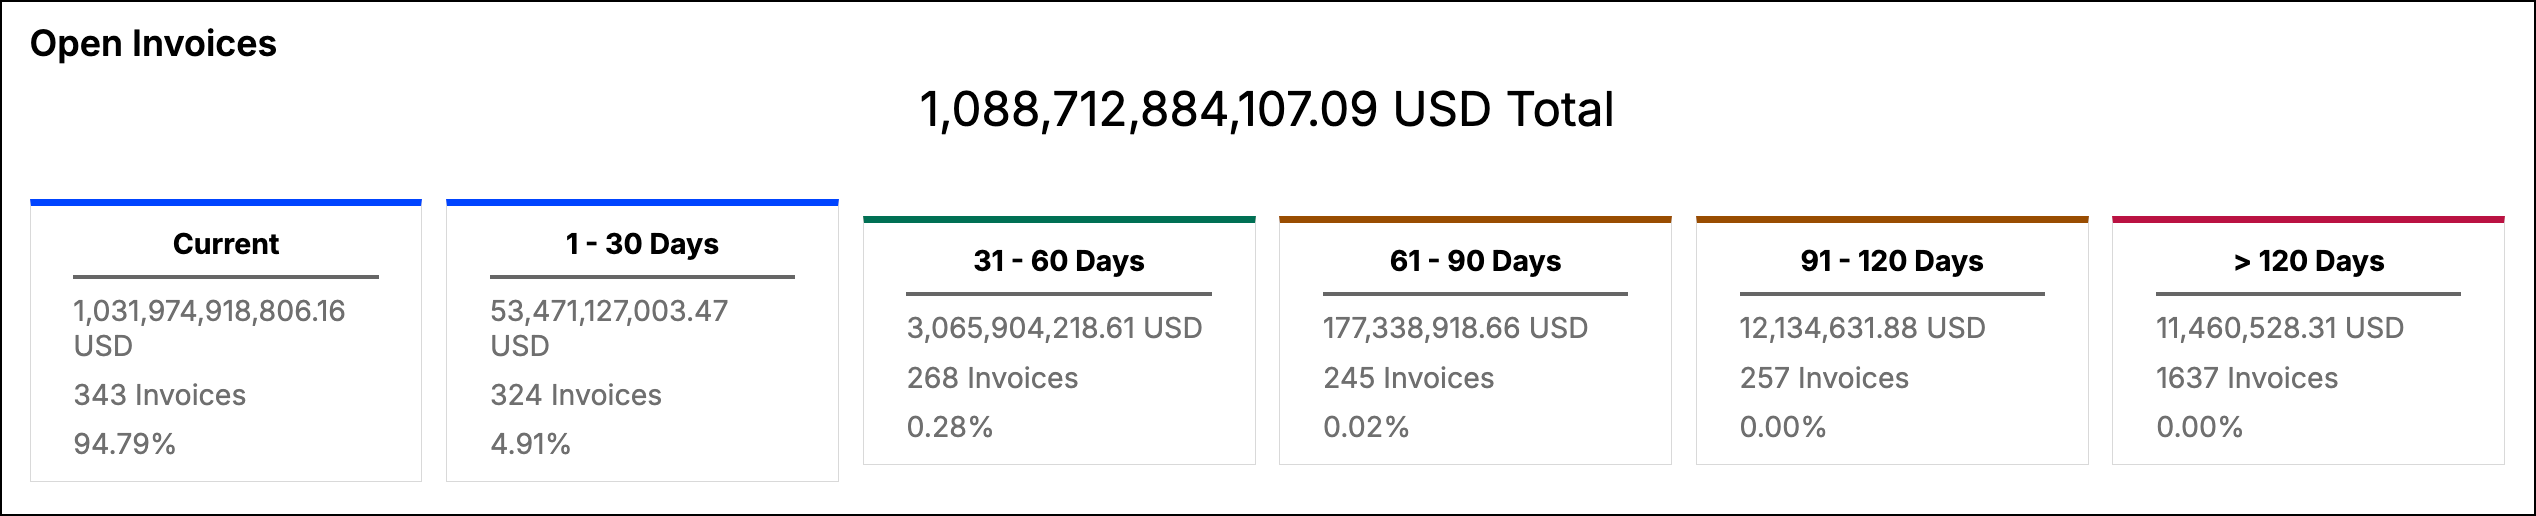
Click any aging card to filter the table to that bucket.
Important notes
- If you are using Multi-currency, all of the amounts on this screen display in the home currency. The totals title bar also shows the home currency abbreviation.
- You can add Collection Note columns to the list if you prefer to view that information on this screen.
- If you have additional filters applied, totals and percentages reflect the filtered result set.
Filter down to the Invoices you need
Click the Filter icon below the Search box to filter the list. You can filter by various invoice fields using the standard list filter function. You can also create and save a given list view for easy access.
Use the filter bar to narrow invoices by common AR criteria, such as:
- Customer name or company name
- Register / currency
- Invoice number, date, due date
- Balance due
- e-Bill status (Ready Now, Sent, Problems, Not Sent, Delivery Error, Payment Failed)
- Autopay status (if enabled)
- Cadence template (if enabled)
- Collection note fields (if collection notes are enabled)
Use reset/clear behavior in the filter bar to return to your baseline list.
Sort and personalize the list view
- Click column headers to sort.
- Use Columns to choose which fields are shown.
- Save your preferred filtered/sorted configuration via the saved list view controls so your AR team can reuse consistent working views.
Take action on individual Invoices
From the list, you can select one or more records, hover over the menu icon, and select which of the following actions to perform against the selected invoices.
- Edit - Edit the invoices' information such as invoice date. You cannot make changes to the invoice line items using this function.
- Receive Payment - Apply a payment to the selected invoice(s).
- Issue to Billing Portal - Publish the invoice to the Billing Portal so customers can pay there. If e-Bill is connected, issuing to Billing Portal locks the invoice from being deleted from e-Bill.
- Create Credit Memo - Start a credit memo linked to the selected invoice(s).
- Clone - Create a copy of the invoice to speed up creating a similar invoice.
- Void - Mark the invoice as void when it should no longer be collectible.
- Delete - Permanently remove the invoice when deletion is allowed.
Perform bulk actions
When checkboxes are available for your role, you can select one or more invoices.
Common bulk workflows include:
- Bulk edit of invoice fields
- Bulk Send of e-Bills (email e-Bills to the selected customers)
- Bulk edit of e-Bill options (edit the selected invoices' e-Bill options)
- Bulk Preview and Send (customize and send an Advanced Billing invoice email for the selected invoices)
- Bulk Issue to Billing Portal (publish the selected invoices to the Billing Portal)
Export your working set
Use export actions to download/share the current list (for example, CSV/Sheets options depending on your setup). Exports respect your active filters and visible columns.
Recommended AR workflow
A practical daily rhythm for collections teams:
- Start with the oldest/highest-risk aging bucket.
- Apply filters for owner/team segment (register, cadence template, risk fields).
- Sort by largest balance due.
- Work actions from top to bottom (contact, note follow-up, receive payment, etc.).
- Save a reusable view for each collector or process lane.
- Export end-of-day status for handoff/reporting.
Still need help?
Reach out and our support team will take it from here.