
Customize List Views
Applies to: Maxio Core
Last updated on Aug 26, 2026
List views display data and are geared to help you find specific records with specific conditions. With each list, you can choose columns, set order and sorting, apply filters, and save personal views for quick access. Maxio Core components have a corresponding list view that you can access from the Maxio Core navigation bar:
- Customer List
- Contract List
- Transactions List
- Invoice List
- Invoice Line Item List
- Invoice to Email
- Payment and Refunds List
- Deposit List
- Expense List
- Vendor List
- Bill List
- Bill Line Item List
- Bill Payment List
- Bill Payment Line List
- Report List
- Cadences
You customize list views by setting a combination of filters, columns, column order, and column sorting. With list views, you can quickly identify records to take action on (like bulk editing or exporting).
When you add a column or set the column order in a list view, your changes are automatically saved, even when you navigate away from the list view without saving it first. When you change list filters and/or sort columns, however, you must explicitly save the list view by clicking on the Save icon.
For example, from the Customer List screen, you can generate a list to display customer data that is meaningful to you, and then save it for easy access. You can also set a default list view that automatically loads each time you open the Customer List screen.
Once you’ve configured the list view, you can save it for easy access. List views are user-specific, so you are the only user in your account who will see the list views you create, and you can create as many as you want.
Create and save a list view
Currently, saving the list view is available for most of the list views throughout the application. You will only see the Save View button, for lists that support saving. This feature will soon be available for all list views.
To create a list view, you simply change an existing list view by adding/editing a filter and/or sorting a column, then click Save View.
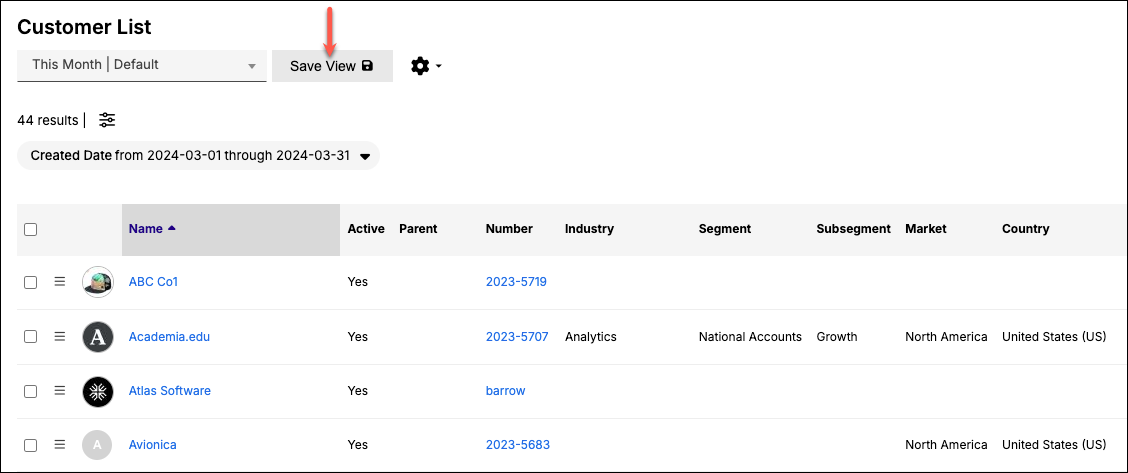
Do the following steps to create a list view.
- On any list view, click the Columns icon located at the top right.
- Select the column(s) you want to display on your list view. The left side represents hidden columns; the right side, active columns. You can select one column or a group of columns. To select a group of adjacent columns, you simply drag the pointer to select the group. To select a group of non-adjacent columns, hold down Command (macOS) or Ctrl (Windows) before selecting the columns.
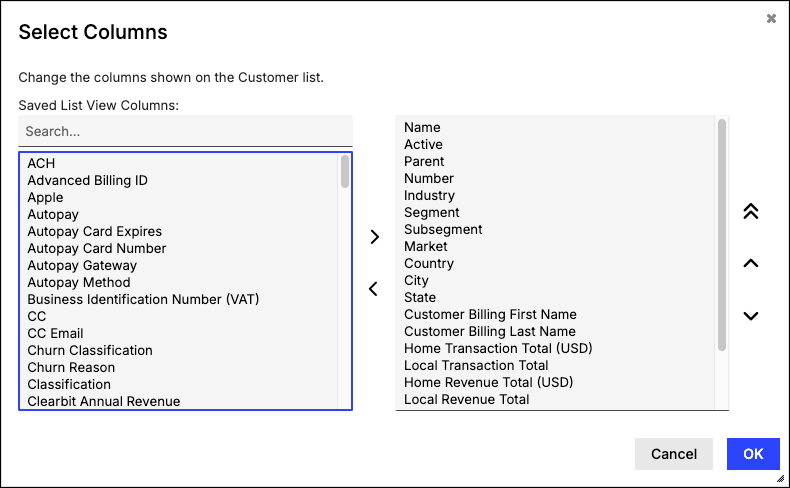
- To add a column, select it from the list on the left (these columns are hidden and do not appear on the list view), and click the right arrow (>) to move it to the list of active columns.
- To set column order, select the column(s) from the list of active columns and then use the up or down arrow to move it. Clicking the double up arrows moves the column to the top (first in order).
- To remove a column, select it from the list of active columns on the right and click the left arrow (<) to move it back to the list of hidden columns.
- Click OK to save the columns.
- To sort the column, hover over the column heading and click it.
You'll notice the column heading color changes when you hover over it. This indicates that the column is sortable. Most columns in the list view are sortable. Each time you click the column heading, the sort toggles from increasing to decreasing (down arrow) and vice-versa (up arrow).
Once your columns are set, use filters to display only the records you’re searching for.
- Next, click the Filters icon.
- Choose the list filters you want to apply.
- For each filter, click inside the box and select an option for the given filter.
- Click Apply Filters.
Once you’ve configured your list view, you can save it for easy access, or set it as the default view that appears each time you open the given screen.
- To save your list view, click Save View.
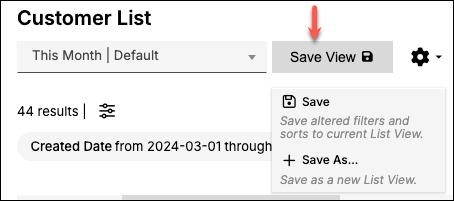
- From the shortcut menu, click Save As.
This opens the Create List View dialog. - Enter the Name for the new list view and then click Create.
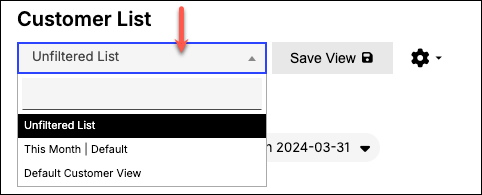
The list view is now saved and can be selected from the drop-down.
Example - setting up a Customer list view
For this example, you create the following Customer List view by:
- Adding an Autopay column next to the Name column;
- Removing the Subsegment column;
- Sorting using the Transaction Totals column;
- Displaying only the companies enrolled in Autopay.
-
Open the column selector from the Customer List screen and select the columns you want to display on the list view.
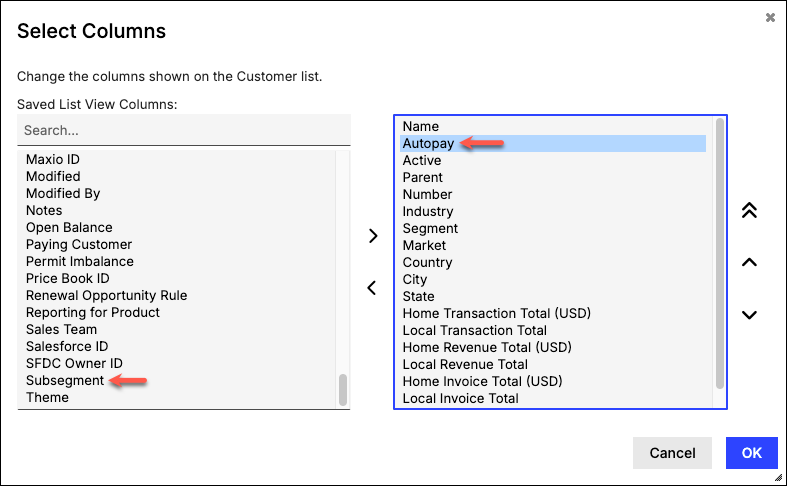
- To add the Autopay column, select it from the list on the left (these columns are hidden and do not appear on the list view), and click the right arrow (>) to move it to the list of active columns.
- To move the Autopay column next to the Name column, select it from the list of active columns and then use the up arrow (^) to move it below the Name column.
- To remove the Subsegment column, select it from the list of active columns on the right and click the left arrow (<) to move it back to the list of hidden columns.
- Click OK to save the columns.
-
To sort the column, hover over the Transaction Totals column heading and click it.
You'll notice the column heading color changes when you hover over it. This indicates that the column is sortable. Most columns in the list view are sortable. Each time you click the column heading, the sort toggles from increasing to decreasing (down arrow) and vice-versa (up arrow).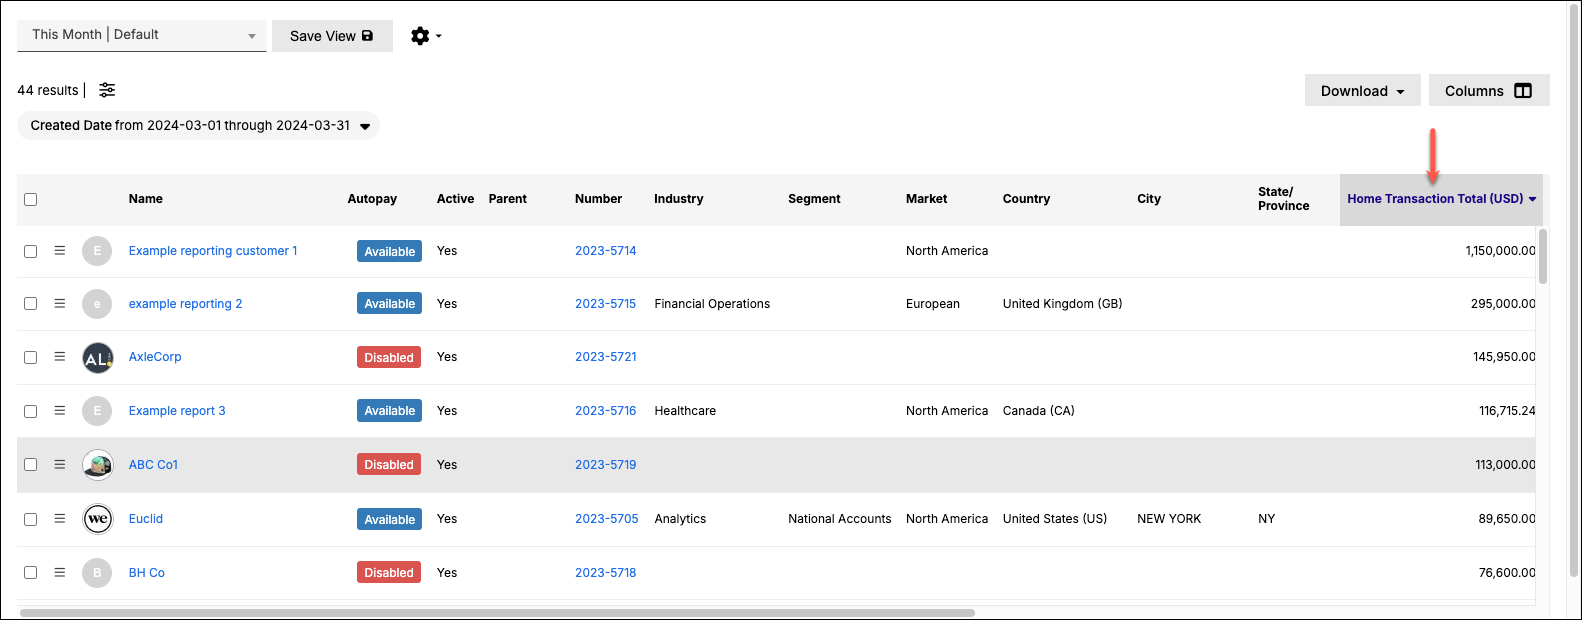
-
Once your columns are set, use filters to display only the records you’re searching for, which in this example are companies enrolled in Autopay. Next, click the Filters icon.
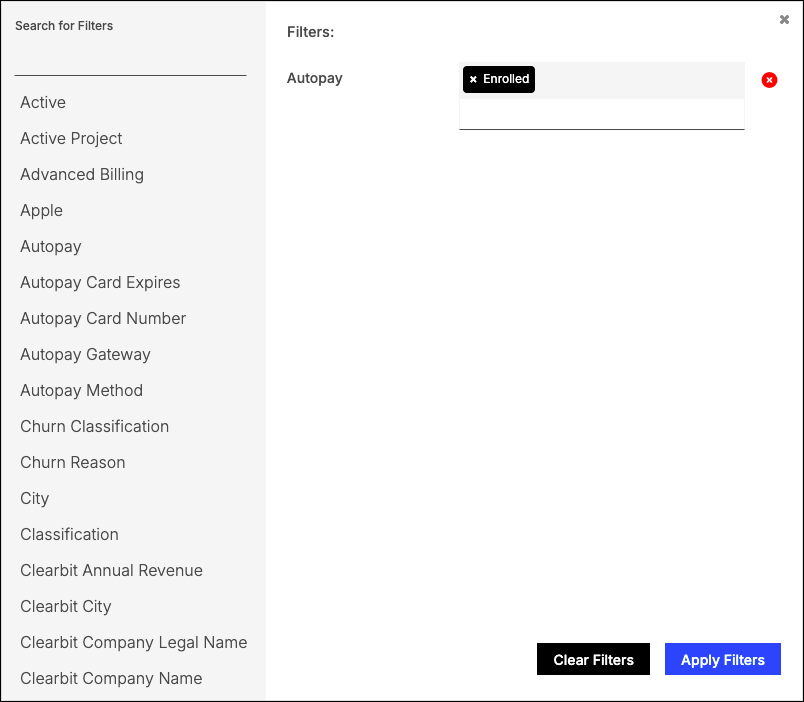
- From the list of filters, click Autopay.
- Click inside the Autopay filter box to see the options for this filter.
- Select Enrolled.
- Click Apply Filters.
Once you’ve configured your list view, you can save it for easy access, or set it as the default view that appears each time you open the Customer List screen.
-
To save your Customer List view, click Save View and then Save As.
-
Enter the Name for the new list view and then click Create.
Set a default list view
Again, list views are user-specific, so you are the only user in your account who will see the list views you create. The default you set applies only to you, and only to that one list — each list has its own default.
- From the list view drop-down, select the view that you want as the default.
- Click the Gear icon, and then click Default.
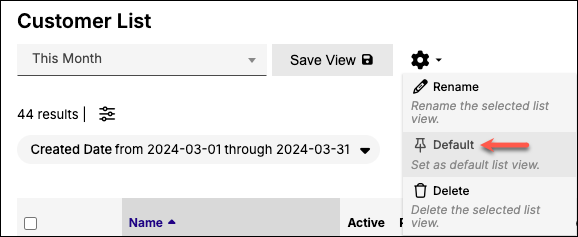
- From the confirmation prompt, click Set as Default.
The term "Default" now appears next to the list view name to indicate that it is the default view.
Manage your list views
When you hover over the Gear icon, you have the following options:
- To rename the selected list view.
- To set a default list view.
- To delete the selected list view.
Sharing list views
Saved List Views are user-specific, so sharing them or copying them to other users or instances is not possible. You can, however, recreate a list view by simply adding the same columns, sorting the list as needed, and then saving the List View as your own.
List view pagination
For large Lists that span multiple pages, use the pagination controls at the bottom of the screen to help you navigate. Visual indicators let you know which page you are currently on and how many pages there are in total.
You can go directly to a specific page by using the Go to Page option. The Go to Page option is helpful when, for example, you are editing records in bulk and need to access a specific page.
Still need help?
Reach out and our support team will take it from here.