
Set Up the Billing Portal
Applies to: Advanced Billing
Last updated on Aug 27, 2026
The Maxio Billing Portal lets your Customers view Invoices, manage payment methods, and pay online. Enable and customize the Billing Portal within Maxio by configuring invoice-sync behavior, GL enforcement, and portal invitations, so setup aligns with your internal financial workflows.
Configure Billing Portal settings
Before Customers can view Invoices, manage payment methods, or pay online in the Billing Portal, configure a few Advanced Billing settings within Maxio.
To configure Billing Portal settings
-
From the Advanced Billing menu, open Integration Settings, then click Update Settings.
-
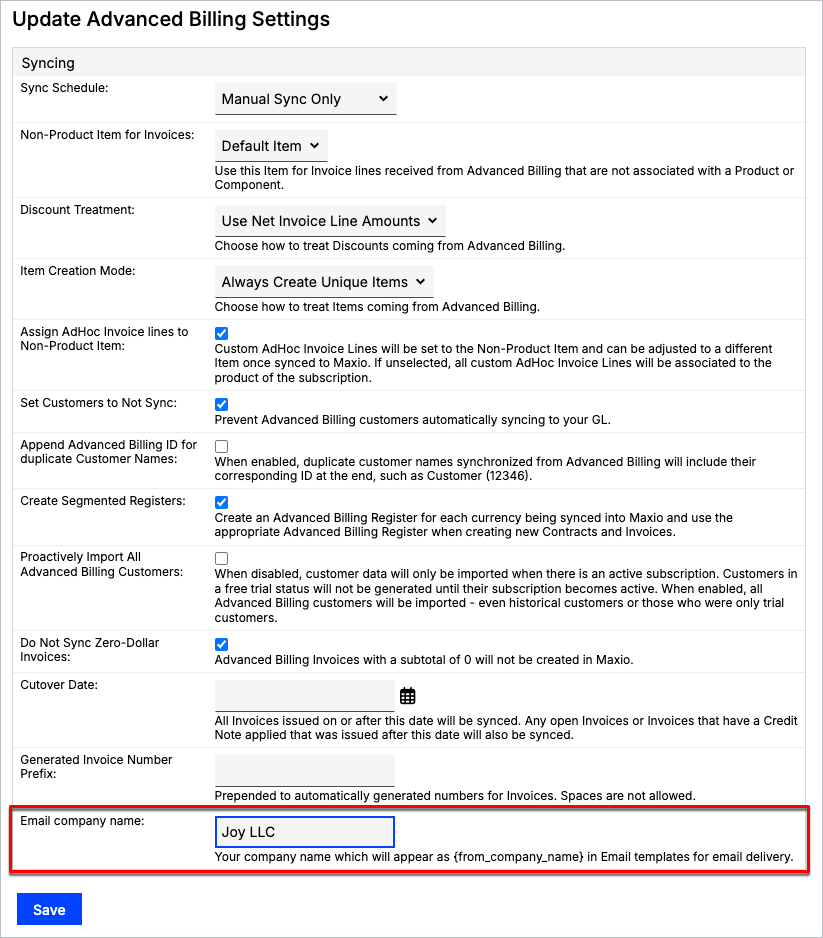
On the Update Advanced Billing Settings page, review the Email company name field. It's optional, but if your team uses Email templates that reference the company name, enter a value for consistency.
-
Decide whether to enable Do Not Sync Zero-Dollar Invoices. When enabled, Advanced Billing Invoices with a subtotal of 0 aren't created in Maxio.
-
Decide whether to enable Require Sync Before Issuing Invoice. When enabled, Maxio only emails an Invoice after it has synced to your GL. This setting only appears when a GL integration is connected.
-
If you need to configure autopay or automatic email delivery, contact your implementation consultant or Maxio support. These settings are only available to Maxio staff, not on this self-service page.
-
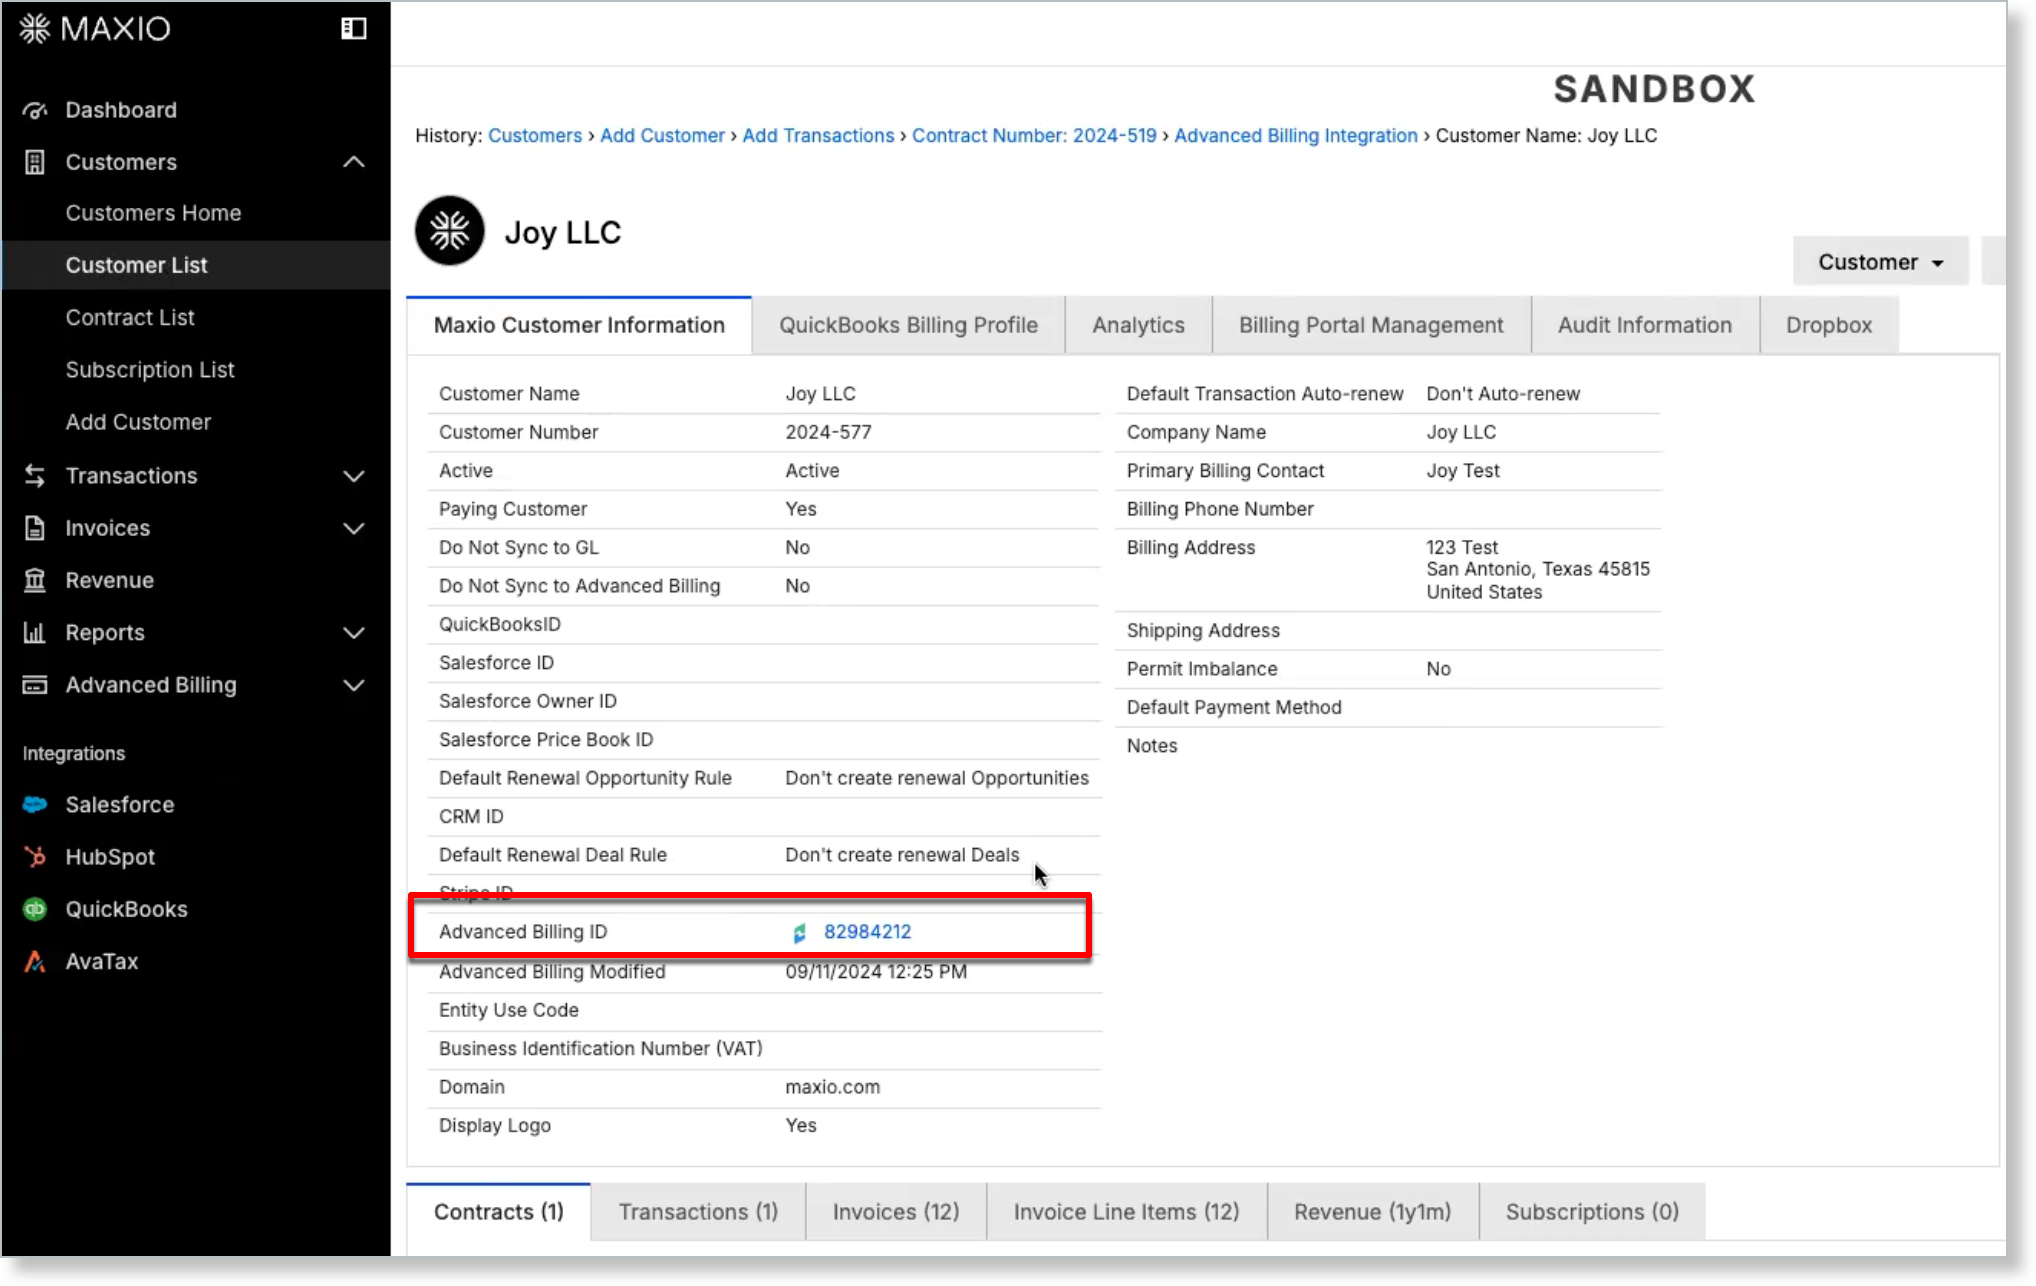
Click Save. Your setting change syncs automatically, and Maxio assigns an Advanced Billing ID to the Customer.
-
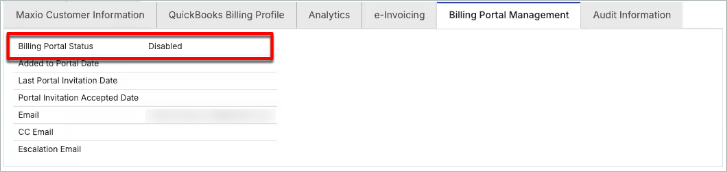
Click the Billing Portal Management tab and check the Billing Portal Status field. It displays Disabled until you enable Billing Portal access for that Customer.
Next steps
Continue to Configuring Billing Portal Options to review additional Billing Portal settings.
Still need help?
Reach out and our support team will take it from here.