
Create a Theme
Applies to: Advanced Billing
Last updated on Aug 25, 2026
Create a Branding Theme to standardize Invoice appearance across billing workflows. Set up logos, colors, fonts, and layouts to ensure consistent customer-facing documents. Branding Themes affect invoice PDFs, hosted Invoice pages, Public Signup Pages, and related invoice email styling. After you create a theme, you can continue refining it in the Template Editor and its settings.
Add a new theme
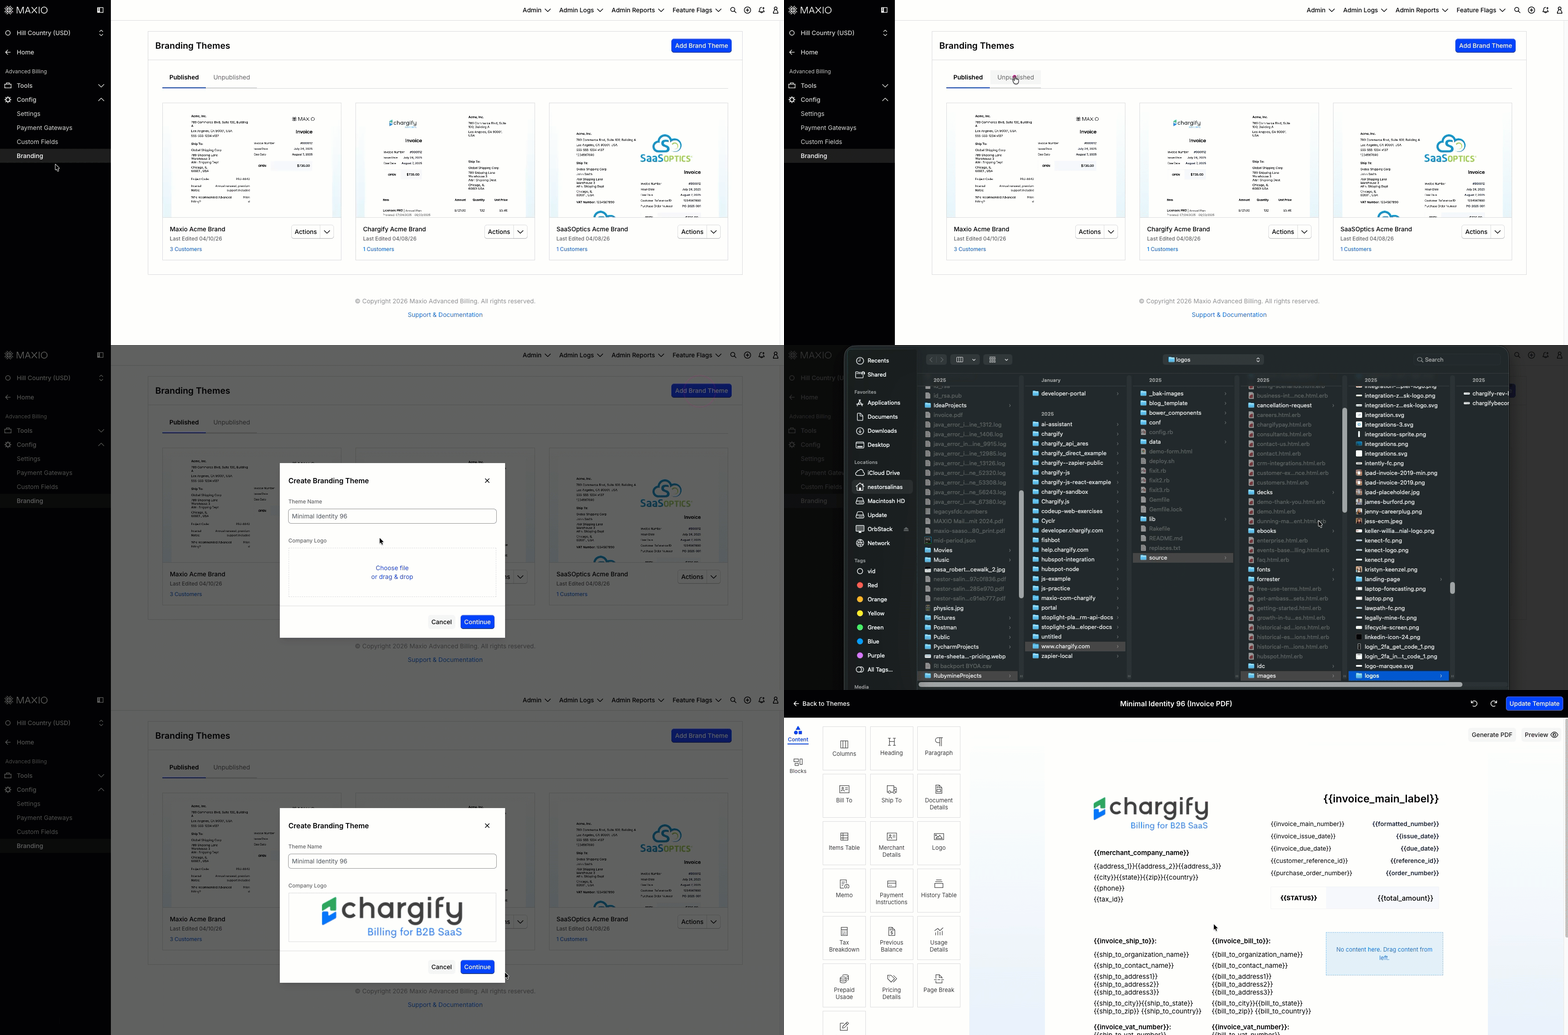
A new theme starts with just a name and an optional logo. You add colors, fonts, and layout afterward in the Template Editor.
To create a new theme
-
Go to Config > Branding.
-
Click Add Brand Theme.
-
Enter a Theme Name.
The text box includes a default placeholder theme name. You may use this suggested name or overwrite it with a new name of your choice.
-
Optionally upload a Company Logo.
-
Click Continue.
What happens next
New themes begin as unpublished until you publish them, and default to the English language. After creation, the app opens the Template Editor so you can continue customizing the invoice layout. A preview image is also generated so the theme displays with a visual preview in the themes list.
Tips
Start by creating the theme, then update the visual settings and layout after the unpublished theme is created. If a logo is not ready yet, you can add or replace it later.
Related information
For an overview of what Branding Themes are and how theme assignment works, see Understand Branding Themes.
To change an existing theme's colors, fonts, language, or logos, see Update Theme Settings.
To lay out the fields on an Invoice generated from a theme, see Edit Invoice Template Layout.
For the undo, redo, and template-switching controls in the Template Editor, see Using Template Editor Navigation and Controls.
Before publishing your new theme, see Preview a Theme Before Publishing to check how it appears to Customers.
Still need help?
Reach out and our support team will take it from here.