This article explains how to use the HubSpot–Advanced Billing integration to streamline your subscription sales workflows, manage multi‑currency deals, preview and create subscriptions from HubSpot deals, and sync advanced billing events and timeline activities.
Please make sure that the proper browser is being used to set up and use this integration. For more information, please look at this article from HubSpot.
Using Multi‑Currency on HubSpot Deals
For HubSpot deals, the “Currency” property is required to determine the deal’s currency. When creating a deal, select the currency for the deal.
The integration will then present pricing of the deal line items in that currency both in the product catalog, on the deal, and on HubSpot quotes.
Preview a Subscription on a HubSpot Deal Record
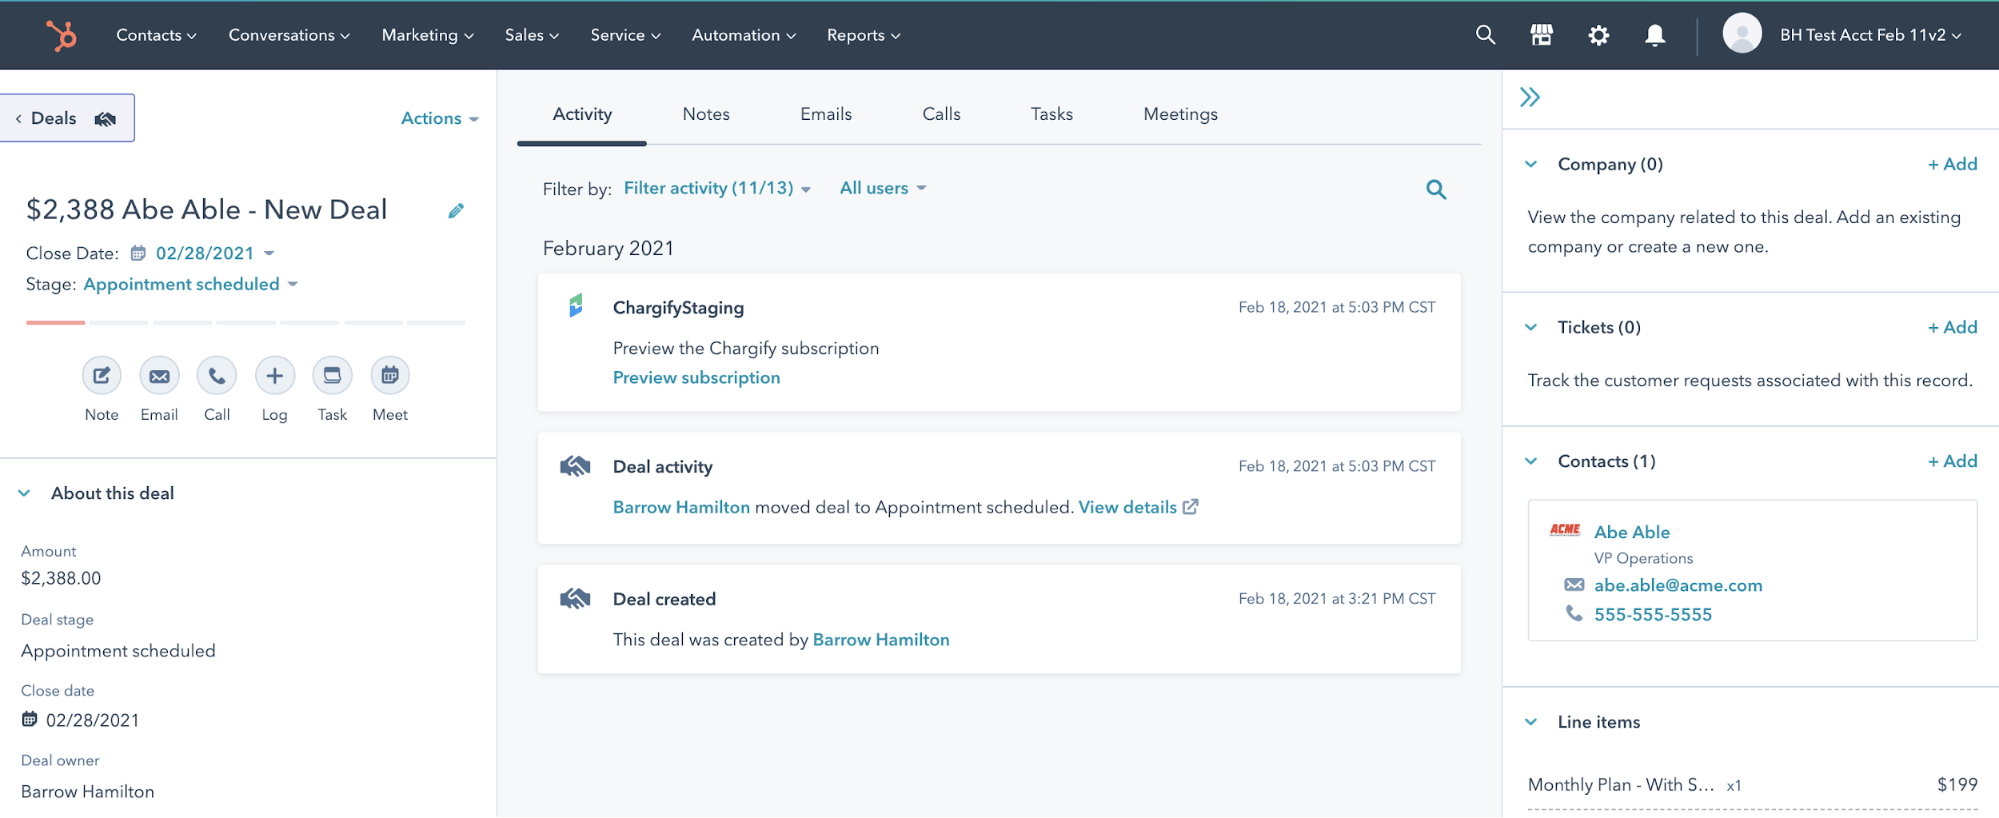
After the HubSpot user (sales rep) creates the correct associations between the deal, the line items, and the billable contact, the deal record displays a timeline event from Advanced Billing. This event triggers additional actions, such as Create Subscription. Users must ensure the Advanced Billing integration timeline events filter is enabled in the Activity view.
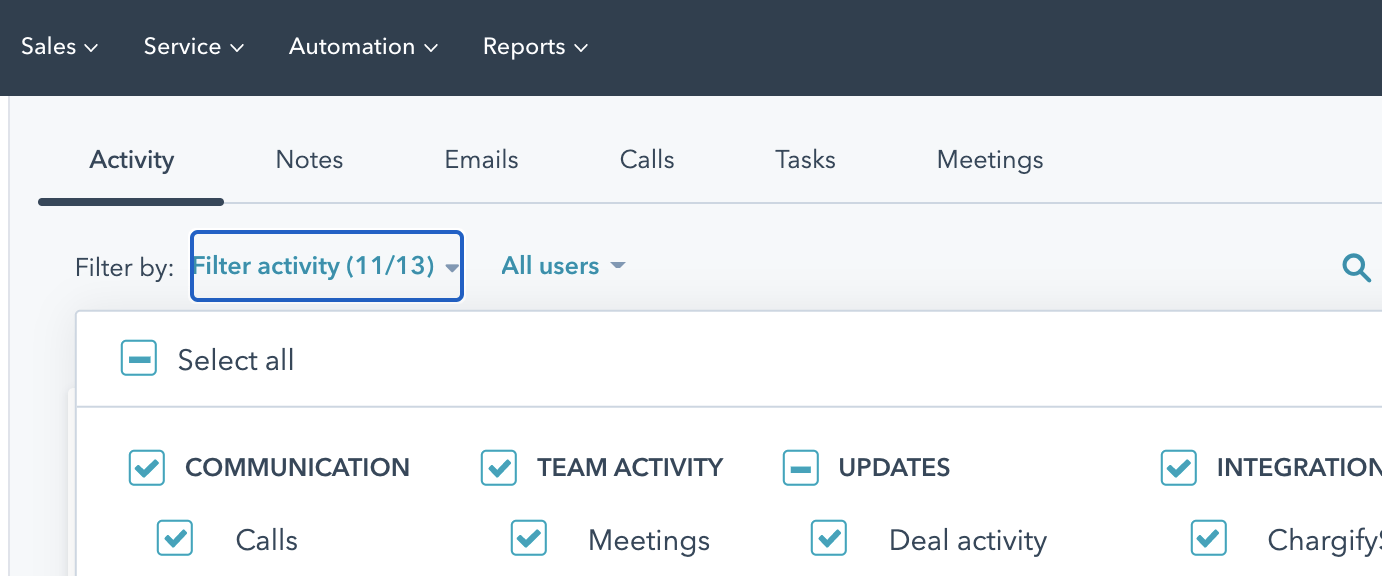
The first time the integration is used, you may need to select the Advanced Billing integration in the Filter By: Filter Activity dropdown at the top of the Activity view in HubSpot.
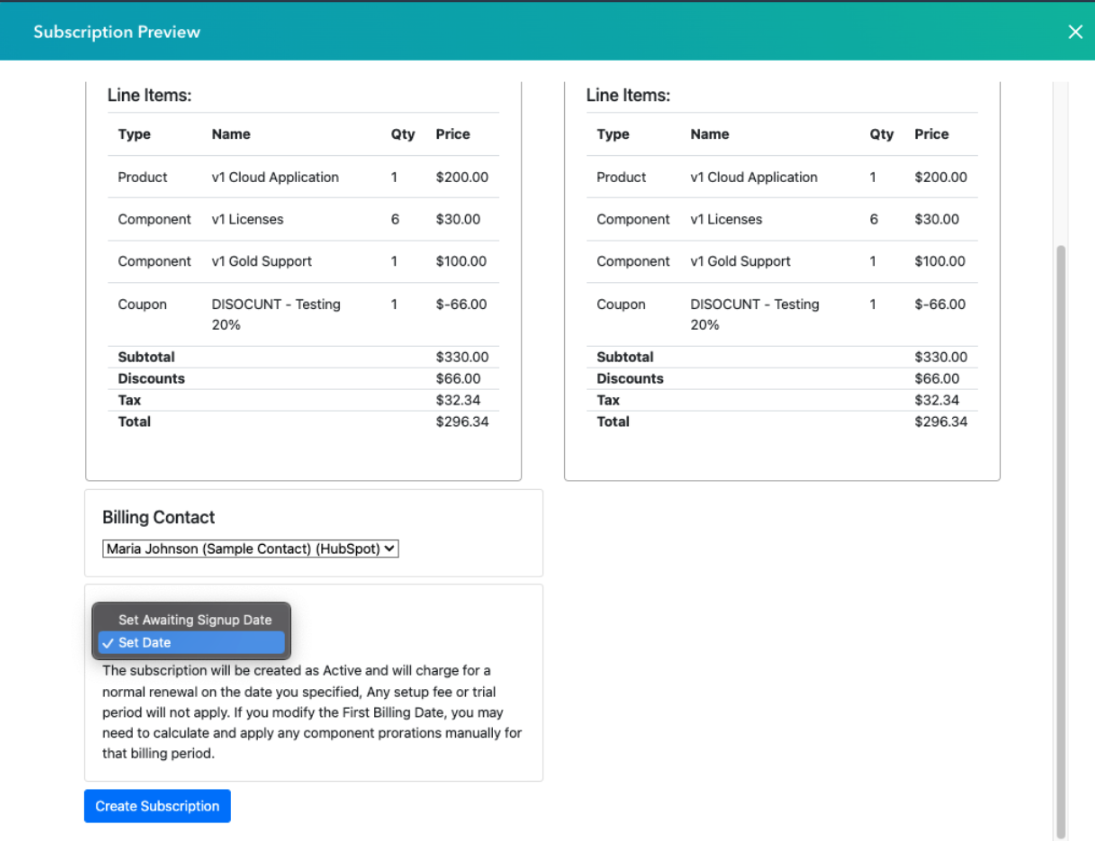
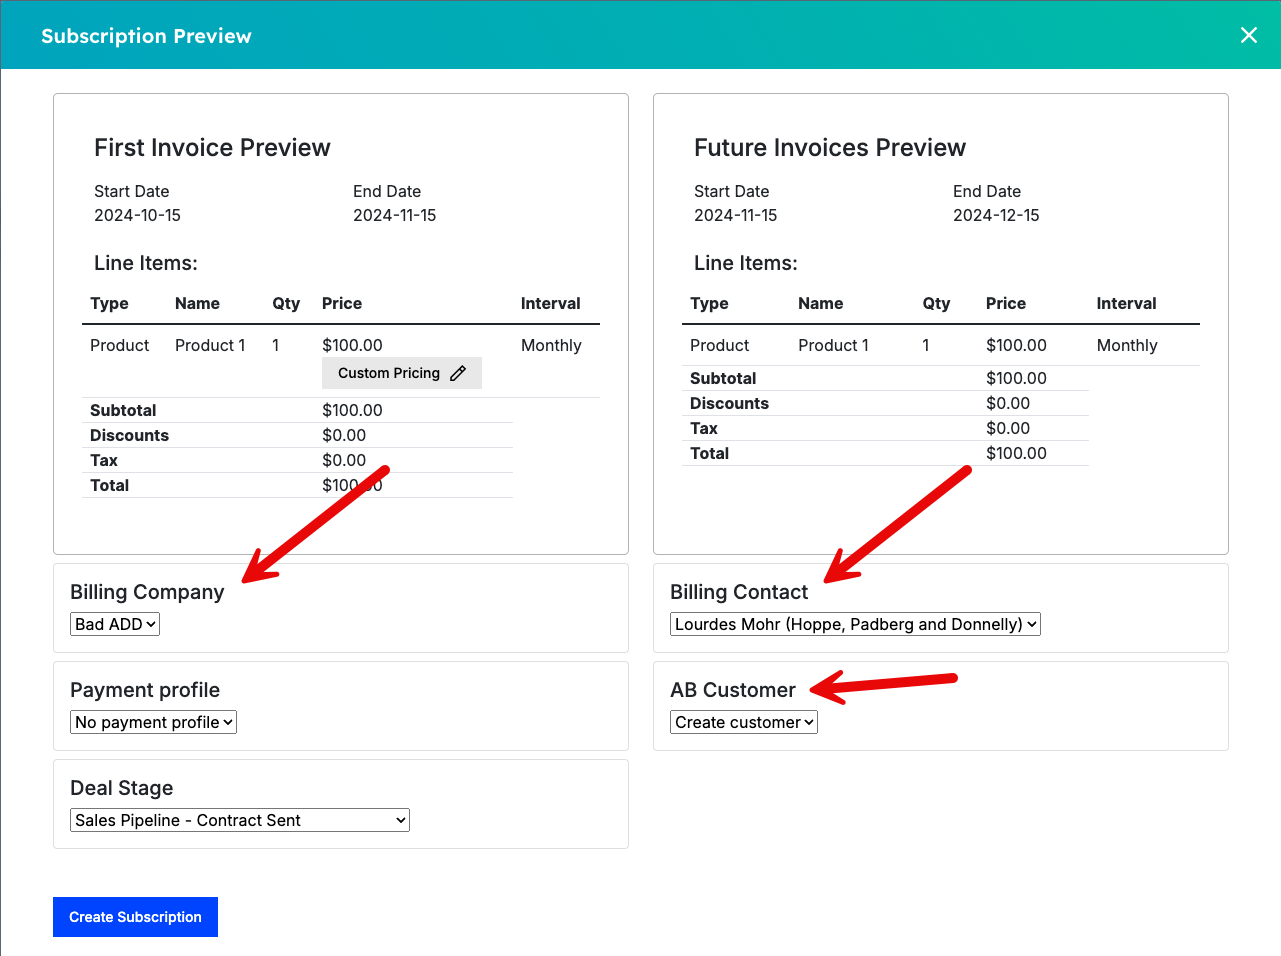
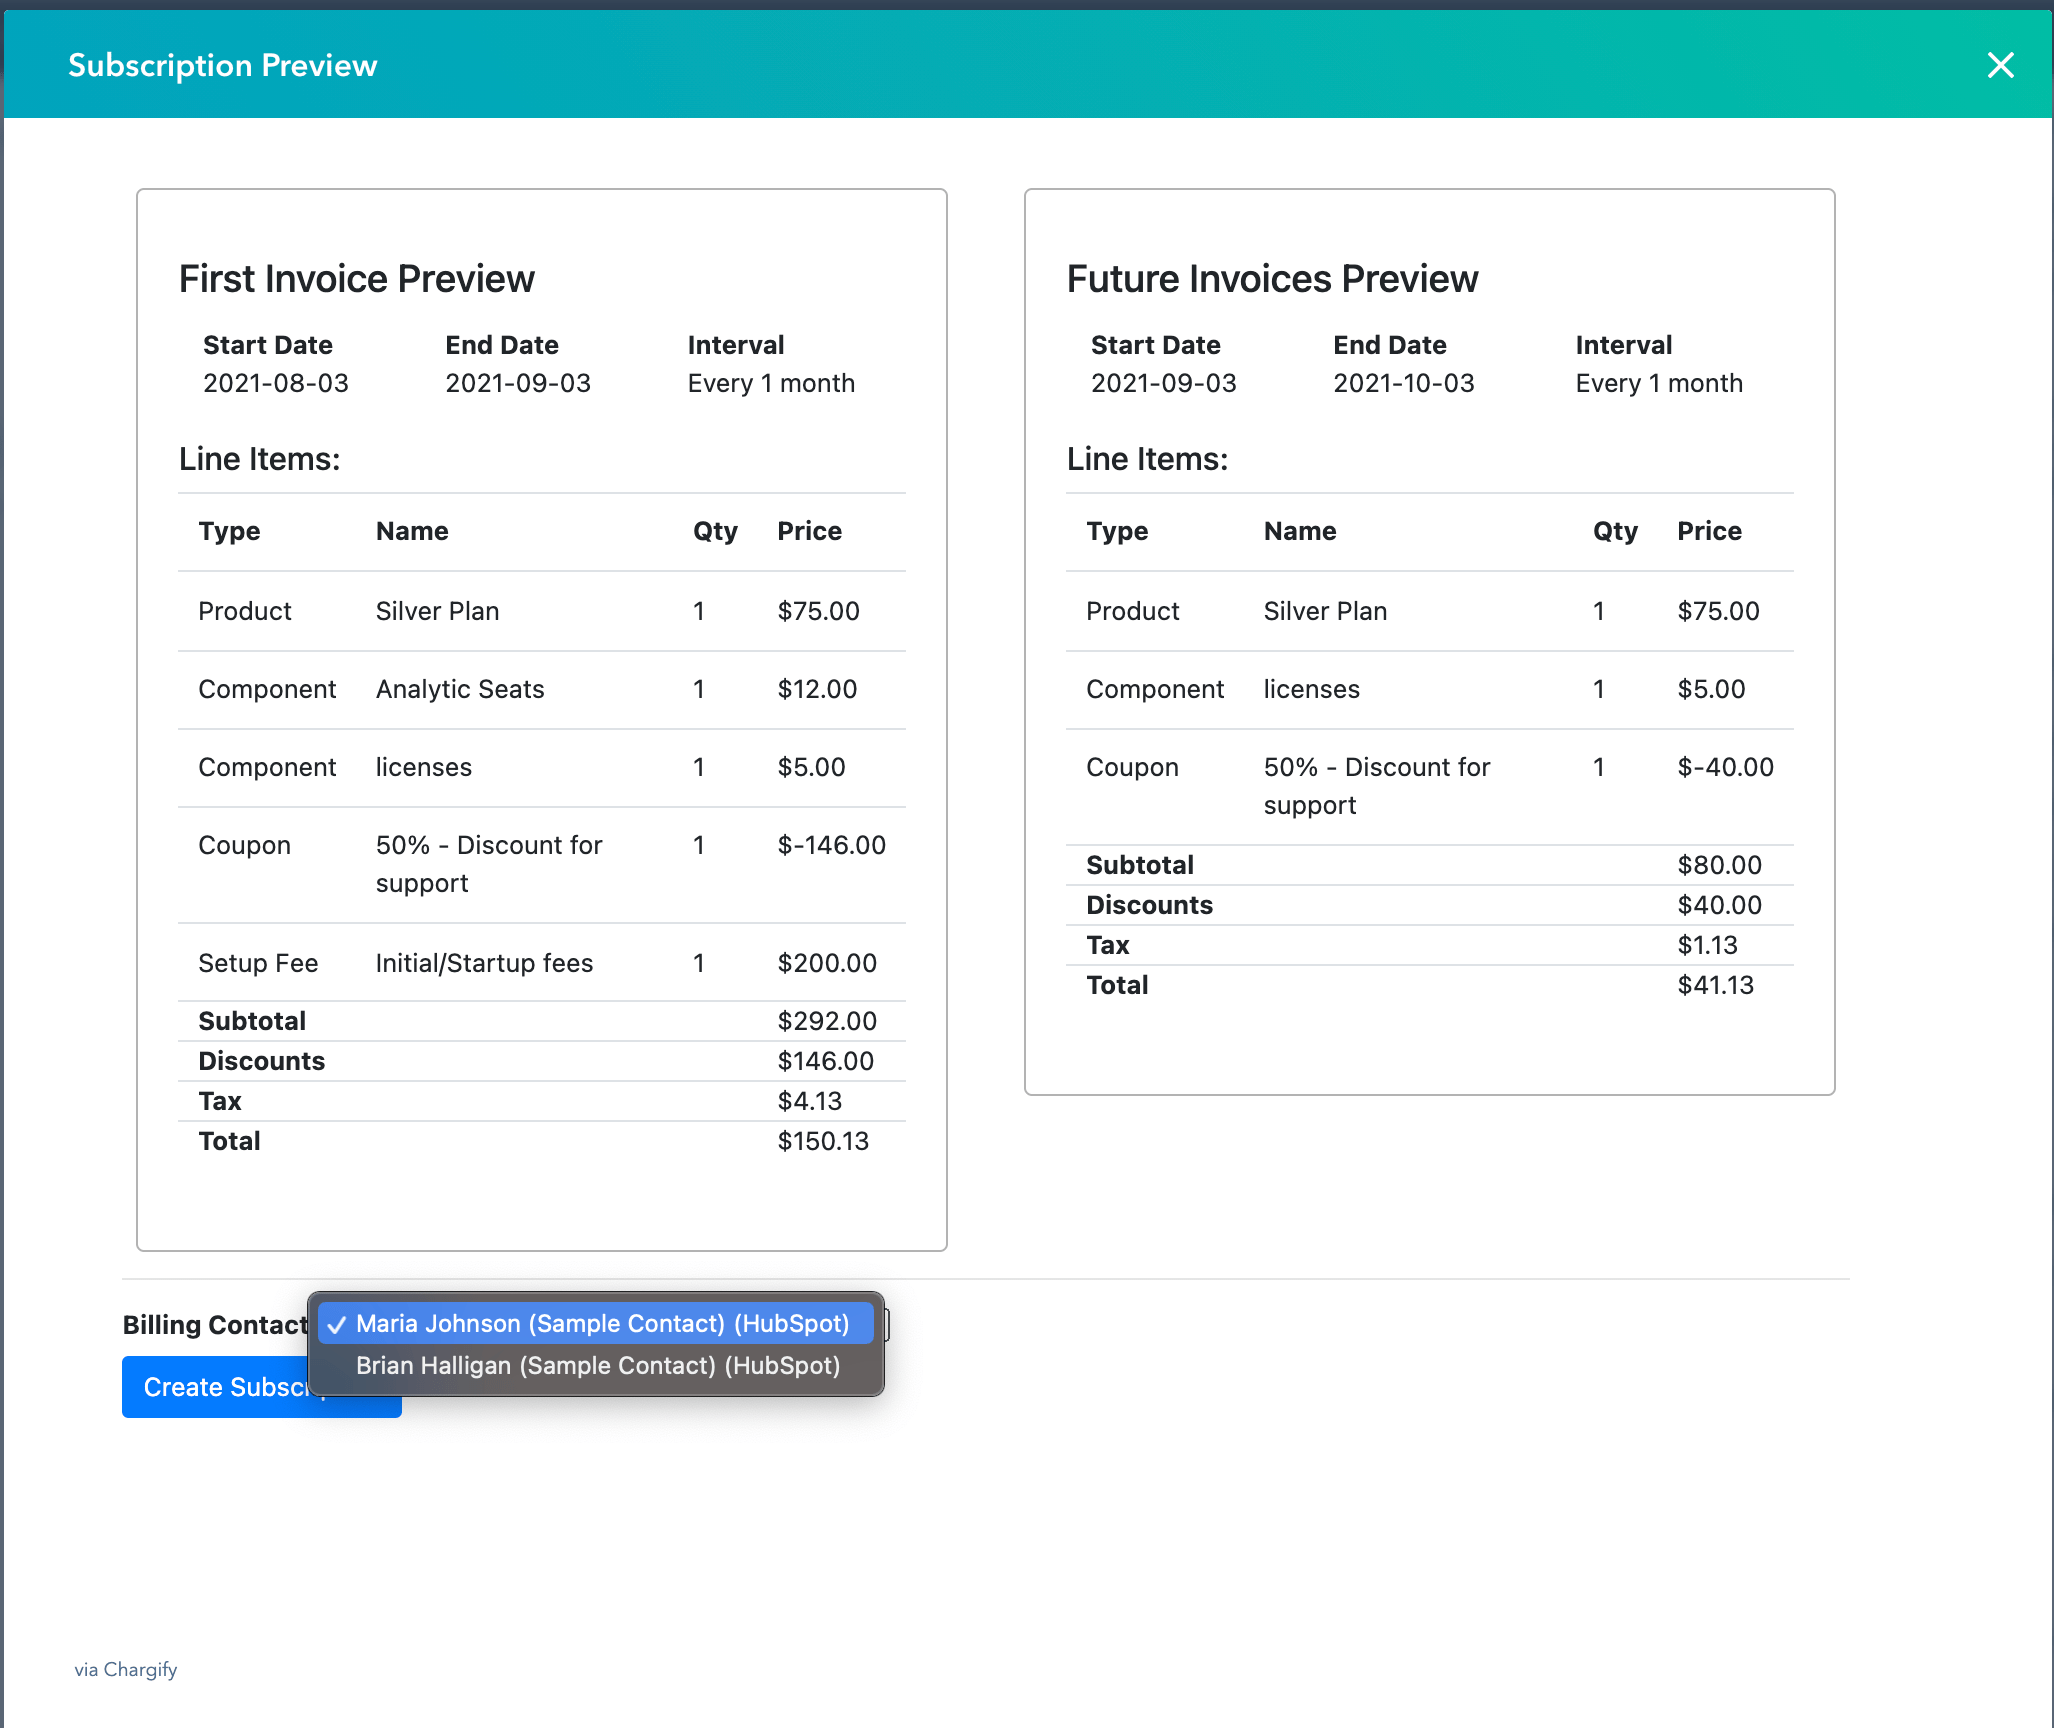
The subscription preview shows both the first invoice and the next ongoing invoice. This helps you see what will be invoiced initially and how it differs from ongoing subscription fees when one‑time fees or discounts apply. Taxes are calculated and displayed if the deal’s products are taxable, the contact is not tax‑exempt, and the contact address supports tax‑jurisdiction calculation.
If a user selects incompatible line items, such as components and products from different Advanced Billing product families, those line items will not appear on the subscription preview and will not be added to the subscription in Advanced Billing.
Selecting a First Billing Date
When using the First Billing Date attribute on the deal record, the subscription preview offers two options: Set Date or Set Awaiting Signup Date.
If you select Set Date, the subscription is created as Active and will charge a normal renewal on the date specified. Any setup fee or trial period will not apply. If you modify this date, you may need to calculate and apply any component prorations manually for that billing period.
If you select Set Awaiting Signup Date, the subscription is created in an Awaiting Signup state, and its signup is delayed until the date specified. Any setup fee or trial period, when applicable, will be applied at that time.
If you want to bill immediately, leave the First Billing Date deal property blank.
Selecting a Payment Profile
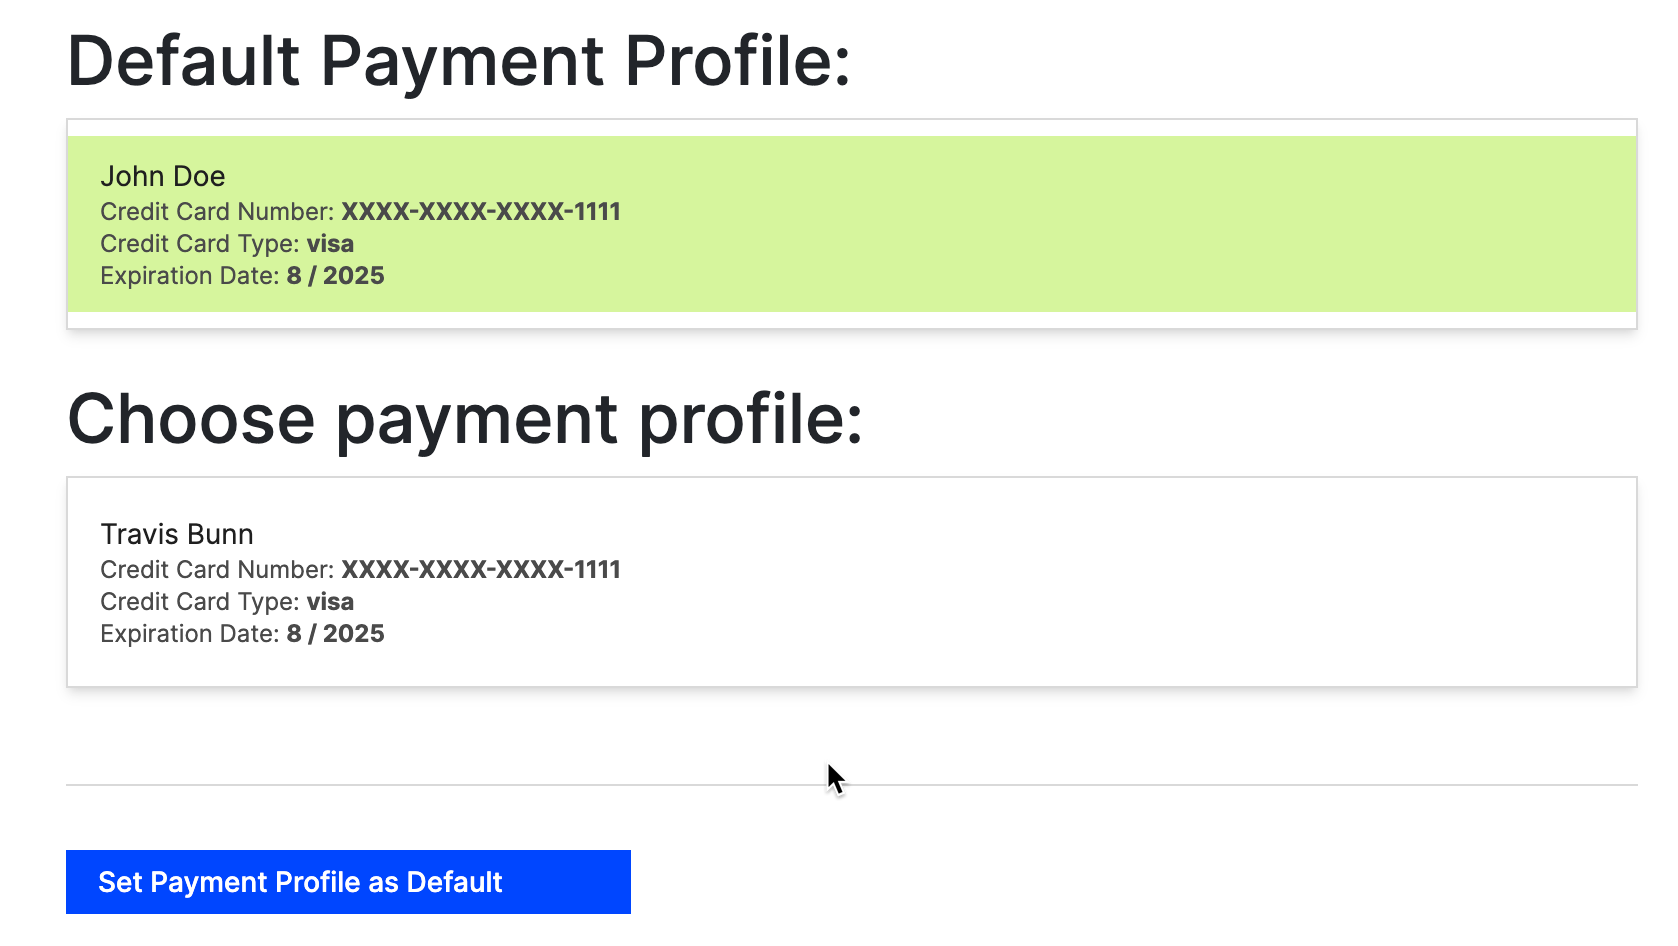
The Payment Profile option lets you select a saved payment profile to attach to a HubSpot deal. It pulls information from existing profiles in the customer record in Advanced Billing. All payment profiles attached to the customer appear as options; if more than one exists, a profile must be selected or else the system defaults to the Default Payment Profile.
Sync Deal Record with Advanced Billing Subscription Preview
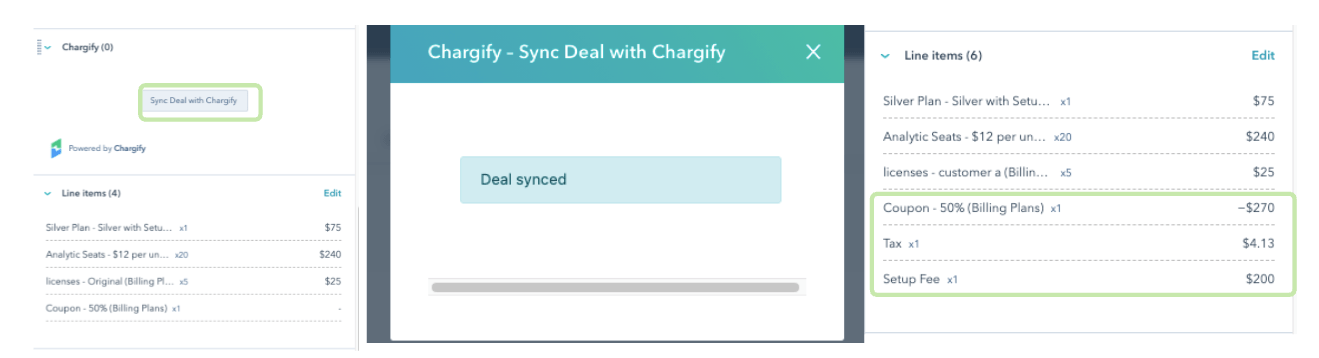
This action lets sales and finance teams solidify their sales‑to‑finance hand‑off process. Sales reps can use the Advanced Billing engine to auto‑generate taxes, setup fees, or discounted line items and associate them with the deal record. When the sales representative triggers the action, they can verify that all correct line items are reflected in both the invoice and the quote.
All Coupons, Components, and Products are available via the HubSpot Product Library. Once those line items are associated with the deal record, the Advanced Billing subscription preview adjusts accordingly. If taxes, discounts, or setup fees are included in the line items, the sales rep must trigger the Sync Deal with Advanced Billing action to get the correct taxable and discounted amounts on the deal line items.
Creating a HubSpot Quote From Advanced Billing Products, Components, Coupons, Taxes, and Setup Fees
After the deal has been synced with Advanced Billing’s billing engine and reviewed by the sales representative, the sales rep can leverage the newly associated line items on the deal to display discounts, setup fees, and taxes in the quote. This quote‑to‑cash integration lets users continue managing quotes and customers in HubSpot while Advanced Billing automates recurring billing and subscriptions.
The quote must be created from the Deal Record view. In other words, click the “+ Add” button in the Quotes section of the deal view.
Using HubSpot Snippets for Quote Purchase Terms
Due to HubSpot API limitations, Advanced Billing cannot create snippets or access certain quote functionality through the integration. Users must create and manage the snippets manually through the HubSpot UI. These purchase terms can reflect volume, tiered, or stair‑step thresholds that admins set up inside the Advanced Billing product catalog.
Create an Advanced Billing Subscription from a HubSpot Deal Record
If multiple contacts are associated with a HubSpot deal, the subscription preview page displays a Billing Contact dropdown. Users can select which HubSpot contact to use for billing. The selected contact’s details are merged into the subscription payload so that an Advanced Billing customer record is created or updated with that contact’s information.
The application automatically synchronizes HubSpot deal line items with the subscription preview and its associated pro‑forma invoice. Once synchronization succeeds, the Subscription Preview timeline event appears on the HubSpot deal record. From that event, users can click Create Subscription to generate the Advanced Billing subscription.
The integration enforces certain compatibility rules defined in your Advanced Billing catalog. For example, coupons and components must belong to the same product family. Incompatible coupons display a warning message (“The coupon is not valid for the selected product”) but do not block subscription creation.
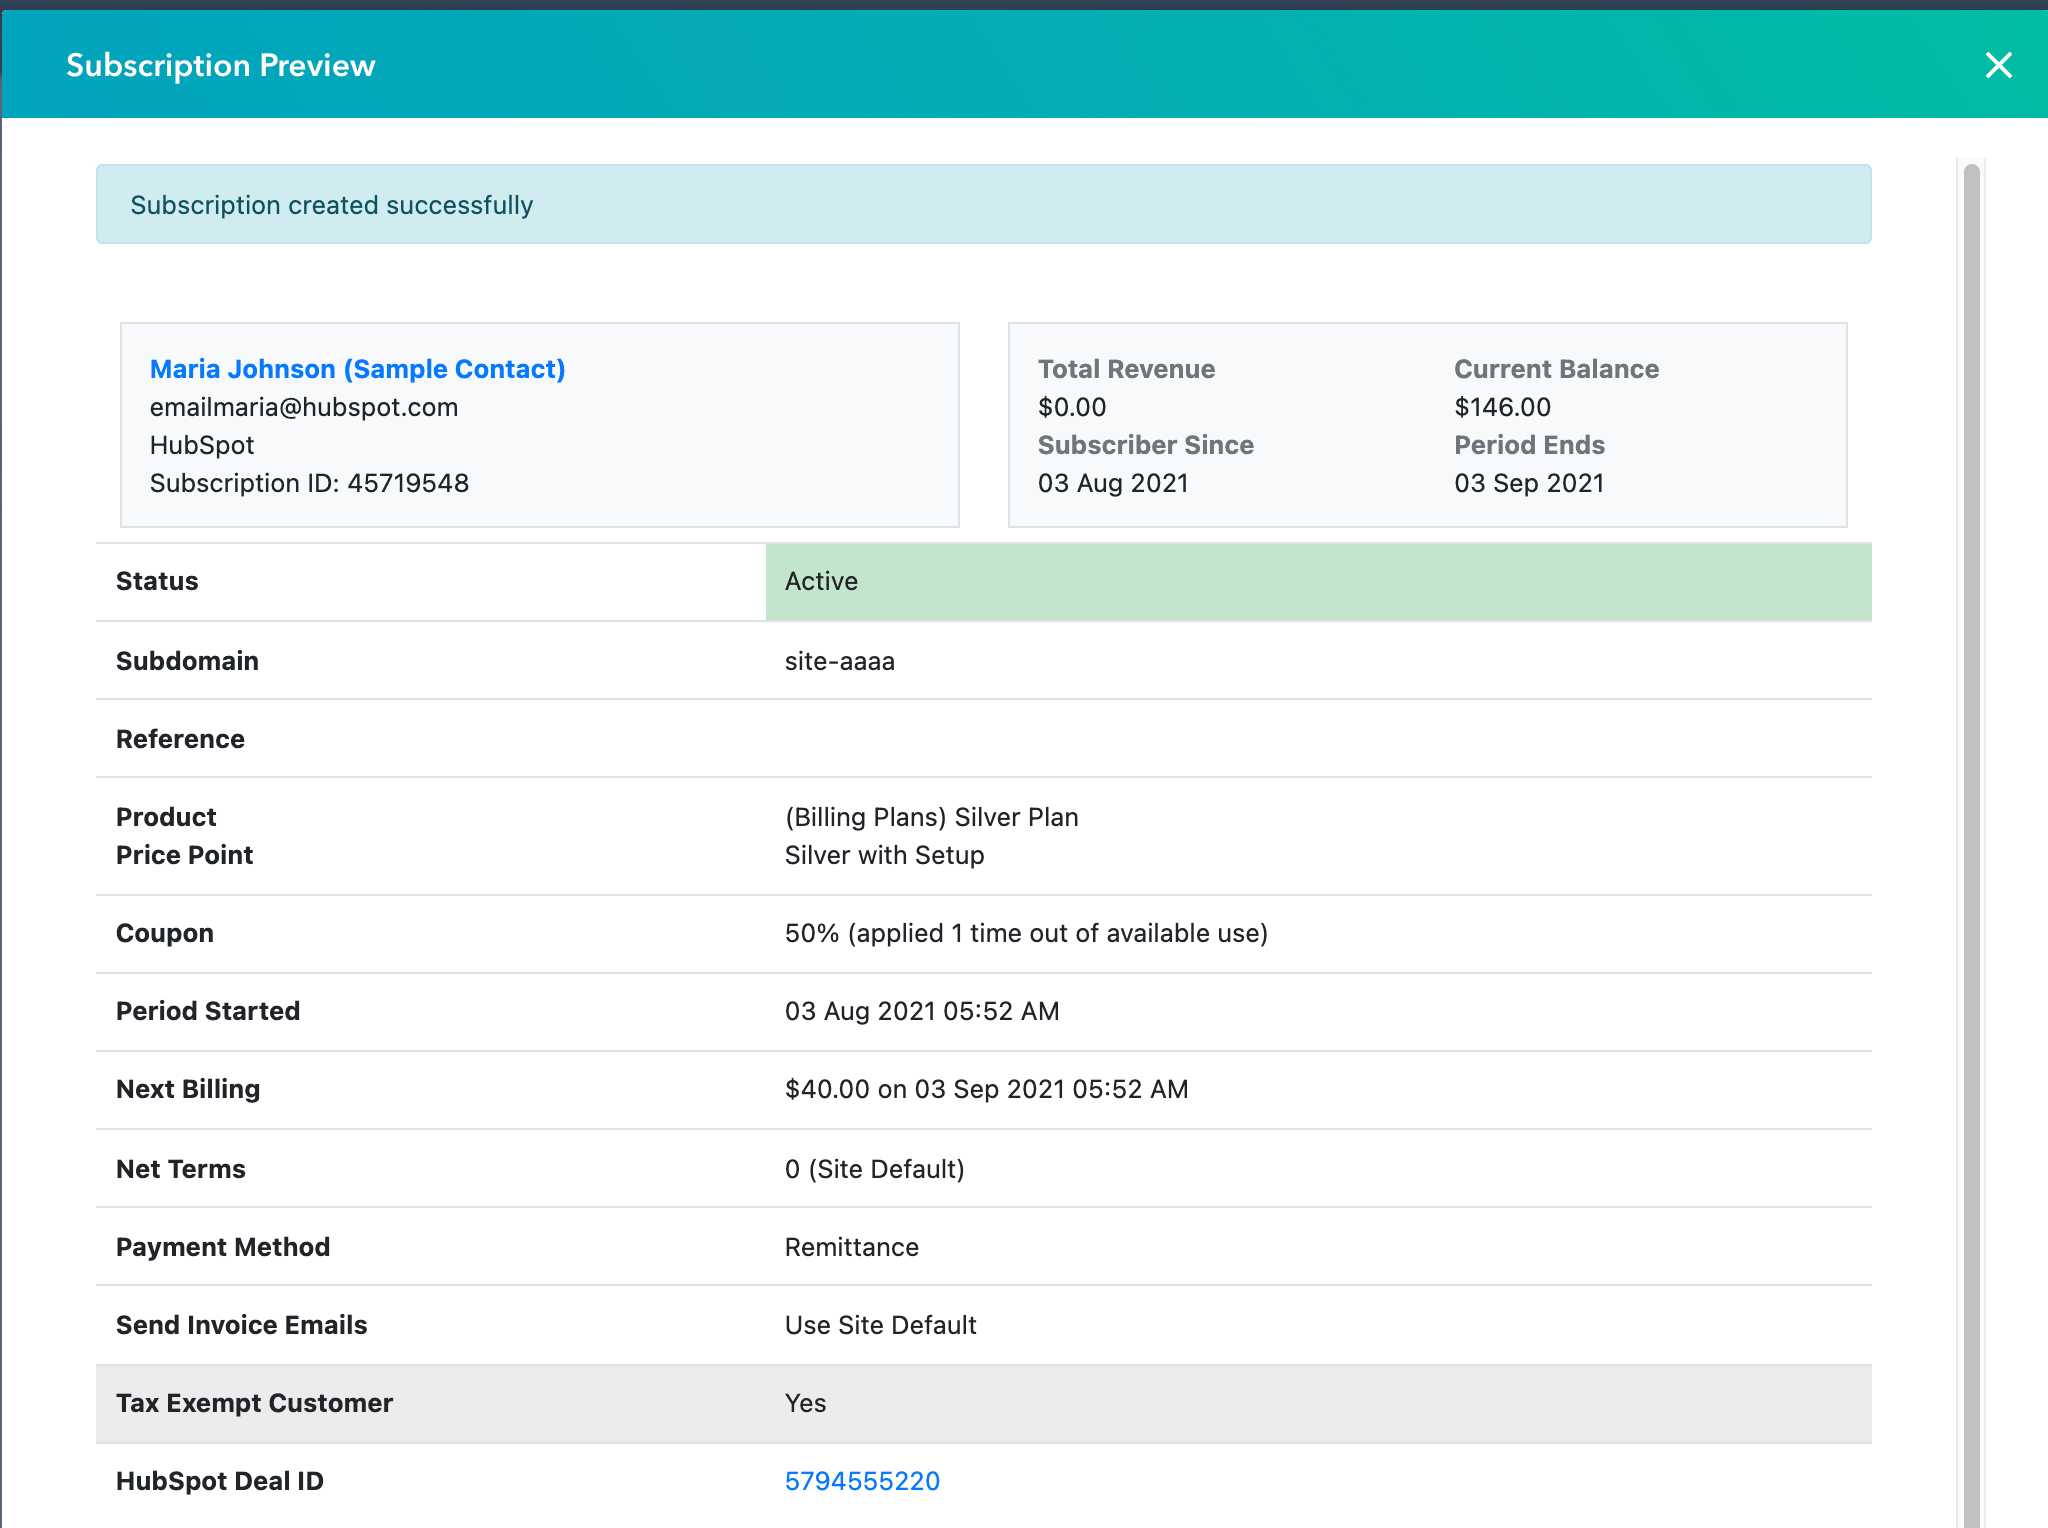
Upon subscription creation, the user will see a confirmation message.
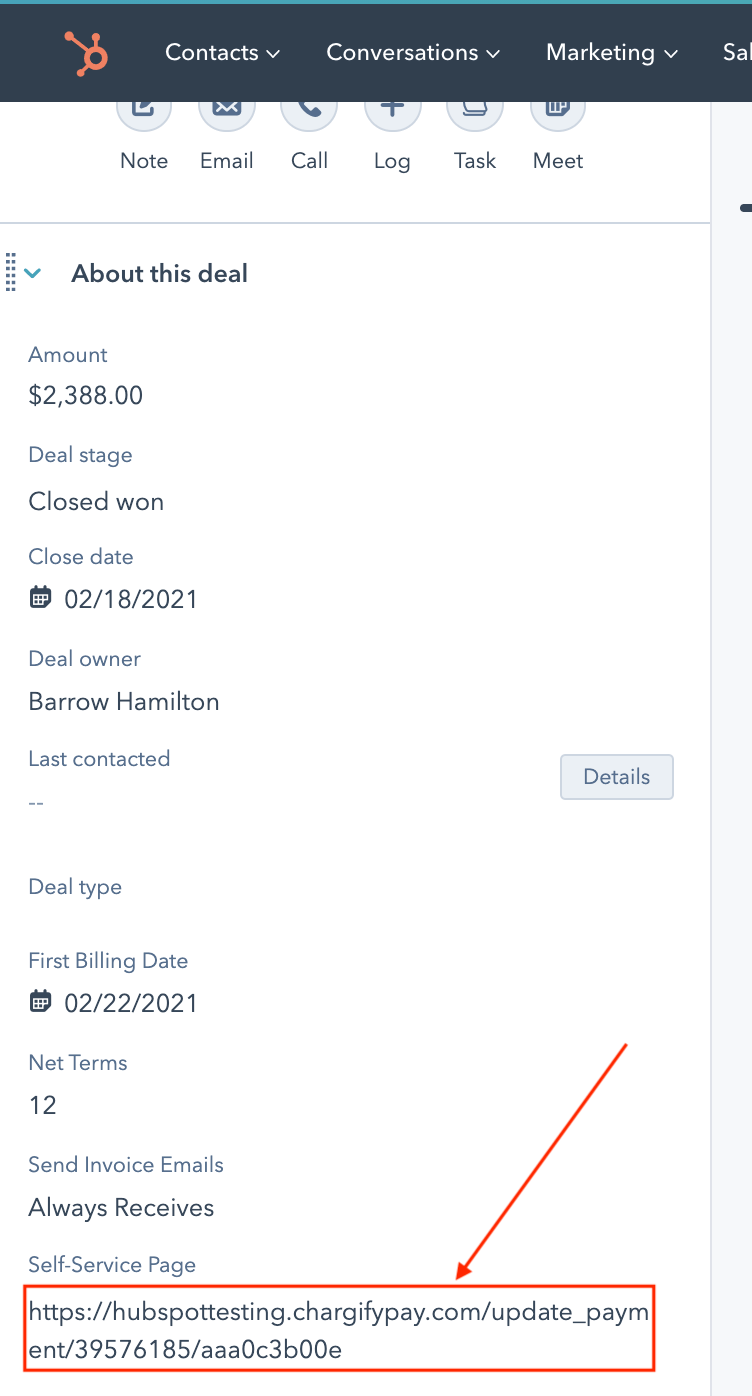
The integration then automatically updates the HubSpot deal record with the Self‑Service Page URL generated from the subscription’s self‑service token. This URL can be sent to new subscribers for secure entry of their credit‑card payment information. For subscriptions set to automatic collection, a valid payment profile (such as an existing credit card) must already be on file before activation. If no payment method exists, the system blocks activation to prevent the subscription entering a past‑due state due to missing card details.
General Subscription Actions Available via the HubSpot User Interface
- Activate
- Sync Now
- Manage Coupons
- Give / Deduct a Service Credit
- Record Prepayment
- Initiate Cancellation
- Put on Hold
The Advanced Billing admin can decide which actions appear in the HubSpot UI via Sync Options.
Activate Subscriptions Directly in HubSpot
The Activate action on the subscription card in HubSpot lets you activate subscriptions without switching to Advanced Billing, keeping the subscription lifecycle, creation, payment, and activation, within HubSpot.
Steps to Activate a Subscription from HubSpot
- In HubSpot, sync the subscription with Advanced Billing.
- Ensure the subscription status is Awaiting Signup.
- Complete the customer’s payment profile and always verify payment information before activating the subscription.
- Open the subscription card.
- From the Actions drop‑down, select Activate.
Viewing Advanced Billing Subscription Details
Advanced Billing subscription details, such as status, total revenue, current balance, net terms, and next billing date, are viewable in the CRM card on the associated Contact or Deal record. Any updates made in Advanced Billing sync back to the HubSpot CRM card, enabling you to keep operations streamlined between your CRM and Advanced Billing’s subscription management engine.
Viewing Invoice Details
You can view invoice details such as Invoice ID, Status, Payment Collection Method, Invoice Due Amount, Invoice Paid Date, Credits Used, and a public link to access the invoice.
Advanced Billing Events to Create Contact or Deal Timeline Activities
Stay up to date and track subscription‑related timeline activities within the Contact or Deal record views. This provides visibility for your client‑services teams to make meaningful decisions, and gives the administrator the levers to determine which events are relevant to the business need. For more details on which events are available, read here.
Auto‑create a New Deal from Quantity Component Allocation Increases
HubSpot users can automatically create new deals from Advanced Billing quantity‑allocation increase events. Similarly, users can create new allocations directly within the HubSpot UI. After connecting the integration, navigate to the bottom of the settings view and select Edit Sync Options. This lets you specify which pipeline and stage these deals should be created in.
Making Component Allocations from the HubSpot User Interface
In some cases, service providers want to enable their customer‑facing teams to update quantity allocations for components via the HubSpot UI. Users must create the Component Allocation Change timeline activity to assign components to the subscription. They do this by navigating to the subscription CRM card, selecting View Details, scrolling down, and then clicking Create a Deal for Component Allocation Change. A new deal ID appears on the screen, and the user can copy and paste the deal ID into the URL. This opens the new deal with an Advanced Billing timeline event titled Edit Component Allocations. This gives the user the ability to configure component allocation changes on subscriptions in the Active, Trialing, or Awaiting Signup states.
Product Library Matching Rules
When Advanced Billing products and components sync to the HubSpot Product Library, the price‑point ID is used in the product’s SKU property. The integration uses the object name (product/component) and the price‑point ID to identify items across both catalogs.
Attributing Advanced Billing Metadata with HubSpot Properties
An administrator configures this during implementation. Please review Step #2 of the Advanced Billing setup in the installation guide. This requires Advanced Billing‑generated custom fields before connecting the integration. The integration automatically creates the necessary properties and makes any drop‑downs, radio buttons, or text‑input fields available in the deal or contact creation view.
Custom fields can also sync from Advanced Billing to HubSpot if they are changed or updated on the Advanced Billing side. You must create these before connecting the integration. Any Advanced Billing custom fields created after both systems are connected will not become HubSpot custom properties — they are only included in the initial sync.
Comments
Article is closed for comments.