
Setup the Salesforce Integration for Maxio Core
Applies to: Maxio Core
Last updated on Aug 29, 2026
Connect and configure the Salesforce integration to start syncing Sales Orders and financial data between Salesforce and Maxio. Maxio must activate the integration for your account before you can complete the steps below. If you don't see the Salesforce icon in the side navigation, it hasn't been enabled yet.
Connect to Salesforce using the Maxio Connection Wizard
From the side navigation pane, click the Salesforce link to launch the Connection Wizard. Follow the prompts to connect and complete the default settings.
Connect to Salesforce manually
Maxio provides an installation package to facilitate the connection to Salesforce.
This is a "managed" package that's maintained and upgraded by Maxio as our product changes. The package automatically configures the necessary API settings and adds custom Salesforce objects to save you time and reduce manual errors.
To install the Maxio package
-
Log in to Salesforce and Maxio Platform in the same web browser, using Administrator accounts.
-
Click the correct installation URL below:
- Production installation: https://login.salesforce.com/packaging/installPackage.apexp?p0=04tKf000000olyO
- Sandbox installation: https://test.salesforce.com/packaging/installPackage.apexp?p0=04tKf000000olyO
-
From the package installation page, choose from the three profiles provided.
If you select the Specific Profiles option, you also need to select which profiles will receive the package.
-
Click Install. When the installation finishes, click Done.
-
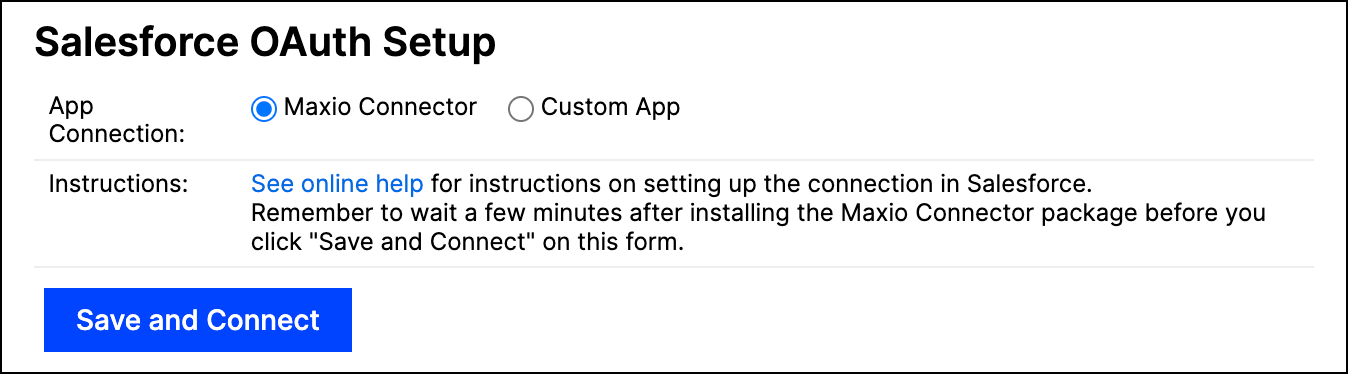
In Maxio Platform, from the Admin menu, open the Salesforce Integration Settings page and click the Connect to Salesforce icon.

This opens the Salesforce OAuth Setup screen.
-
Select your Salesforce Environment, Production or Sandbox, matching the org you're connecting to.
-
For App Connection, make sure Maxio Connector is selected.
-
Click Save and Connect.
-
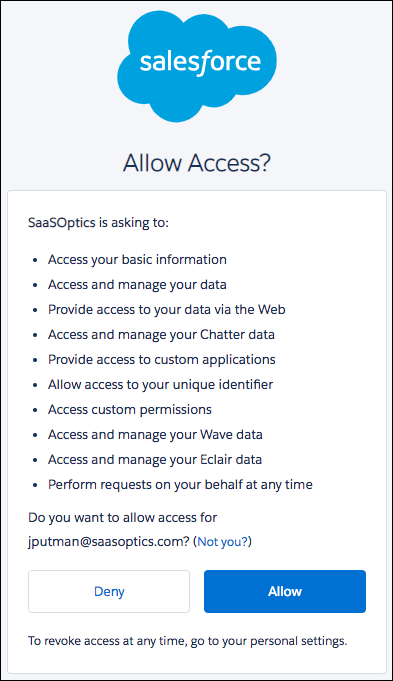
From the "Allow Access" screen, click Allow. Maxio Platform is now connected to Salesforce.
Assign licenses to users
Once the Maxio package is installed, assign it to the users who will use the integration.
To assign licenses
-
Navigate to Setup > Installed Packages.
-
Locate the Maxio package and click Manage Licenses.
-
Click Add Users, then select the users who need access to the application and click Add.
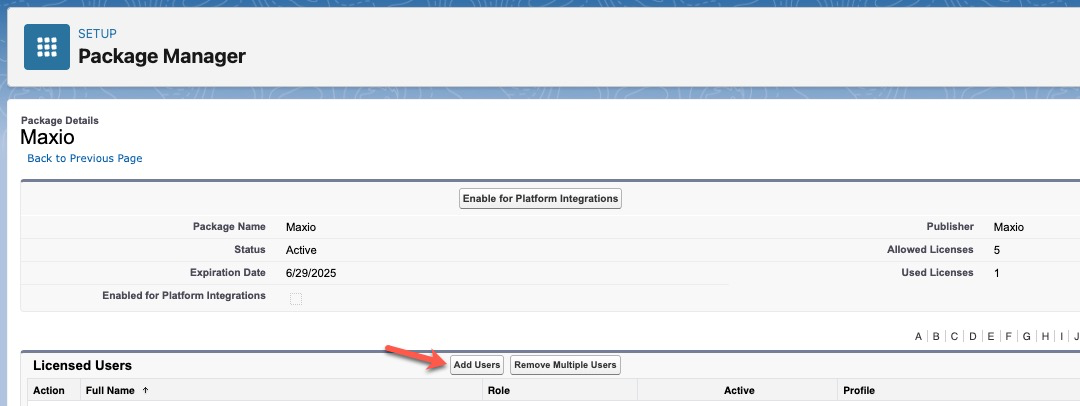
This step ensures users are properly licensed and can access Maxio functionality before assigning permission sets.
Integration settings
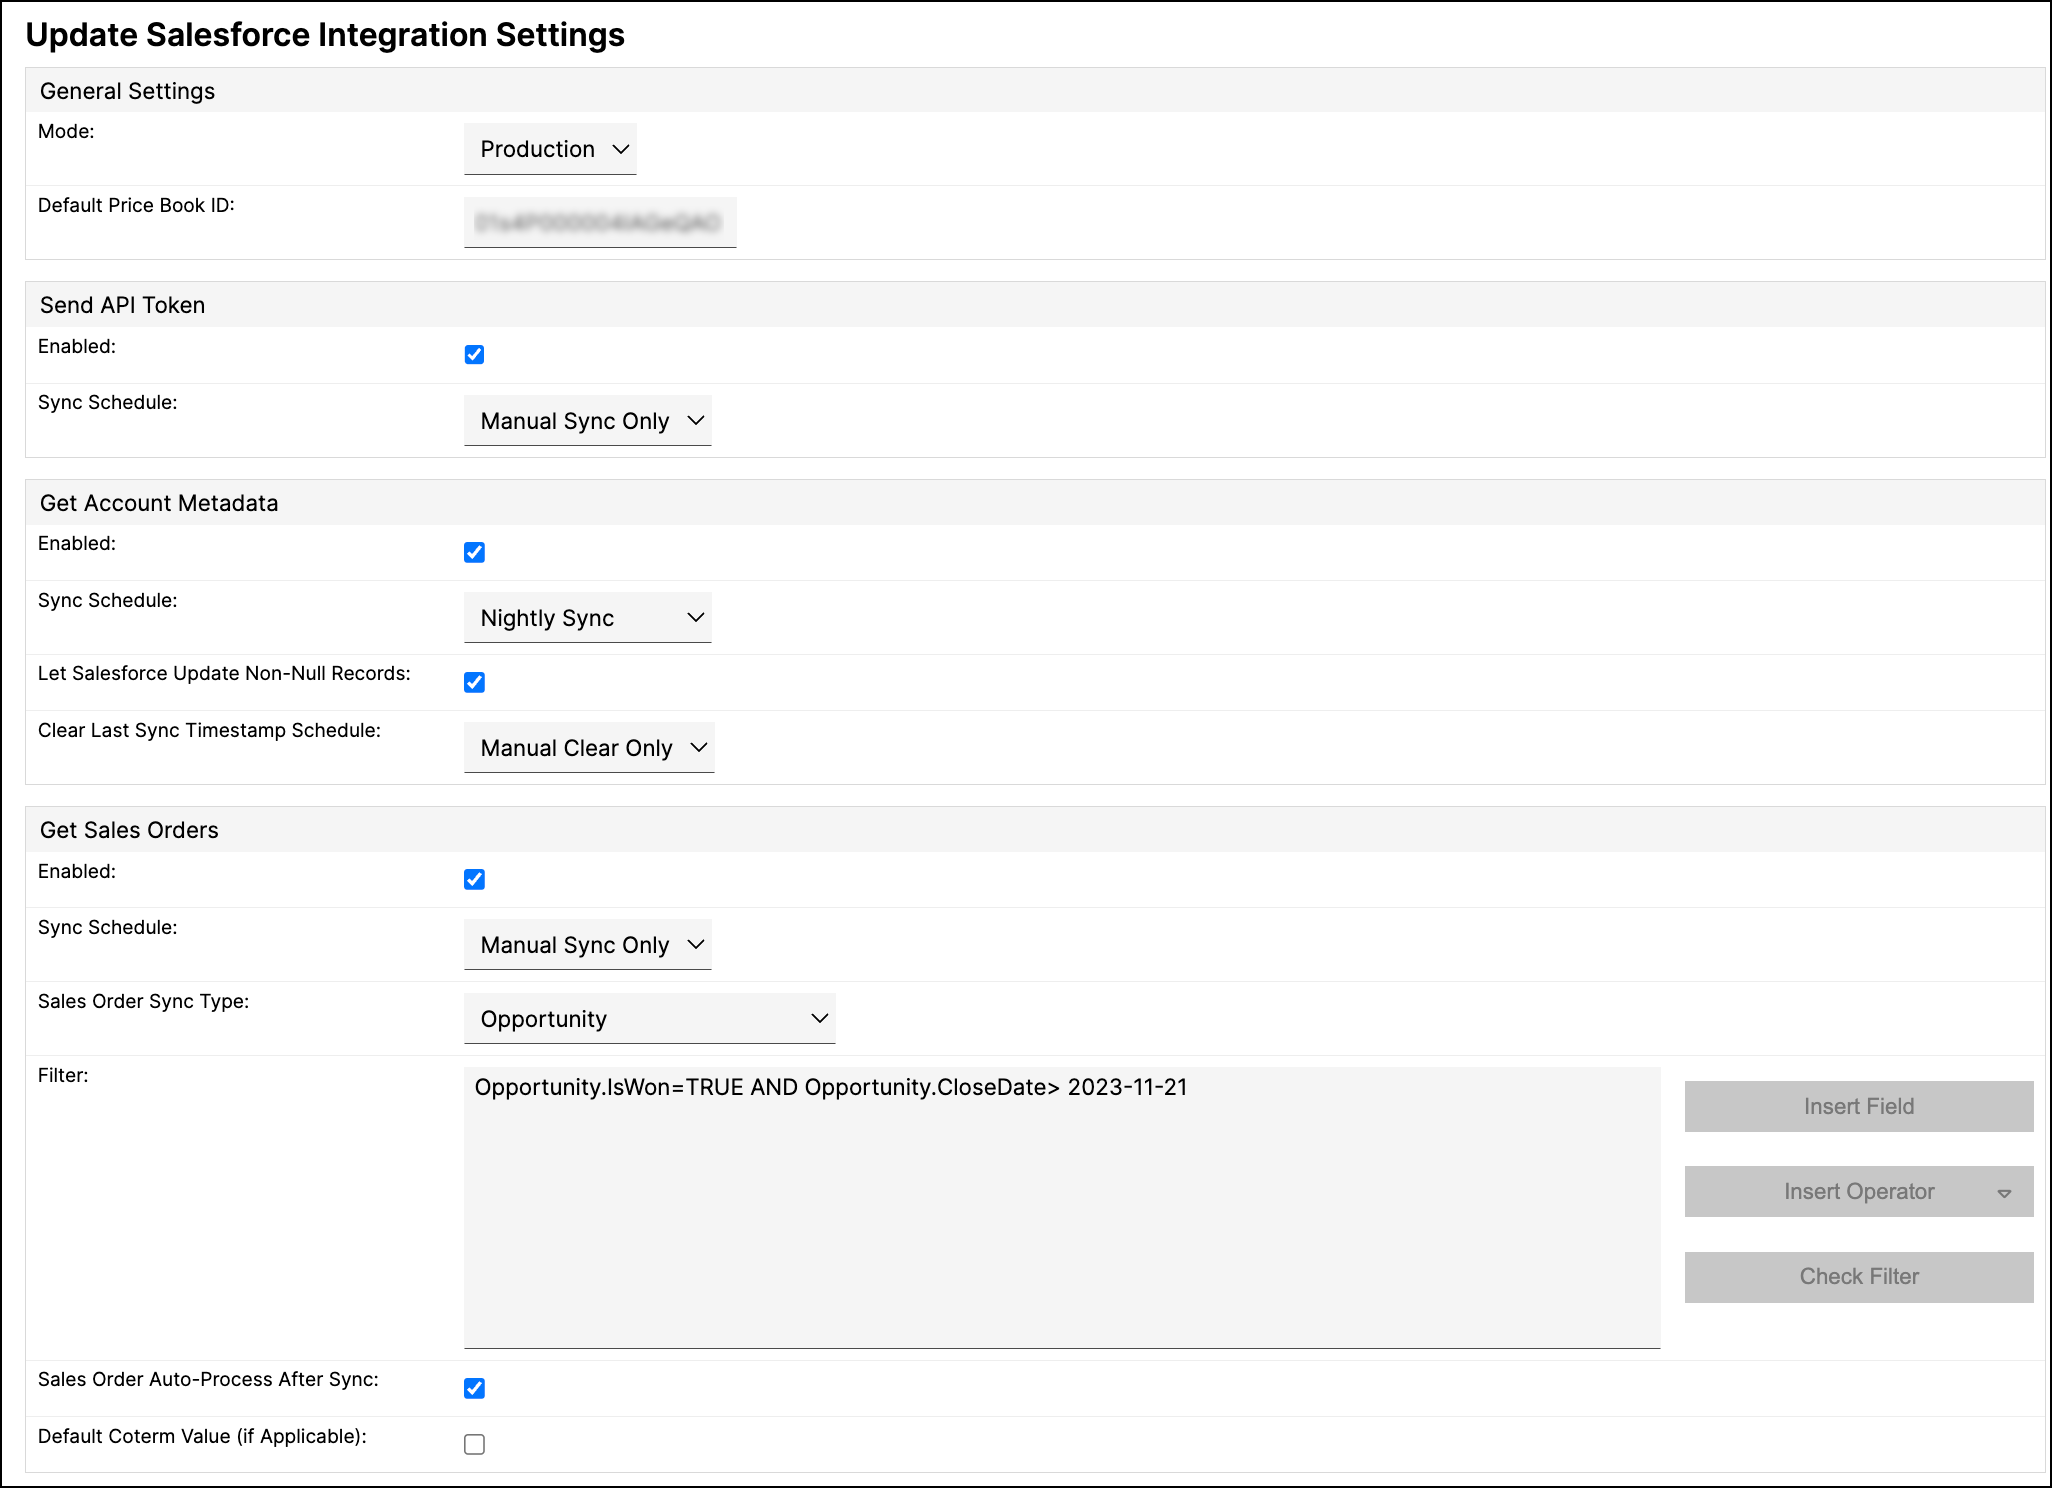
Now that your Salesforce and Maxio Platform systems are connected, configure the integration settings in Maxio. Complete the steps below according to which modules your organization is using. For example, if you're not using Send Renewal Opportunities, you can skip that module's steps.
For any module's Sync Schedule below, we recommend starting with Manual Sync Only until you're familiar with the integration's behavior. Get Sales Orders and Send Financial Records also support an Every 15 Minutes schedule, in addition to the standard Nightly and Hourly options.
Default Price Book ID
You must select a price book when creating product-related records in Salesforce. Maxio Platform captures and saves the price book for a customer when processing a sales order. The system requires a default price book in the event that it's not otherwise obtainable from a previous order for the customer.
To find your default Price Book ID
-
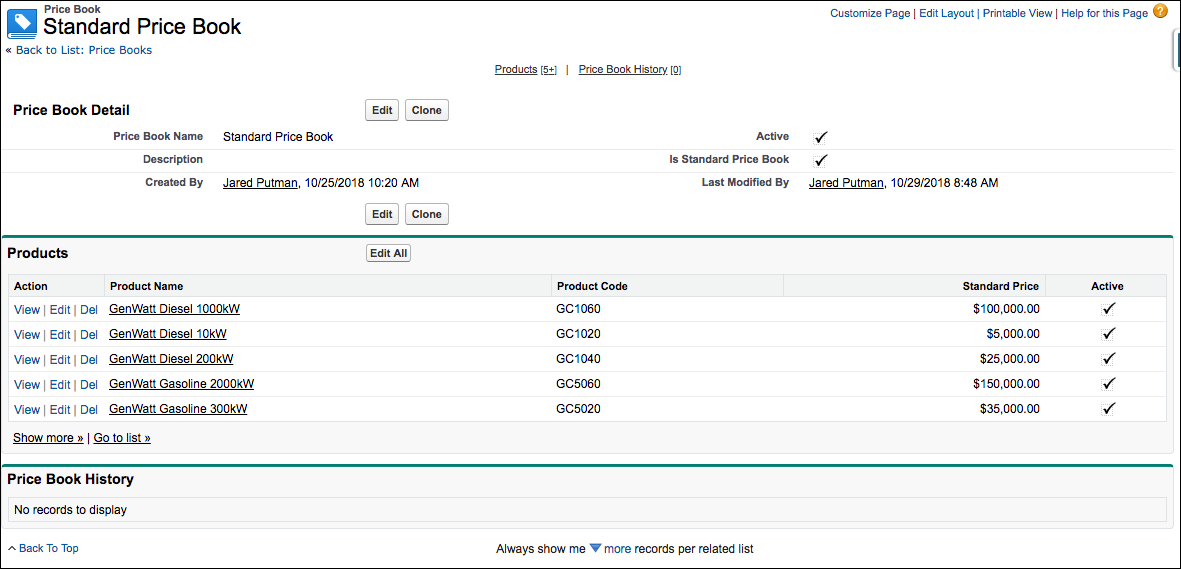
In Salesforce, navigate to the price book you'd like to use as the default. Make sure you're on the price book's main page, which allows you to add products to it.
-
Find the ID number at the end of the URL in your web browser's address bar.

-
Copy and paste this ID number into the Default Price Book ID field in Maxio Platform.

-
Click Save.
Continue on Error
By default, if one step of a sync run fails, Maxio stops the entire run. Check the Continue on Error box if you'd rather have Maxio record the failure and continue with the remaining steps.
A batch that creates new Salesforce records is retried as a full batch if any record in that batch fails, even with Continue on Error enabled.
Get Account Metadata
-
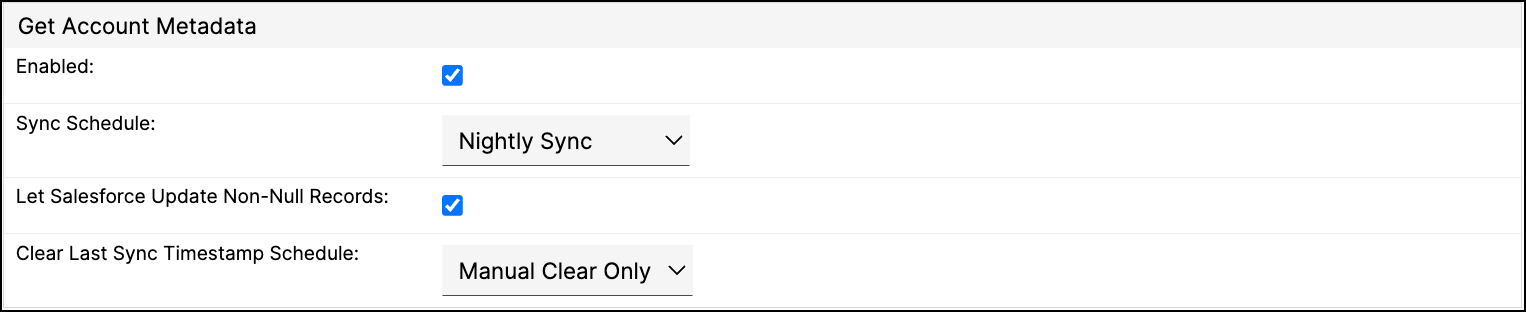
First, activate this feature by clicking the Enable checkbox.
-
Select a Sync Schedule.
-
(Optional) Check the Let Salesforce Update Non-Null Records box if you'd like to allow the Salesforce sync to update data that's already in Maxio Platform.
-
Select a Clear Last Sync Timestamp Schedule (Manual Clear Only, Nightly Clear, or Weekly Clear) to control whether and how often the sync's last-run timestamp resets automatically.
-
Click Save.
Get Sales Orders
-
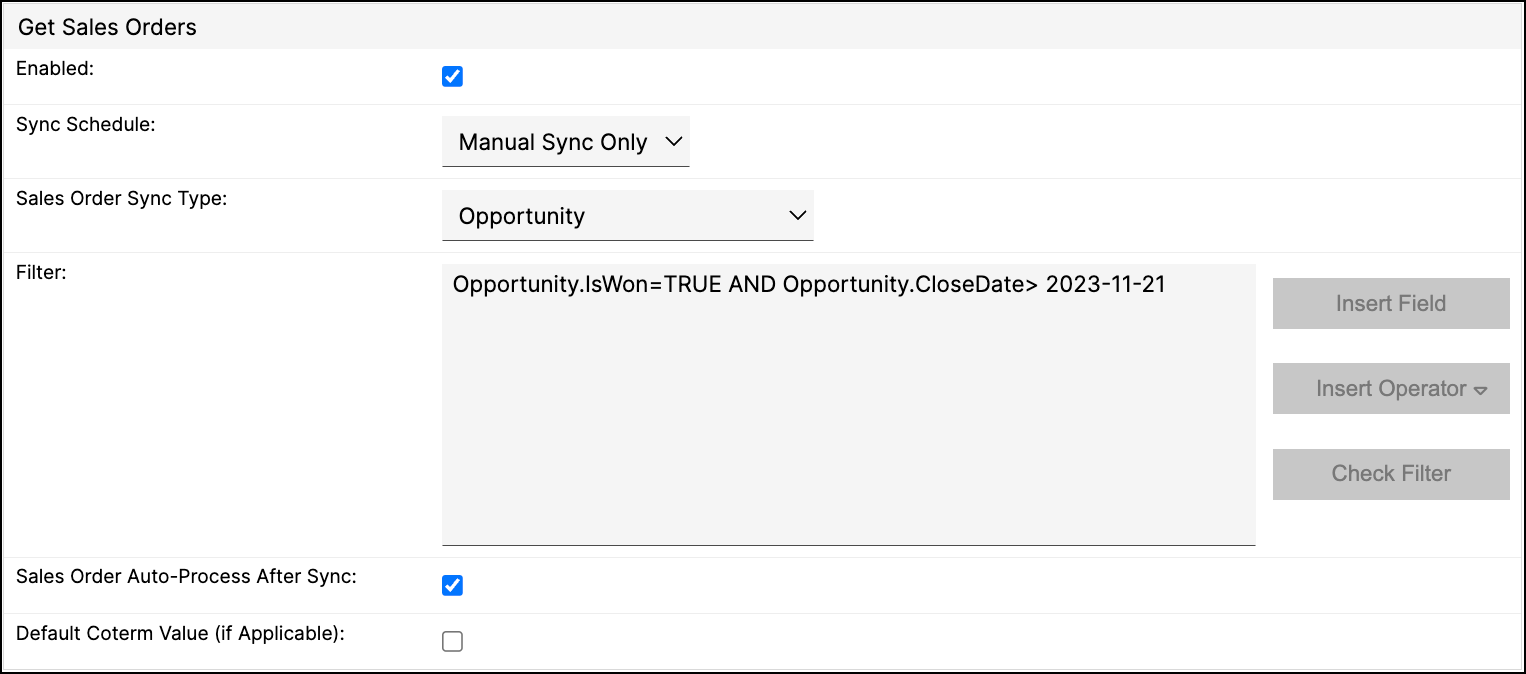
Activate this feature by clicking the Enabled checkbox.
-
Select a Sync Schedule.
-
Select a Sales Order Sync Type from the drop-down menu:
- Opportunity: syncs Opportunity Products from Closed-Won Opportunities.
- Opportunity without Products: syncs Closed-Won Opportunities that don't use Salesforce Products.
- Order: syncs Order Products from Salesforce Orders.
-
Enter any custom Filters you'd like to use.
Saving a blank Filter for the Opportunity or Order sync type can sync a large amount of data into Maxio. Maxio asks you to confirm before saving a blank filter.
The system provides tools that let you insert fields, insert operators, and check the filter to verify it's working properly.
-
(Optional) Check Sales Order Auto-Process After Sync if you want eligible Sales Orders to process automatically after each sync, without manual review. This is available for the Opportunity and Order sync types, not Opportunity without Products. See Configure Auto-Process Sales Orders for Salesforce for more information.
-
(Optional) Check Default Coterm Value (if Applicable) to set the default value of the Coterm checkbox when adding recurring Transactions to an existing Contract.
-
Click Save.
Send Financial Records
-
Activate this feature by clicking the Enabled checkbox.

-
Select a Sync Schedule.
-
Click Save.
After completing these steps, set up each financial record type you wish to sync between the two systems.
Send Renewal Opportunities
-
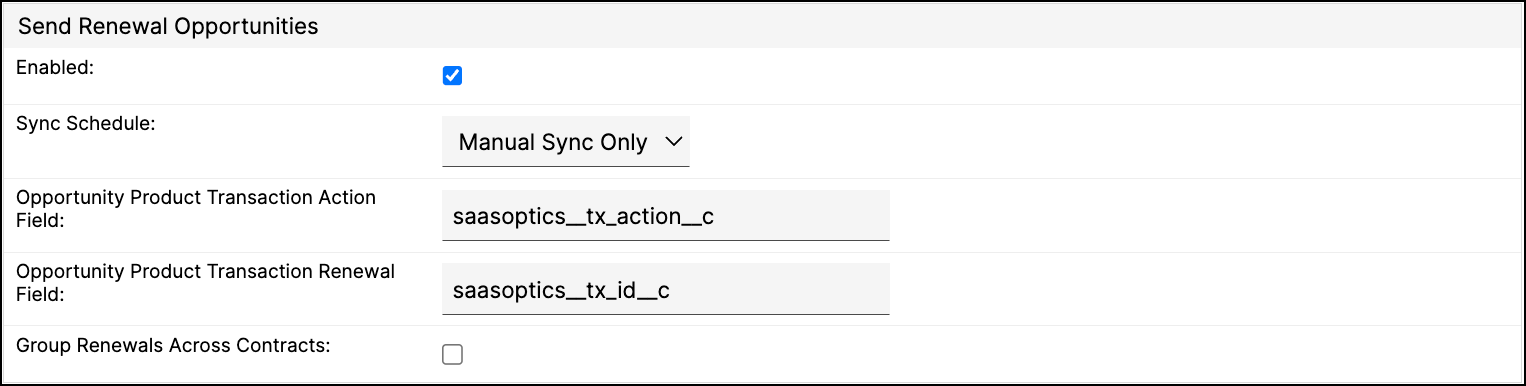
Activate this feature by clicking the Enabled checkbox.
-
Select a Sync Schedule.
-
For Opportunity Product Transaction Action Field, make sure saasoptics__tx_action__c is selected.
-
For Opportunity Product Transaction Renewal Field, make sure saasoptics__tx_id__c is selected.
The Action and Renewal fields are automatically created by the managed package and have their values entered by default. You shouldn't need to change them. If there are no values in the fields, enter saasoptics__tx_action__c and saasoptics__tx_id__c as shown above.
-
(Optional) Check Group Renewals Across Contracts if you want Transactions that share the same end date and the same renewal rule to be grouped into a single Renewal Opportunity even when they span multiple Contracts for the same Customer. Leave it unchecked to group Transactions only within a single Contract.
-
Click Save.
Product codes
Several of the integration modules rely on maintaining item information in both systems through Product codes (Salesforce) or Item codes (Maxio Platform).
There's no syncing of products and Items between Salesforce and Maxio Platform through a shared product catalog. You maintain your Product list in Salesforce and your Item list in Maxio Platform independently. Enter a unique code for each Product in Salesforce, and a matching Item code in Maxio Platform. If the codes don't match exactly, Salesforce products won't map to Transaction Items in Maxio Platform.
Related information
See the Configure Get Account Metadata for Salesforce article for more information on the sync's logic and mapping fields.
See the Configure Get Sales Orders for Salesforce article for more information on mapping fields and setting up filters.
See the Configure Send Financial Records for Salesforce article to set up each financial record type you want to sync.
See the Configure Send Renewal Opportunities for Salesforce article for the steps to create renewal opportunity rules.
Still need help?
Reach out and our support team will take it from here.