
Create Transactions Manually
Applies to: Maxio Core
Last updated on Oct 13, 2026
Most Transactions are created automatically when you process sales orders from an integrated CRM, which is the best practice and most efficient way to add them. However, if you don't integrate Maxio with a CRM, or need to add Transactions manually, you can do so.
This article is related to Maxio Platform's Transactions object and associated functionality. The Transaction is a specific type of financial record that represents a Contract element in Maxio Platform.
To create a Transaction manually
-
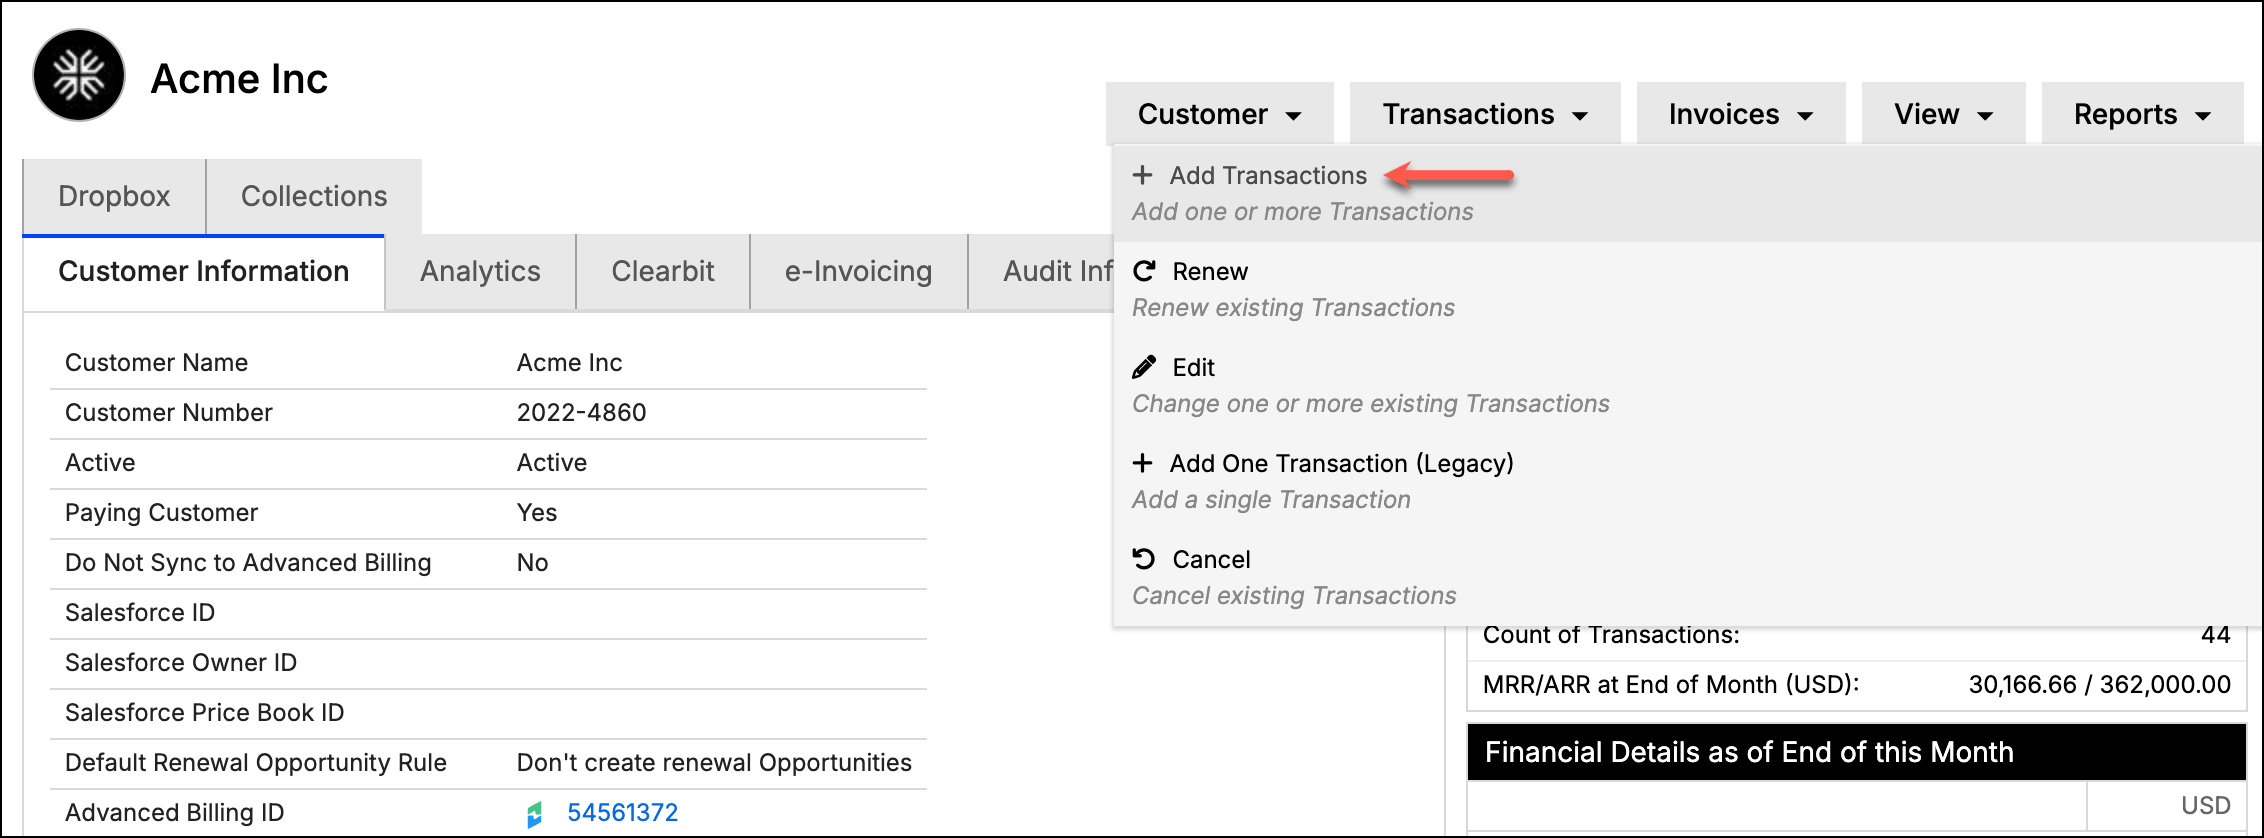
Navigate to the Customer or Contract that owns the Transaction, then select Add Transactions from the Transactions drop-down.
-
Select a Register. This step is only available if you have more than one Register.
-
Select or add a Contract. Transactions must exist within a Contract, which acts as a container. This step is skipped automatically if you start the process from a specific Contract.
-
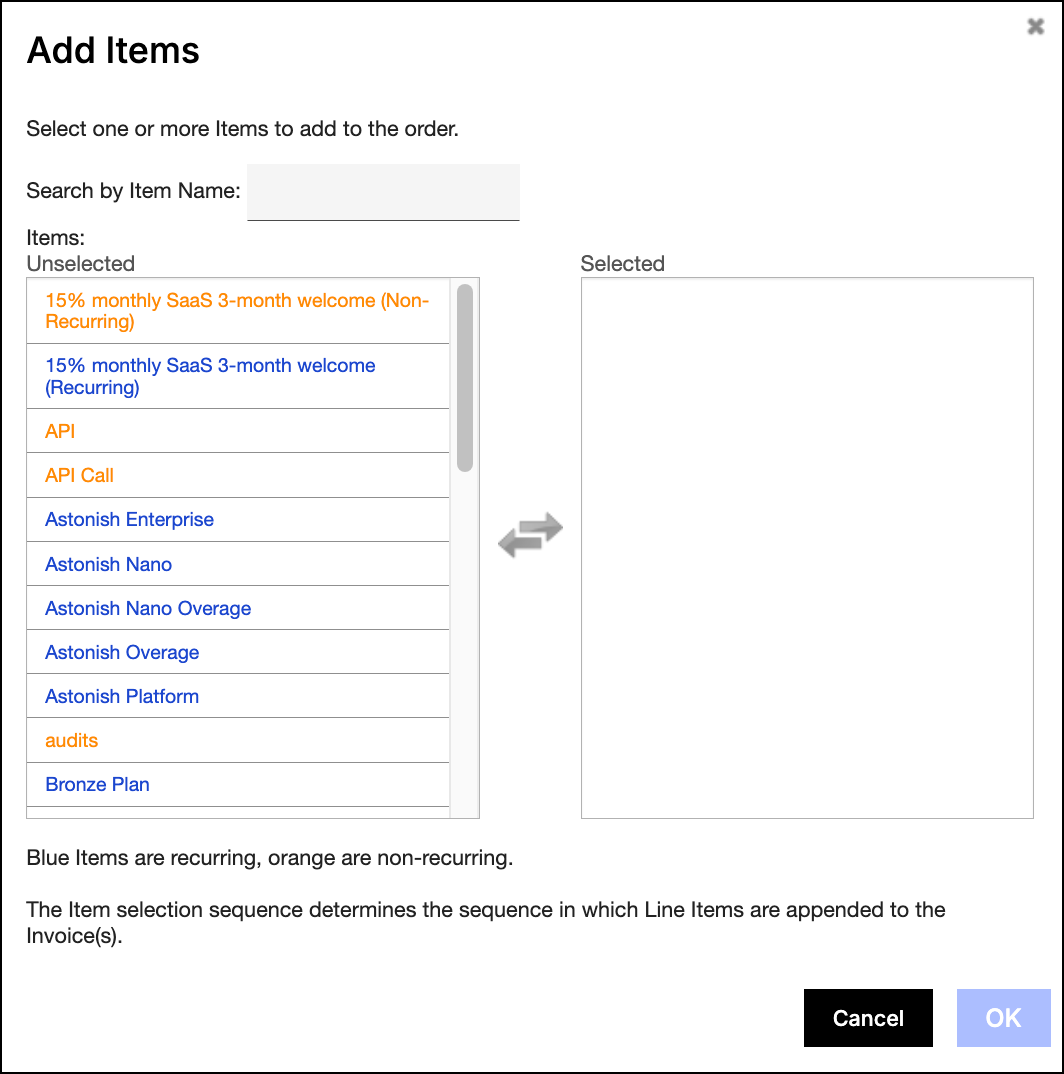
In the Items box, select the Items you want to use for your new Transactions. The order you select them in sets the order they appear as line items on the generated Invoice. Recurring Items display in blue and non-recurring Items display in orange.
To adjust that order before adding the Items:
-
Click OK. One Transaction is created for each Item you selected, appended to the grid in the order shown in the Selected list.
-
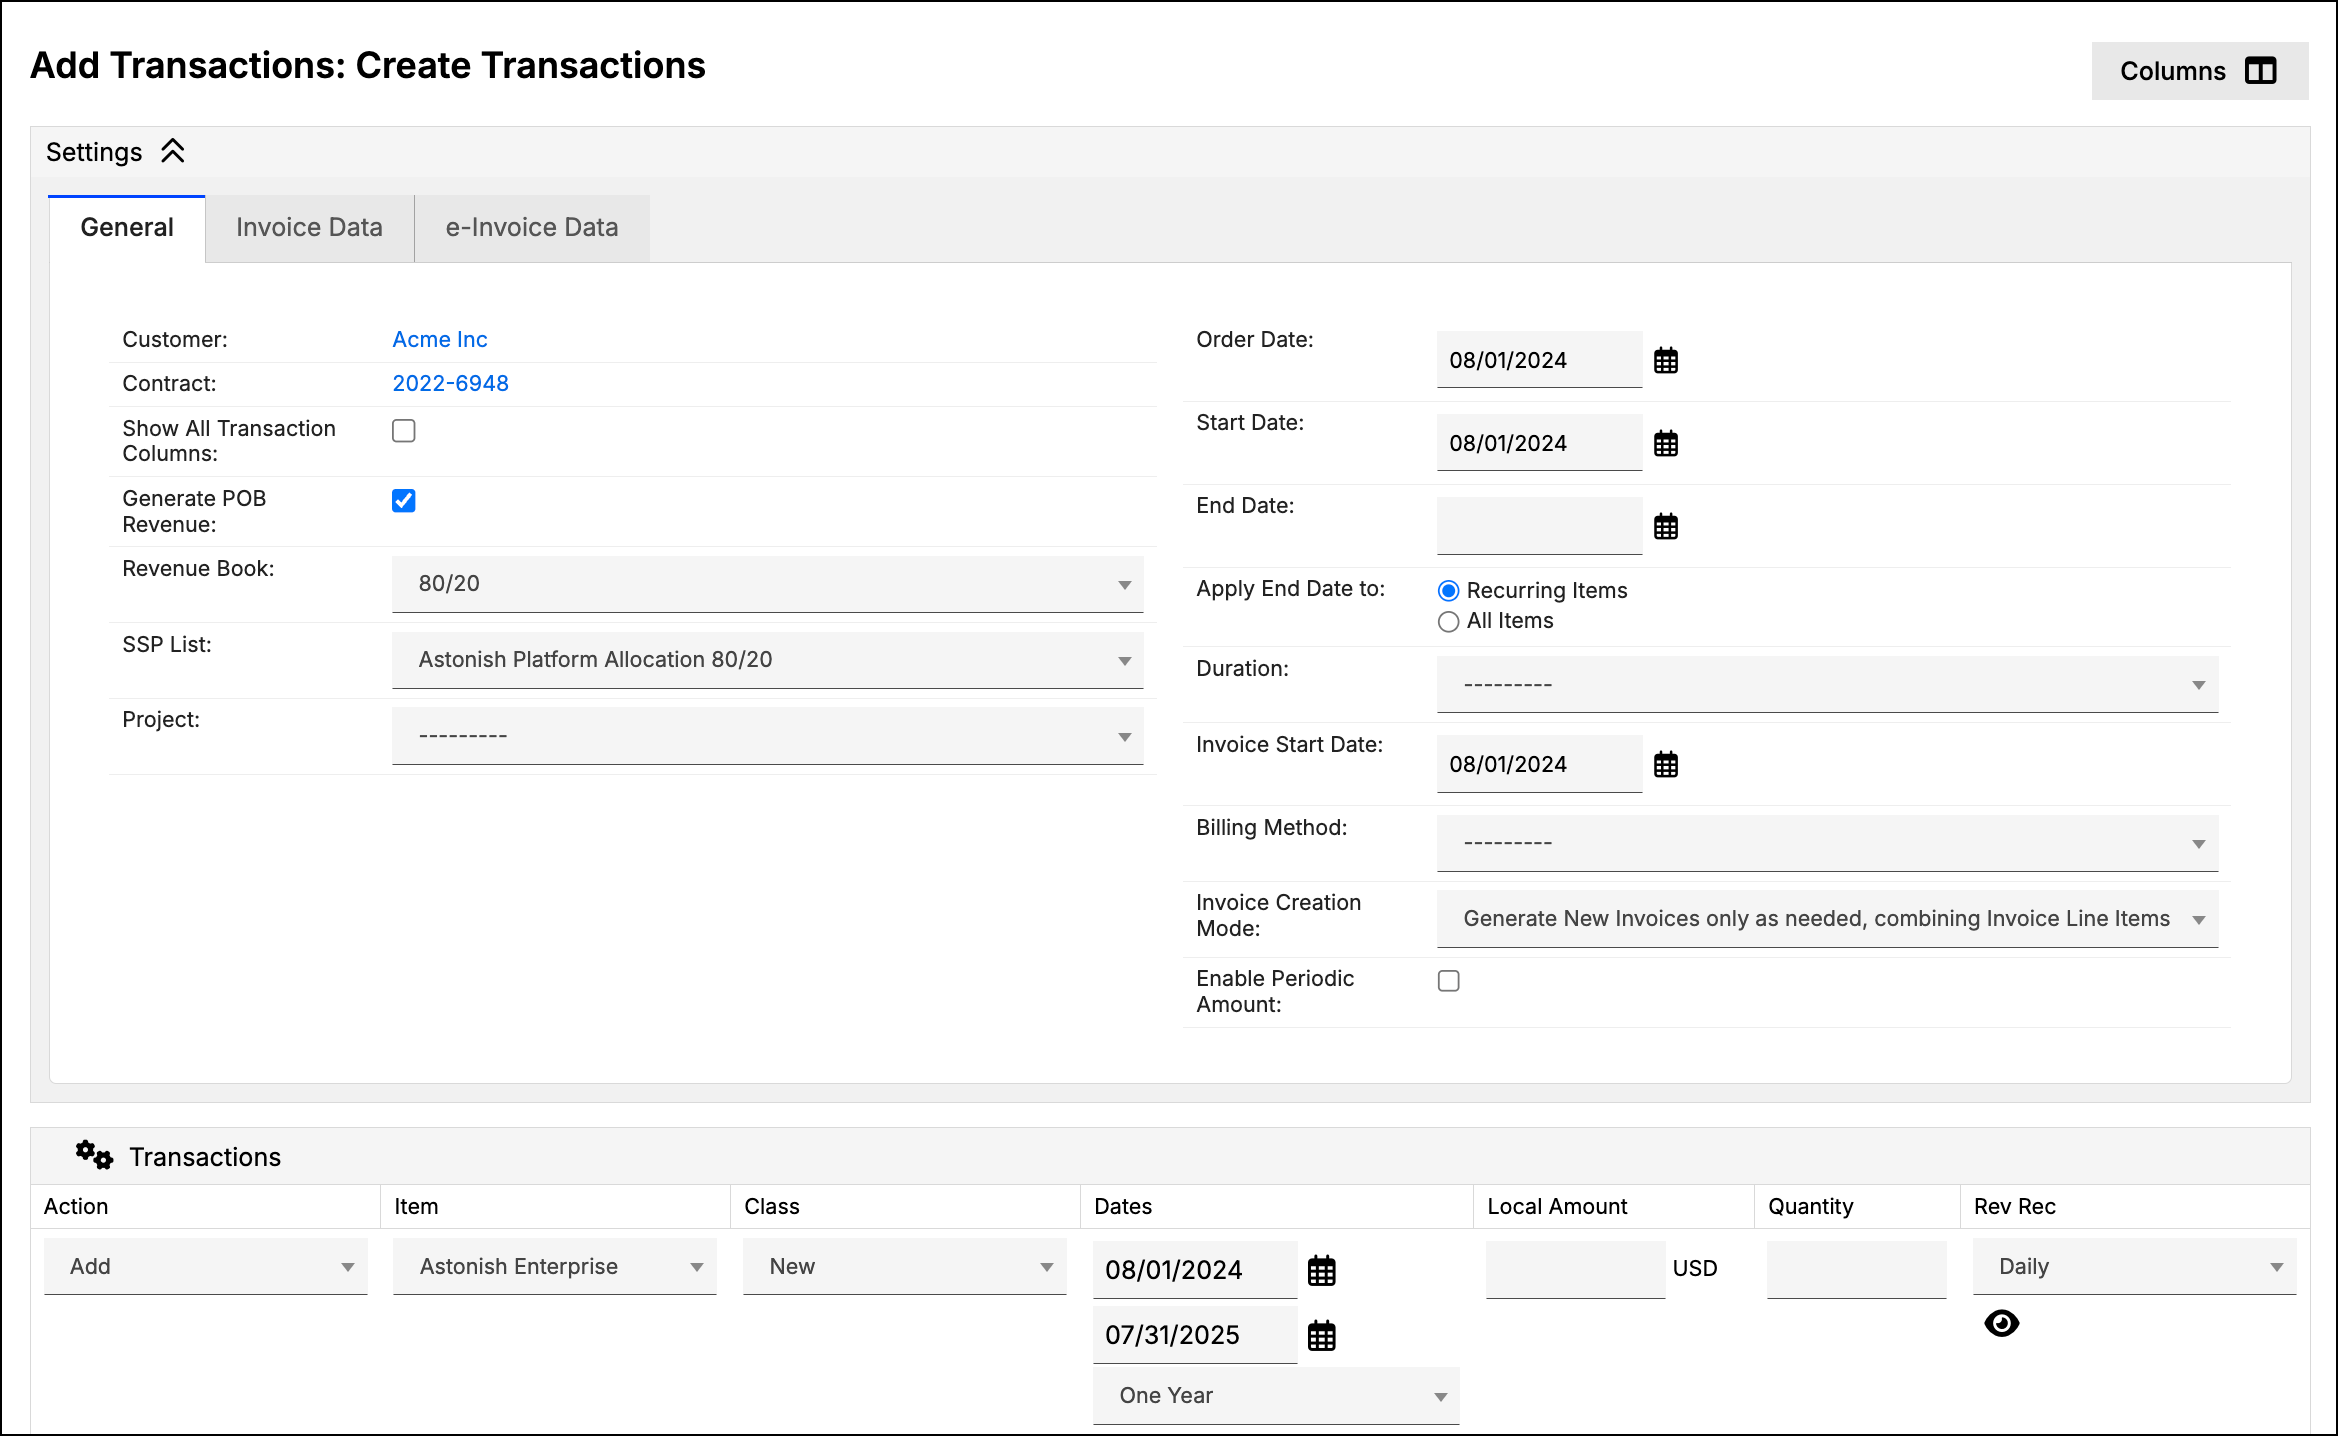
Use the General, Invoice Data, and e-Invoice Data tabs to configure any fields that are common across your Transactions. This pre-populates those fields for each Transaction in the list.
-
Review your Transactions and adjust or add details as needed.
To change the order Line Items are added to the Invoices Maxio generates:
A row shows a greyed-out handle that cannot be moved when its position would not change the Line Item order, for example when Generate Invoices is cleared, or when the Action is (No Action), Delete, Cancel at End of Term, Early Termination, or Reverse.
-
For each Transaction, add the required and optional information. Required fields include Item, Start Date, End Date, and Amount. Typically, you'll also choose to generate revenue and Invoices.
-
Use the Select Columns menu option to add or remove Transaction columns, and to set the order they appear in. The on-screen table updates to match as soon as you click OK.
-
Click Preview Invoices to confirm your Invoices generate as desired, including the Line Item order within each one. If you need a unique Invoice schedule that the standard Billing Methods can't produce automatically, choose the method that most closely matches the schedule you need, then edit the schedule manually in the next step.
-
Click Submit to save the new Transactions along with any revenue or Invoices you've marked to generate. If you know you'll need to manually edit the Invoice schedule after creating it, click the drop-down on this button and choose Submit & Edit Invoices instead. If Submit fails validation, your arranged row order is preserved when the screen re-renders.
Related information
For a broader look at how Transactions work, see Understanding Transactions.
Still need help?
Reach out and our support team will take it from here.