
View and Manage Notifications
Applies to: Maxio Core
Last updated on Aug 26, 2026
Maxio Core notifications alert you of key things that occur in your account. These messages are conveniently listed in one place, the User Notifications page. Here, you can see important account alerts in one place, such as invoice events, payment issues, and sync errors from connected integrations like QuickBooks Online or Salesforce. This article shows admins and finance users how to open notifications, adjust subscription preferences, customize columns, filter notifications, and export the list.
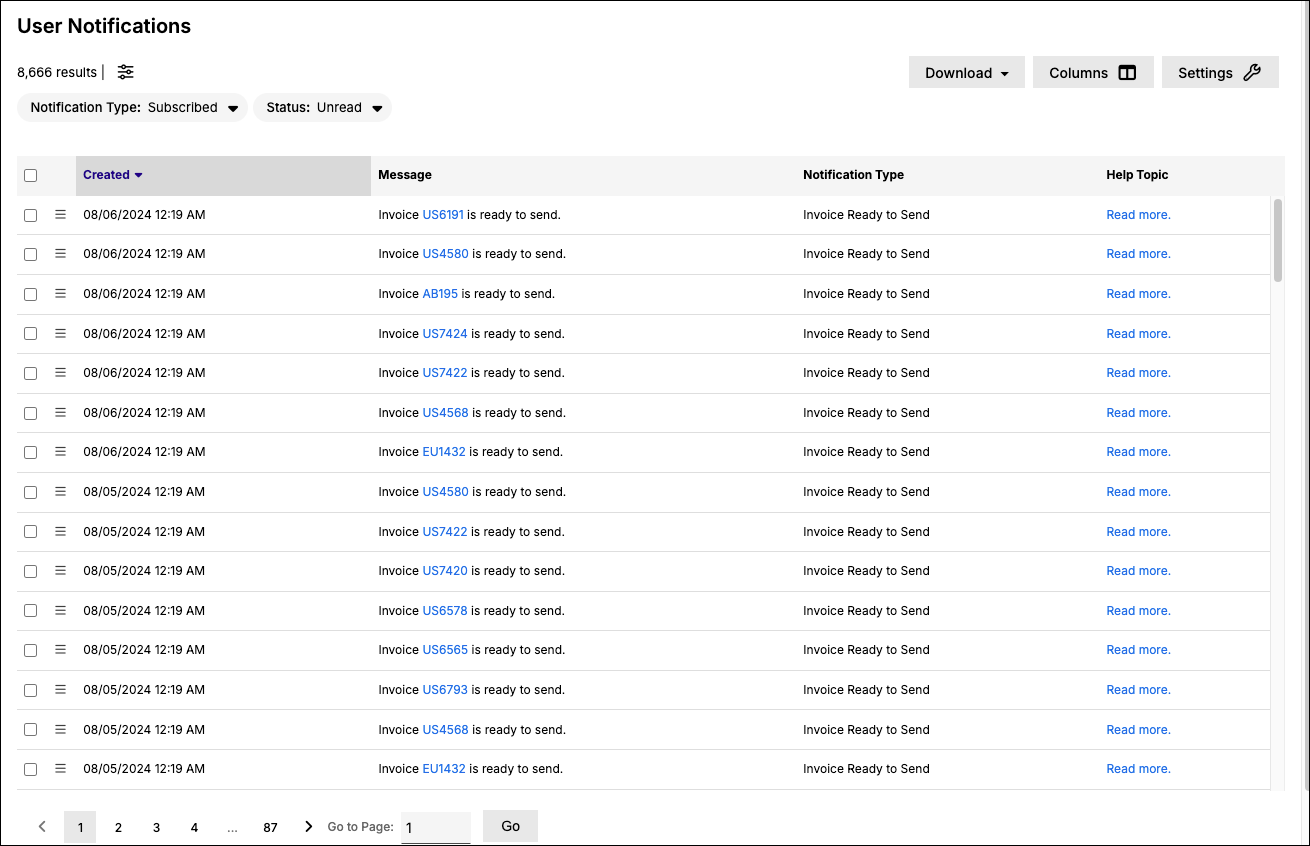
View notifications
To see your notifications, click the Bell icon located on the right of the top banner.
An icon badge (the dot on the Bell icon) indicates that there are unread notifications. When you hover over the icon badge, a tooltip appears that tells you how many unread notifications there are.
Set notifications preferences
On the top right corner of the User Notifications screen, click the Settings table action.
This opens the Update User Notifications Preferences dialog box.
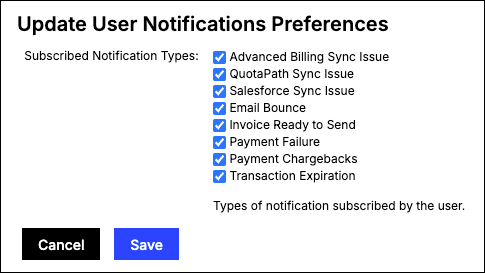
By default, all available subscribed notification types are checked. Sync issue notifications depend on which integrations (for example, QuickBooks Online or Salesforce) you have.
Uncheck the types for which you do not want to receive notifications, then save your preferences.
Customize the notifications list
You can customize the notifications list, so you only see alerts that are important to you.
We recommend you first set your columns before you use filters.
Set columns
First, select the columns you want to display, and the order to display them.
On the top right corner of the User Notifications screen, click the Columns option.
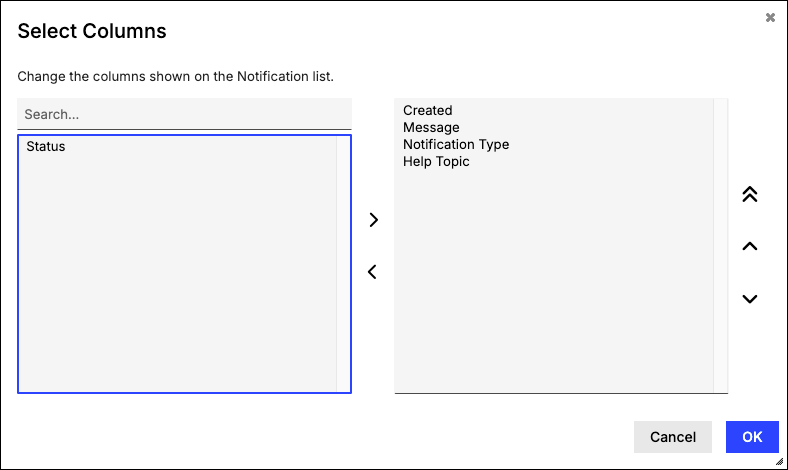
The left box lists the hidden columns; the right, the displayed columns. To hide a column, select it from the right box and then click the left arrow. To add a column, select it from the left box and click the right arrow.
Once you've set which columns to display, use the up and down arrows to determine the column order. Use the two arrows pointing up to bring the column to the top (which is the first column in the table).
Set filters
Once your columns are set, use filters to display only the records that are of interest to you.
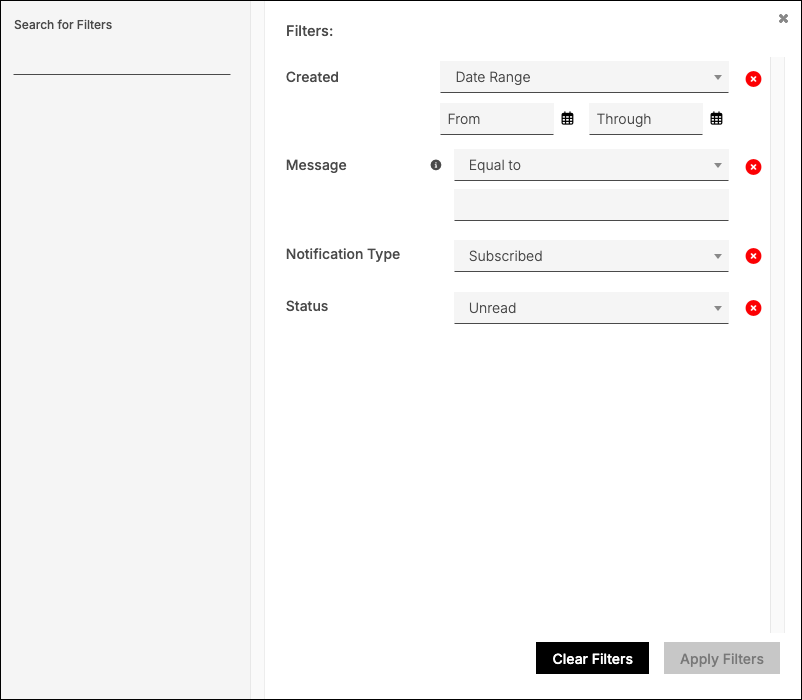
Click the Filter icon to apply the following conditions:
- Created: To see notifications that occurred on a specific date or date range.
- Message: To search for specific text in the notification messages. Click the Info icon next to the Message filter fields for more information on the various operators, or refer to the List Filters article.
- Notification Type: Select the type of notification. These cover sync issues from your connected integrations, and also events such as Email Bounce, Invoice Ready to Send, Payment Failure, Payment Chargebacks, Transaction Expiration, Report Run Completed, Report Export Completed, and SAML Certificate Expiration.
- Status: Read or Unread.
Download the notifications list
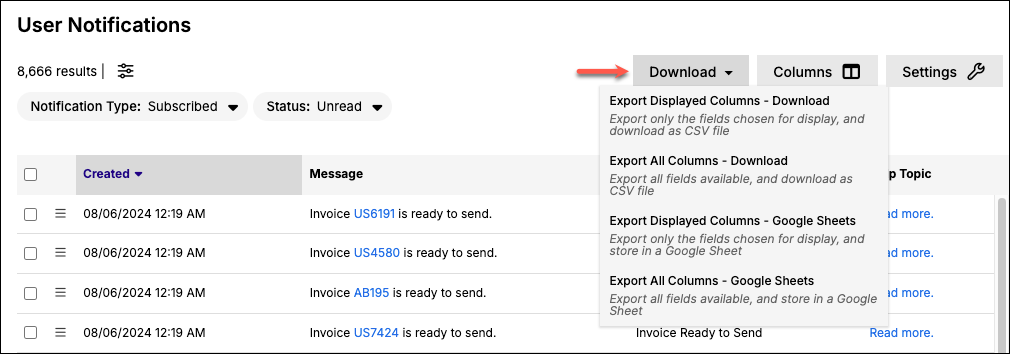
You can export (download) data as a CSV file or as a Google Sheet, if Google Sheets is enabled with your account. From the Table Actions located in the upper-right corner of the screen, click the Download icon and select from the following options:
- Export Displayed Columns - Download: the columns currently shown, as a CSV file.
- Export All Columns - Download: every field available, as a CSV file.
- Export Displayed Columns - Google Sheets: the columns currently shown, stored in a Google Sheet.
- Export All Columns - Google Sheets: every field available, stored in a Google Sheet.
Still need help?
Reach out and our support team will take it from here.