
Connect Maxio Core to Advanced Billing
Applies to: Advanced Billing · Maxio Core
Last updated on Aug 26, 2026
For most users, Advanced Billing should be connected and configured in Maxio Core using our standard implementation process with your Implementation Consultant. This is the preferred method for setting up Advanced Billing. However, the information below is provided for assistance as you complete the implementation. Please reach out to support if you have any questions.
You will complete the following steps to configure Advanced Billing:
- Create a non-product item.
- Address and configure the admin settings.
- Connect Maxio Core to Advanced Billing.
Please be aware that this article is related to Advanced Billing. Together, Maxio Core and Advanced Billing offer full-suite subscription management and financial operations for all SaaS business models.
You can learn more about Advanced Billing by checking out the articles in the Advanced Billing Overview and Resources section of the help center.
Before you connect
Please be aware of the following before connecting Maxio Core with Advanced Billing:
General Ledger
If you use a connected general ledger, Maxio Core must be connected to the GL before connecting to Advanced Billing.
If you would like the system to match the products in your Advanced Billing account with those in your general ledger, their names must be an exact match to each other (spelling, spacing, capitalization).
Multi-Currency
While optional, we strongly suggest purchasing Maxio Core Multi-currency Advanced Workflow. This will allow you to run financial reports across multiple currencies in your home currency. If you wish to send synced Advanced Billing data to your GL:
- Any multi-currency mode must be turned on there
- Any currencies you use in Advanced Billing must be enabled there
- The home currency in Advanced Billing must match the one in the GL
Sales Tax
You must have a "Sales Tax" item in Maxio Core before making this connection. This item should be called "Sales Tax", its Is Sales Tax field must be checked, and it must be active in your GL — the drop-down only offers items that meet both conditions.
This is required for Intacct, NetSuite, QuickBooks, and Rillet. If you use Xero, it is required only when you are not handling sales tax by line item.

In your GL's settings page in Maxio Core, you must choose this Item in the drop-down menu for the field labeled "Send Invoice Sales Tax As."
Non-product item
Advanced Billing requires you to create an item in Maxio Core for use as a default for the following situations:
- The item will be automatically applied to any invoice line items received from Advanced Billing that are not associated with a product or component.
- The item that the system will use to create discount invoice line items received from Advanced Billing for backported Invoices.
Both of these must be designated in the configuration settings (explained further below). Please be aware of the following configurations that are recommended for this item:
- Default Revenue Recognition Template: Daily
- Default Duration: End Date same as Start Date
- Default Billing Method: On Invoice Start Date
- Recurring: Unchecked
- Enable Create Transactions: Unchecked
Create Revenue appears only when Enable Create Transactions is checked, so following the setting above means you will not see it. If you do enable transactions on this item, leave Create Revenue unchecked as well.
Connect to Advanced Billing
-
Be sure to address the configuration settings according to the instructions in the previous section before connecting to Advanced Billing.
-
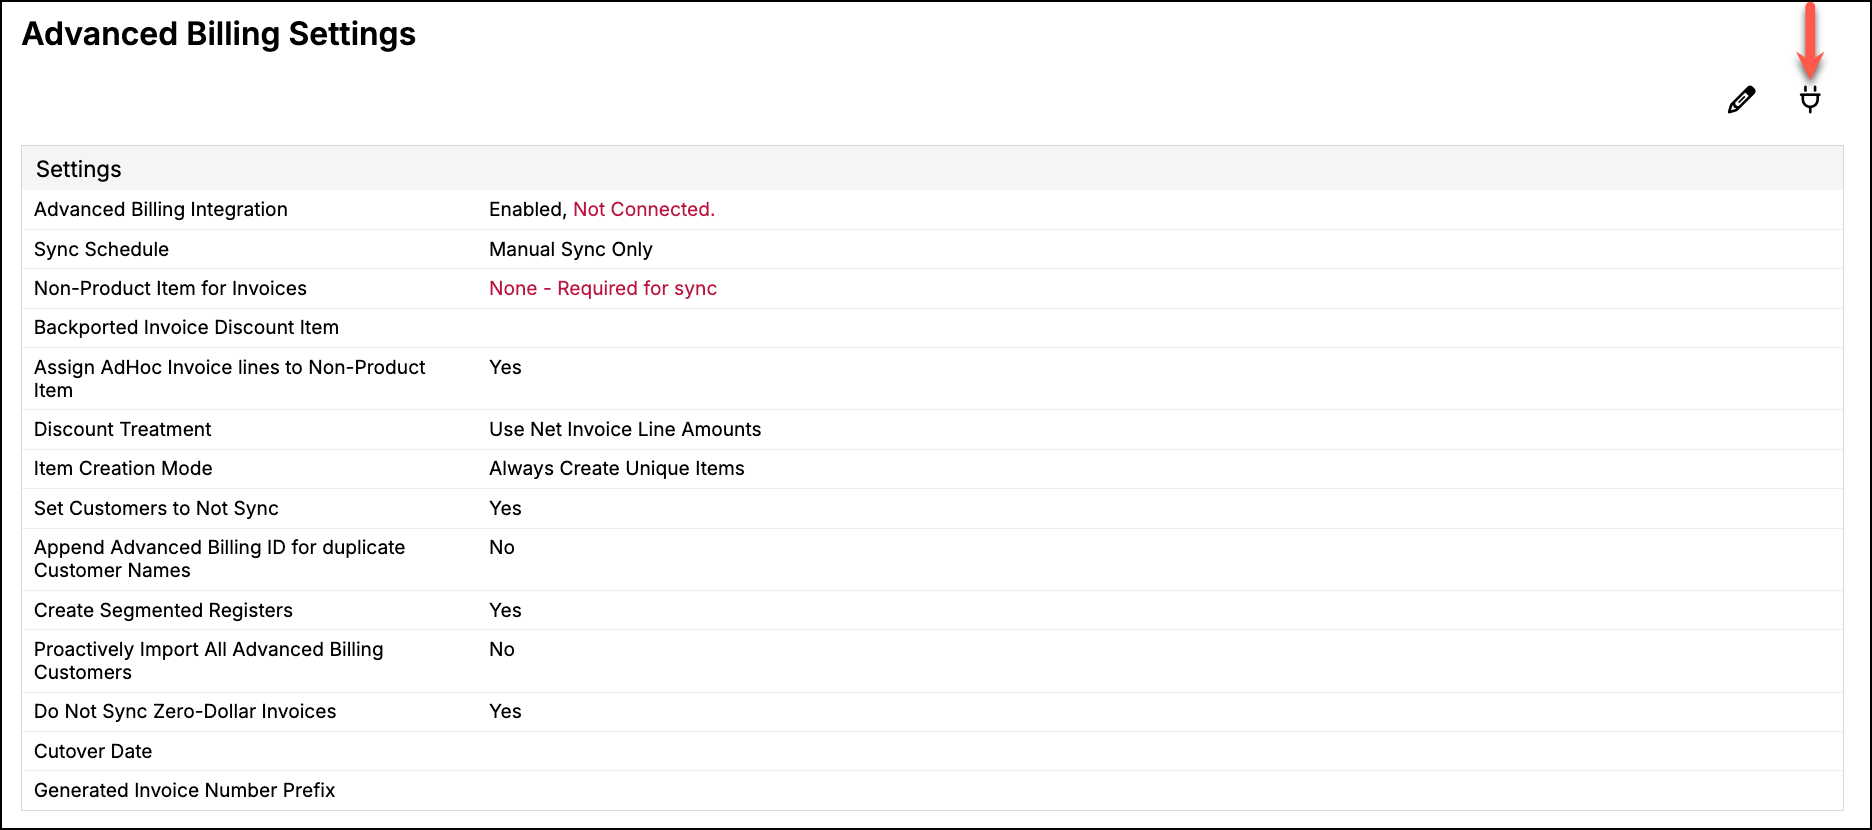
Open the Advanced Billing settings page in Maxio Core, then click Connect to Advanced Billing in the top right corner.
-
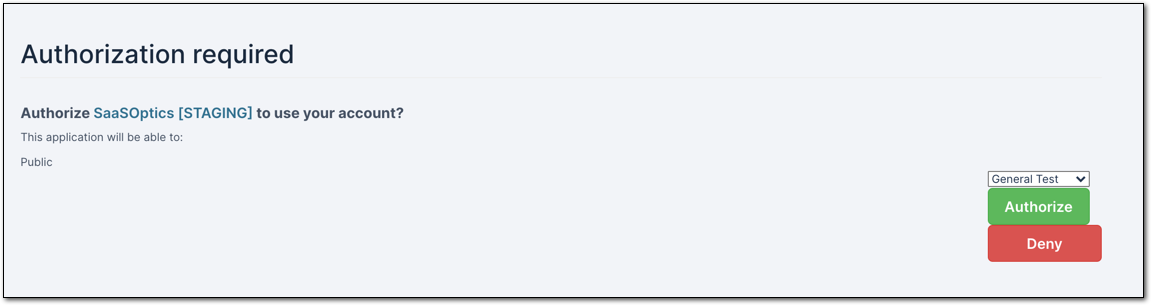
When prompted, log in to Advanced Billing, choose the Advanced Billing Site you want to connect to this Maxio Core account, then authorize the connection.
Still need help?
Reach out and our support team will take it from here.