
Select a Gateway
Applies to: Advanced Billing
Last updated on Sep 17, 2026
Connect a real payment gateway to your site so you can sell subscriptions and process live transactions.
Selecting a gateway
You can select and connect multiple gateways in Advanced Billing while still using your current gateway.
-
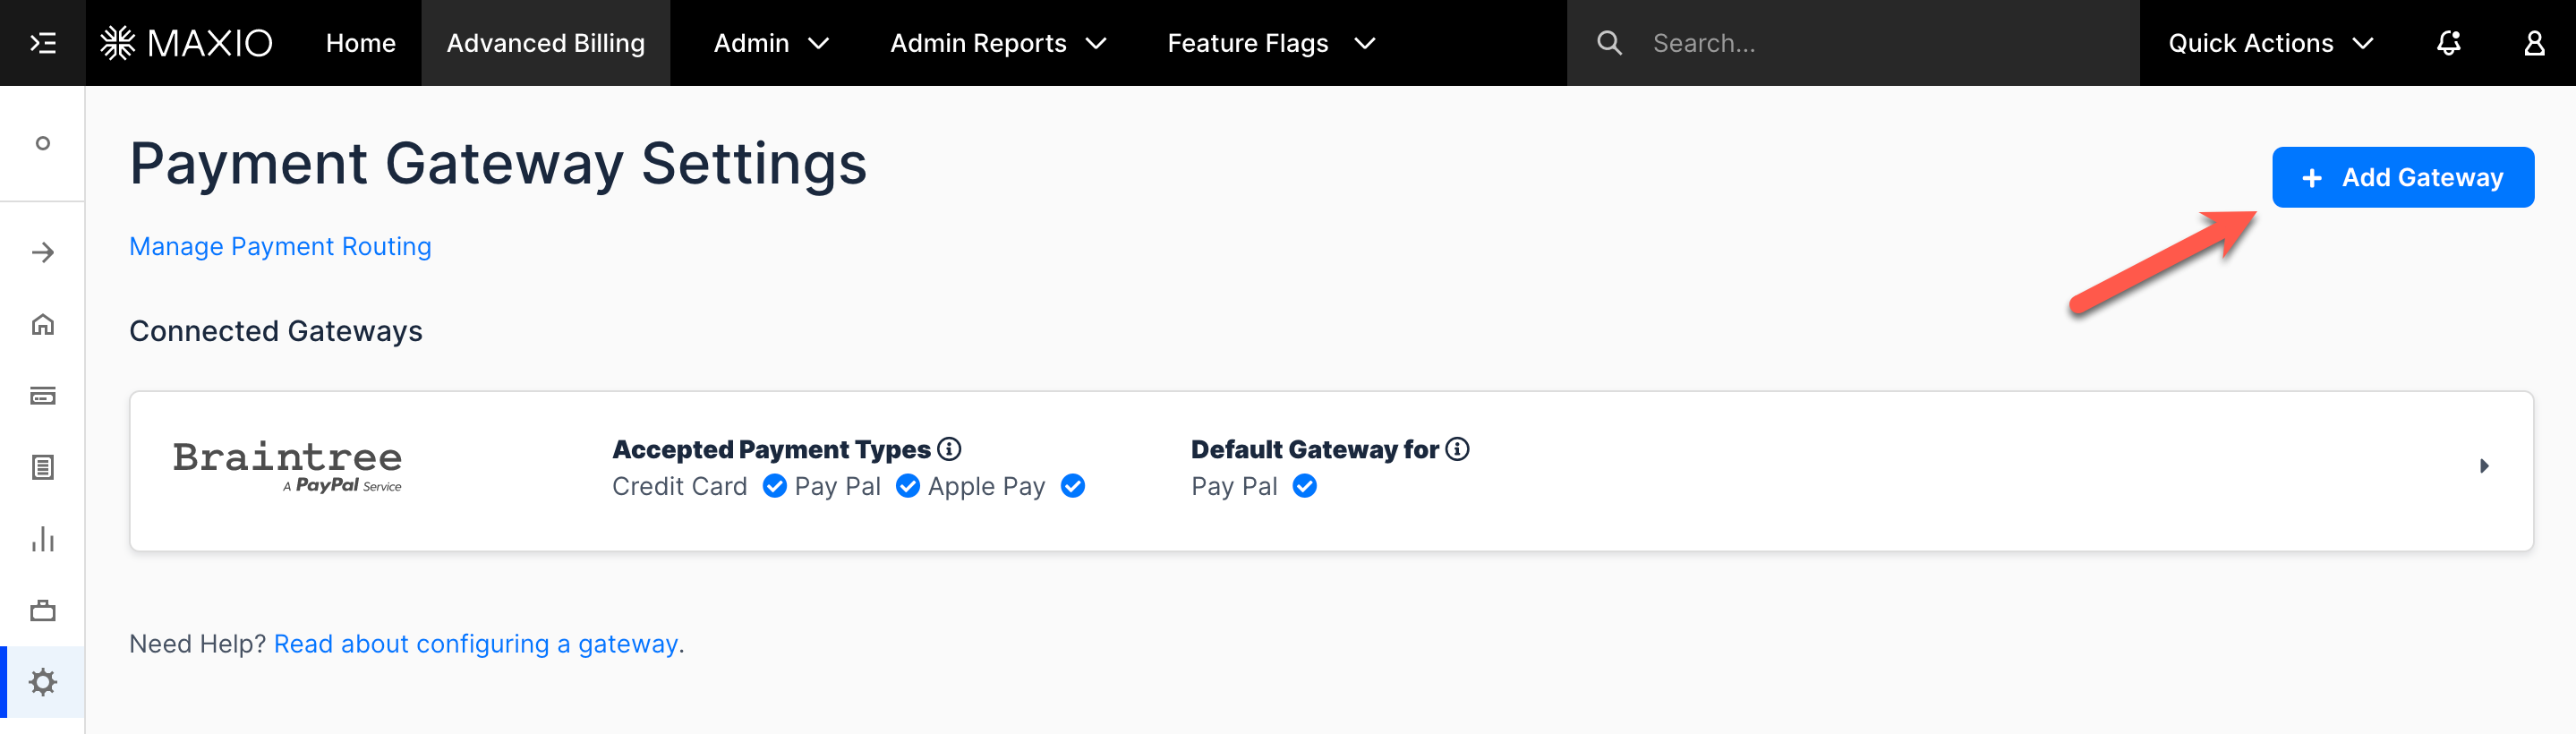
Go to Config > Payment Gateways and select + Add Gateway.
-
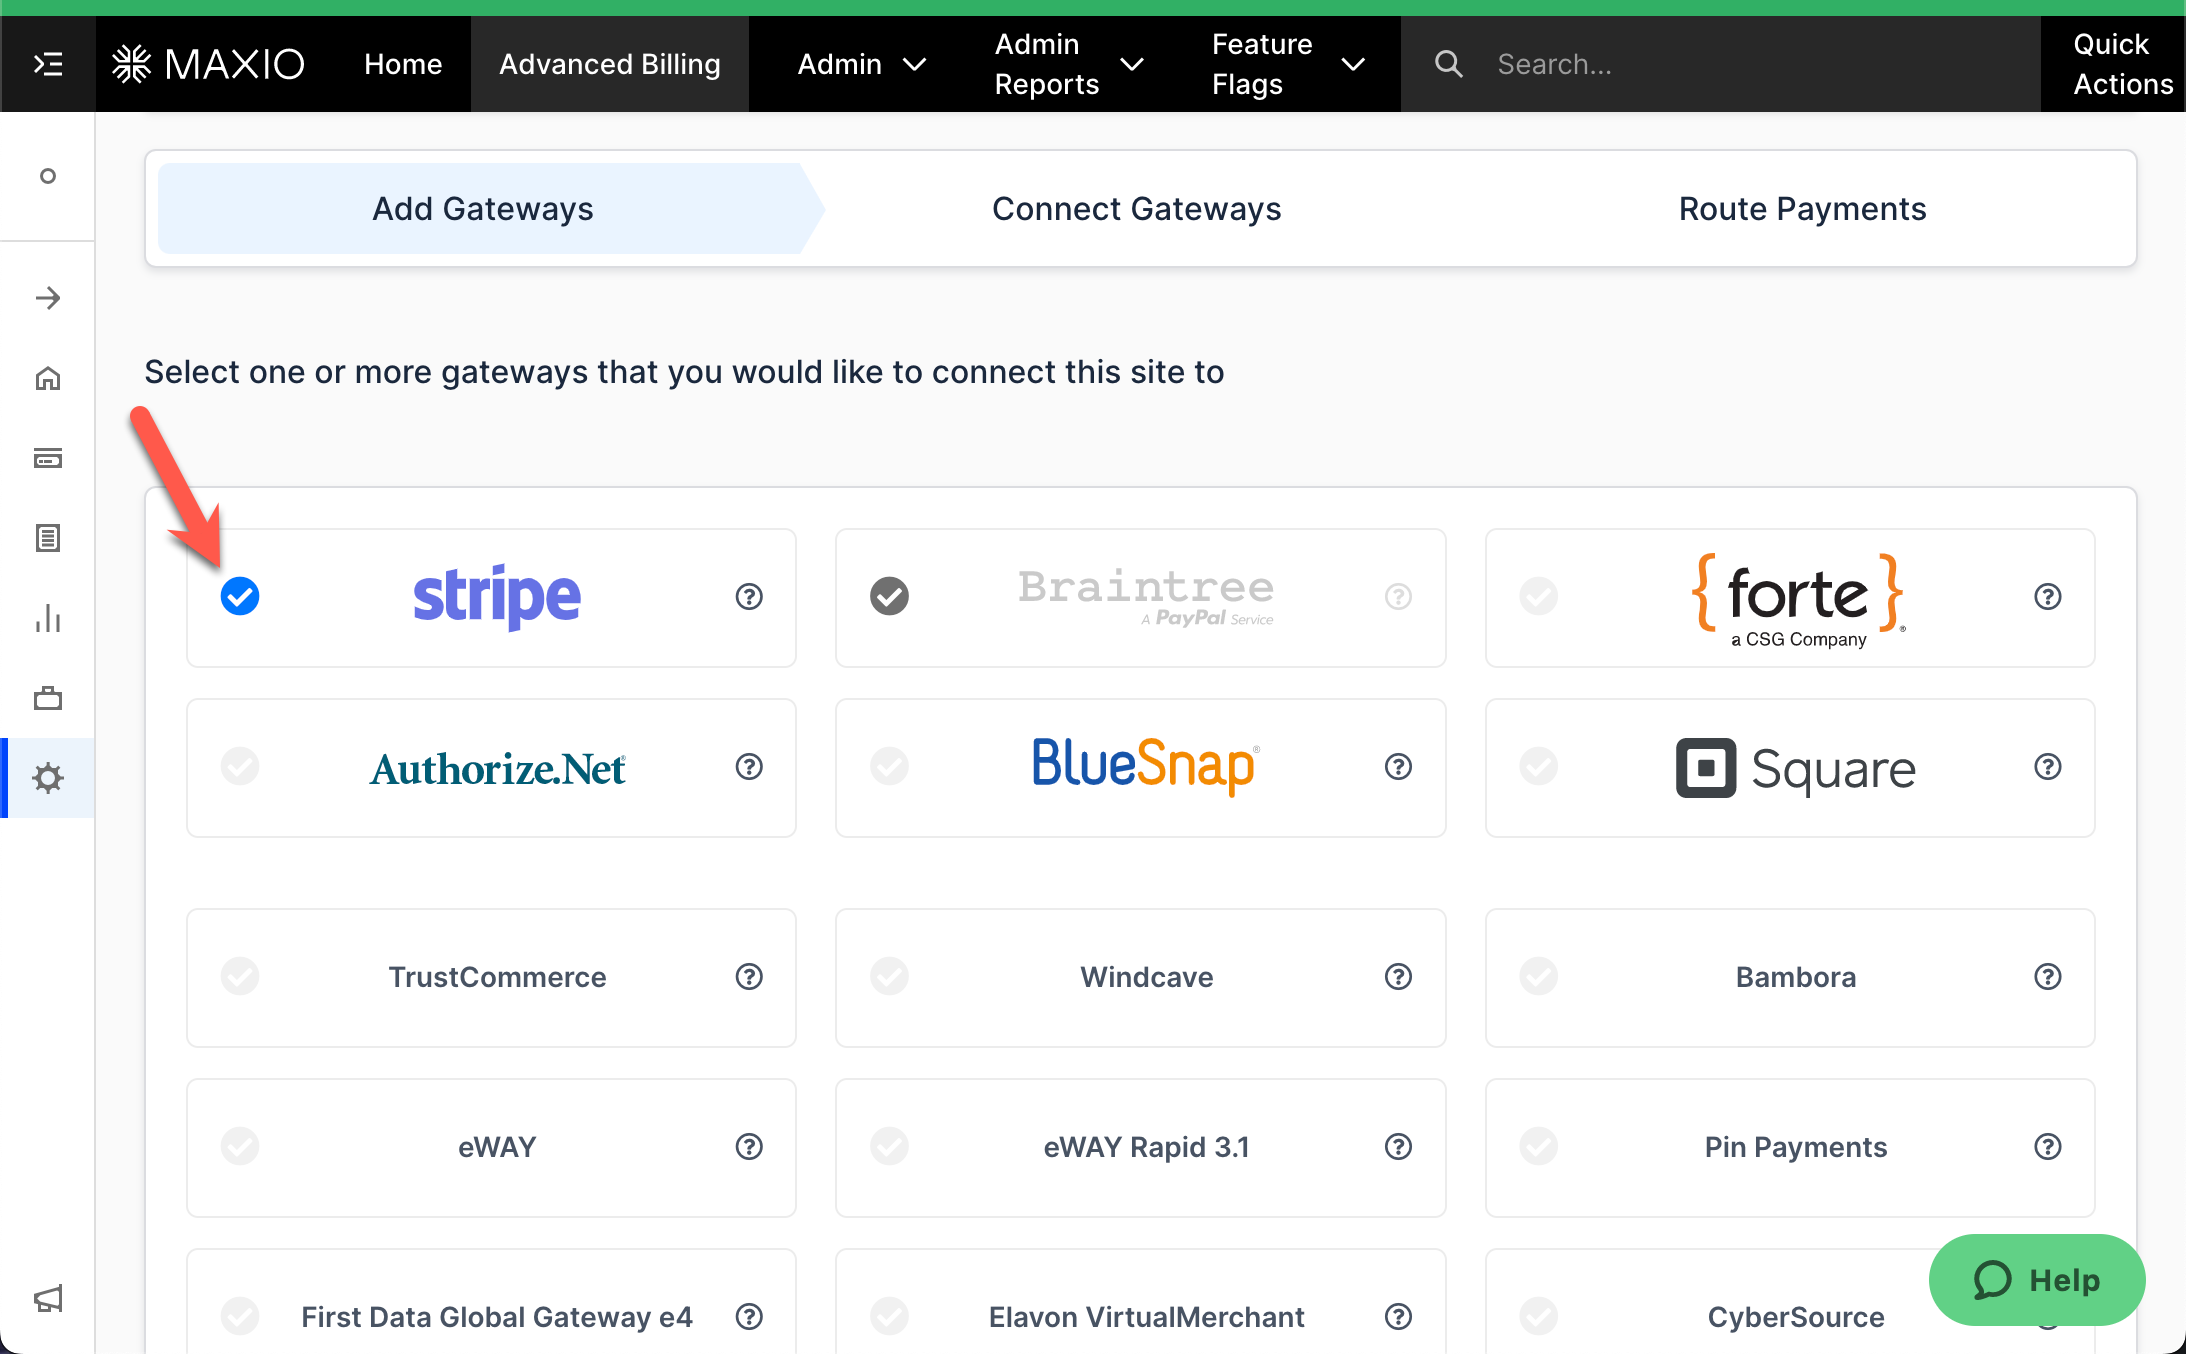
Select the checkmarks next to the names of the gateway providers you want to connect. Some providers may be disabled if they don't support your site's selected currency, or if the site already has subscriptions. Select Continue.
-
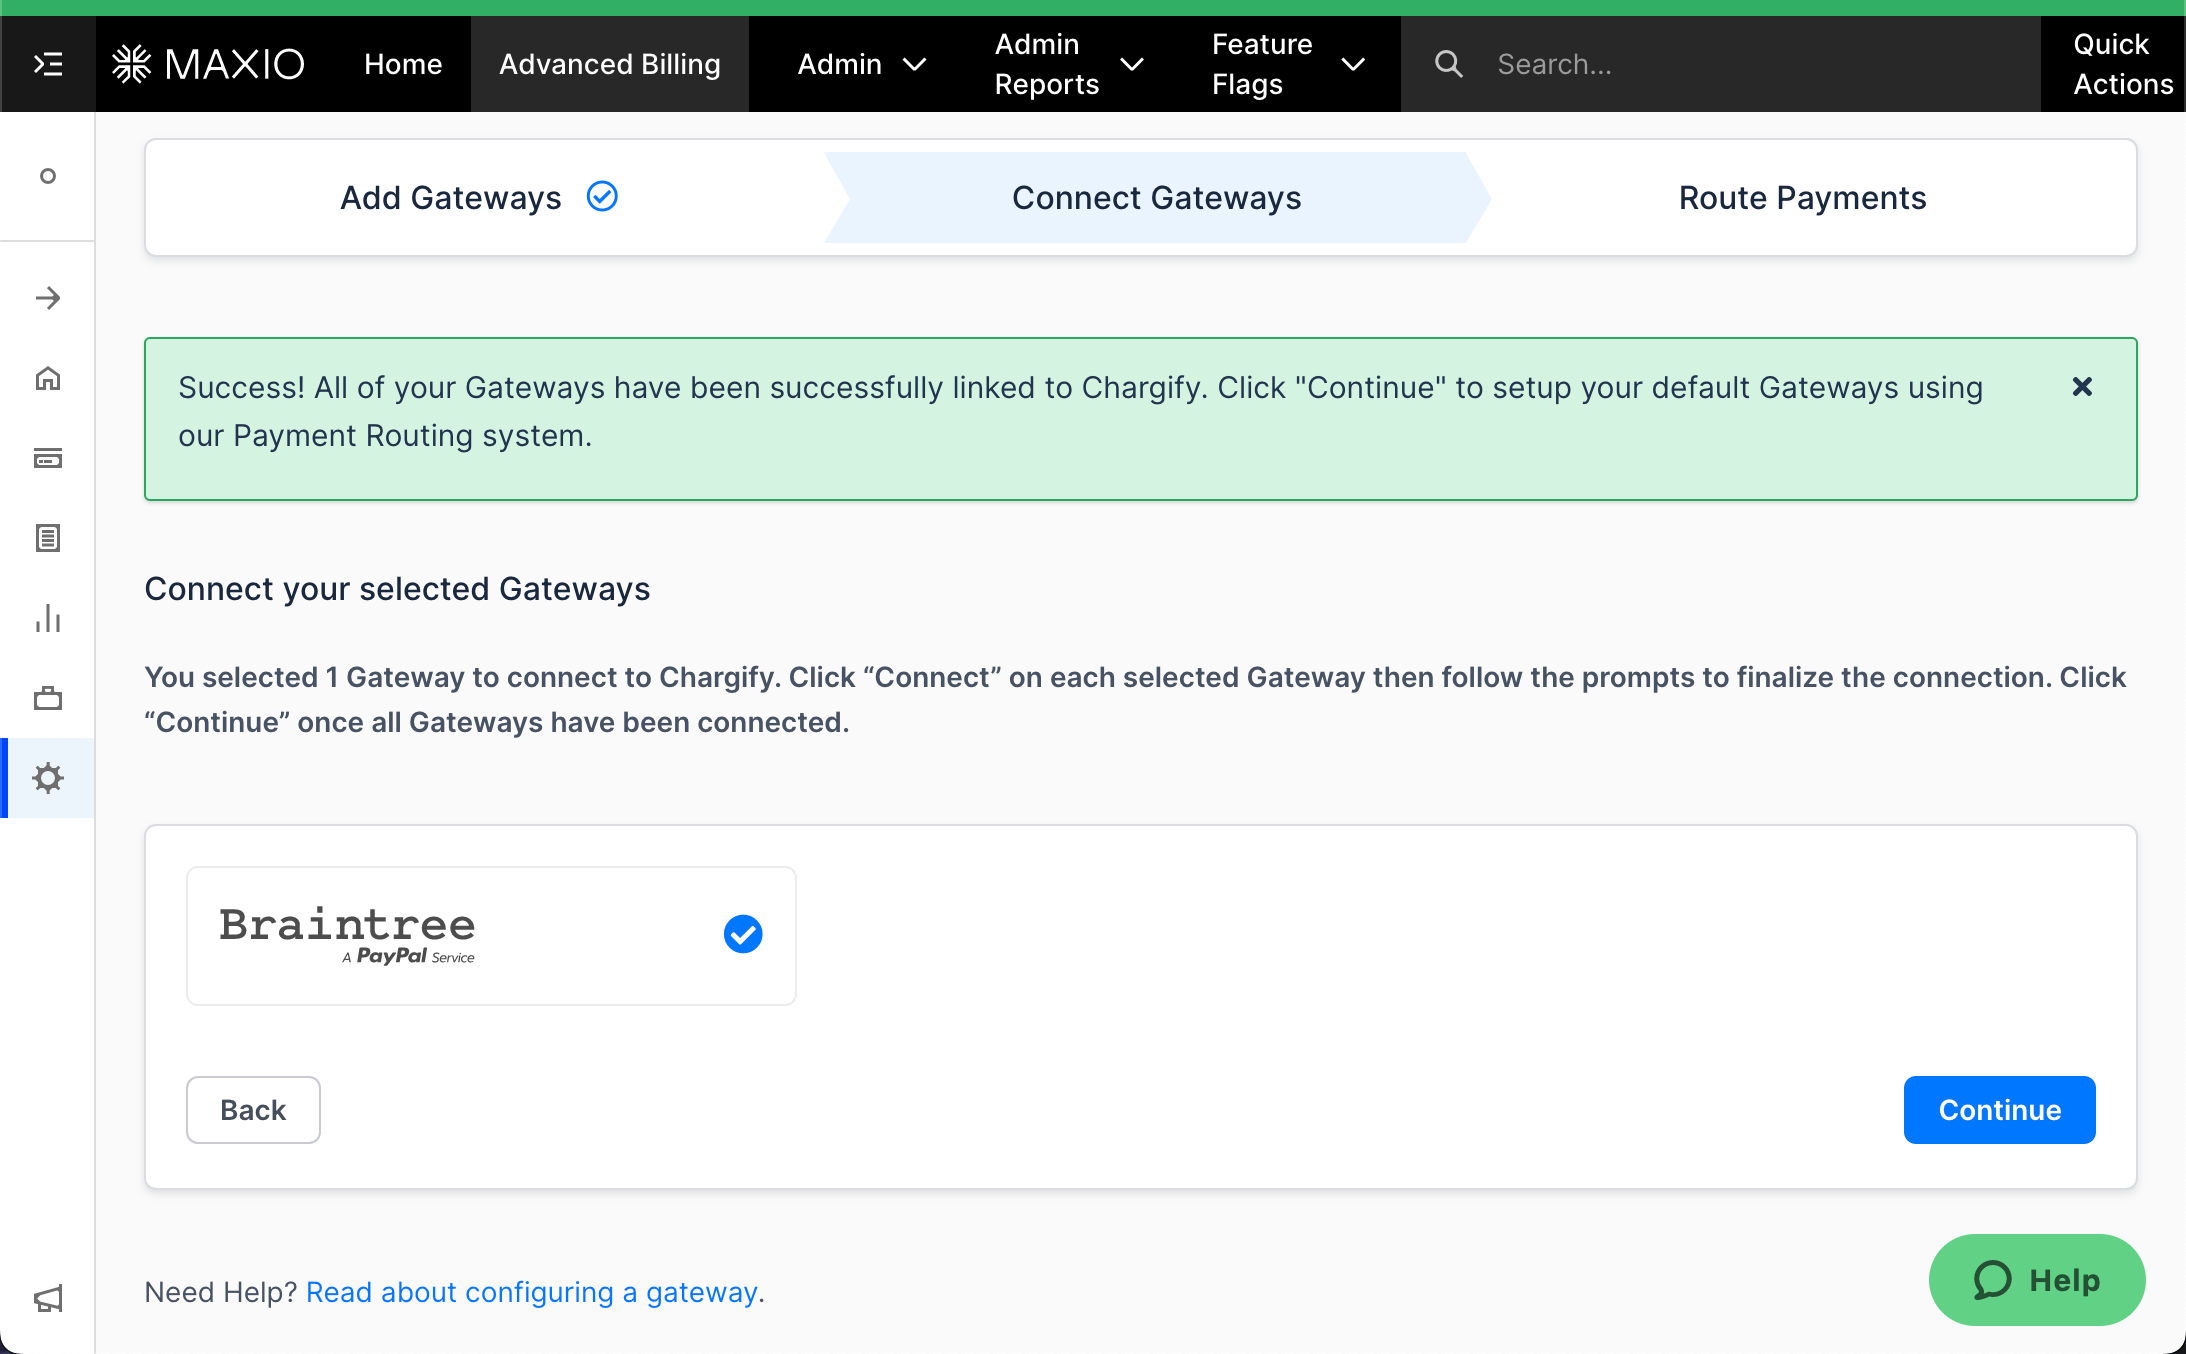
Click the Connect button next to each of your selected gateways. A new window prompts you for connection details. The credentials each provider expects, and where to find them in that provider's dashboard, are covered in the setup guide for your gateway. Once all gateways are successfully connected, click Continue.
-
Select how you want payments routed through your gateways. This sets the default gateway used for each payment type, and is mostly important if you have multiple gateways. Once the settings are correct, click Finish.
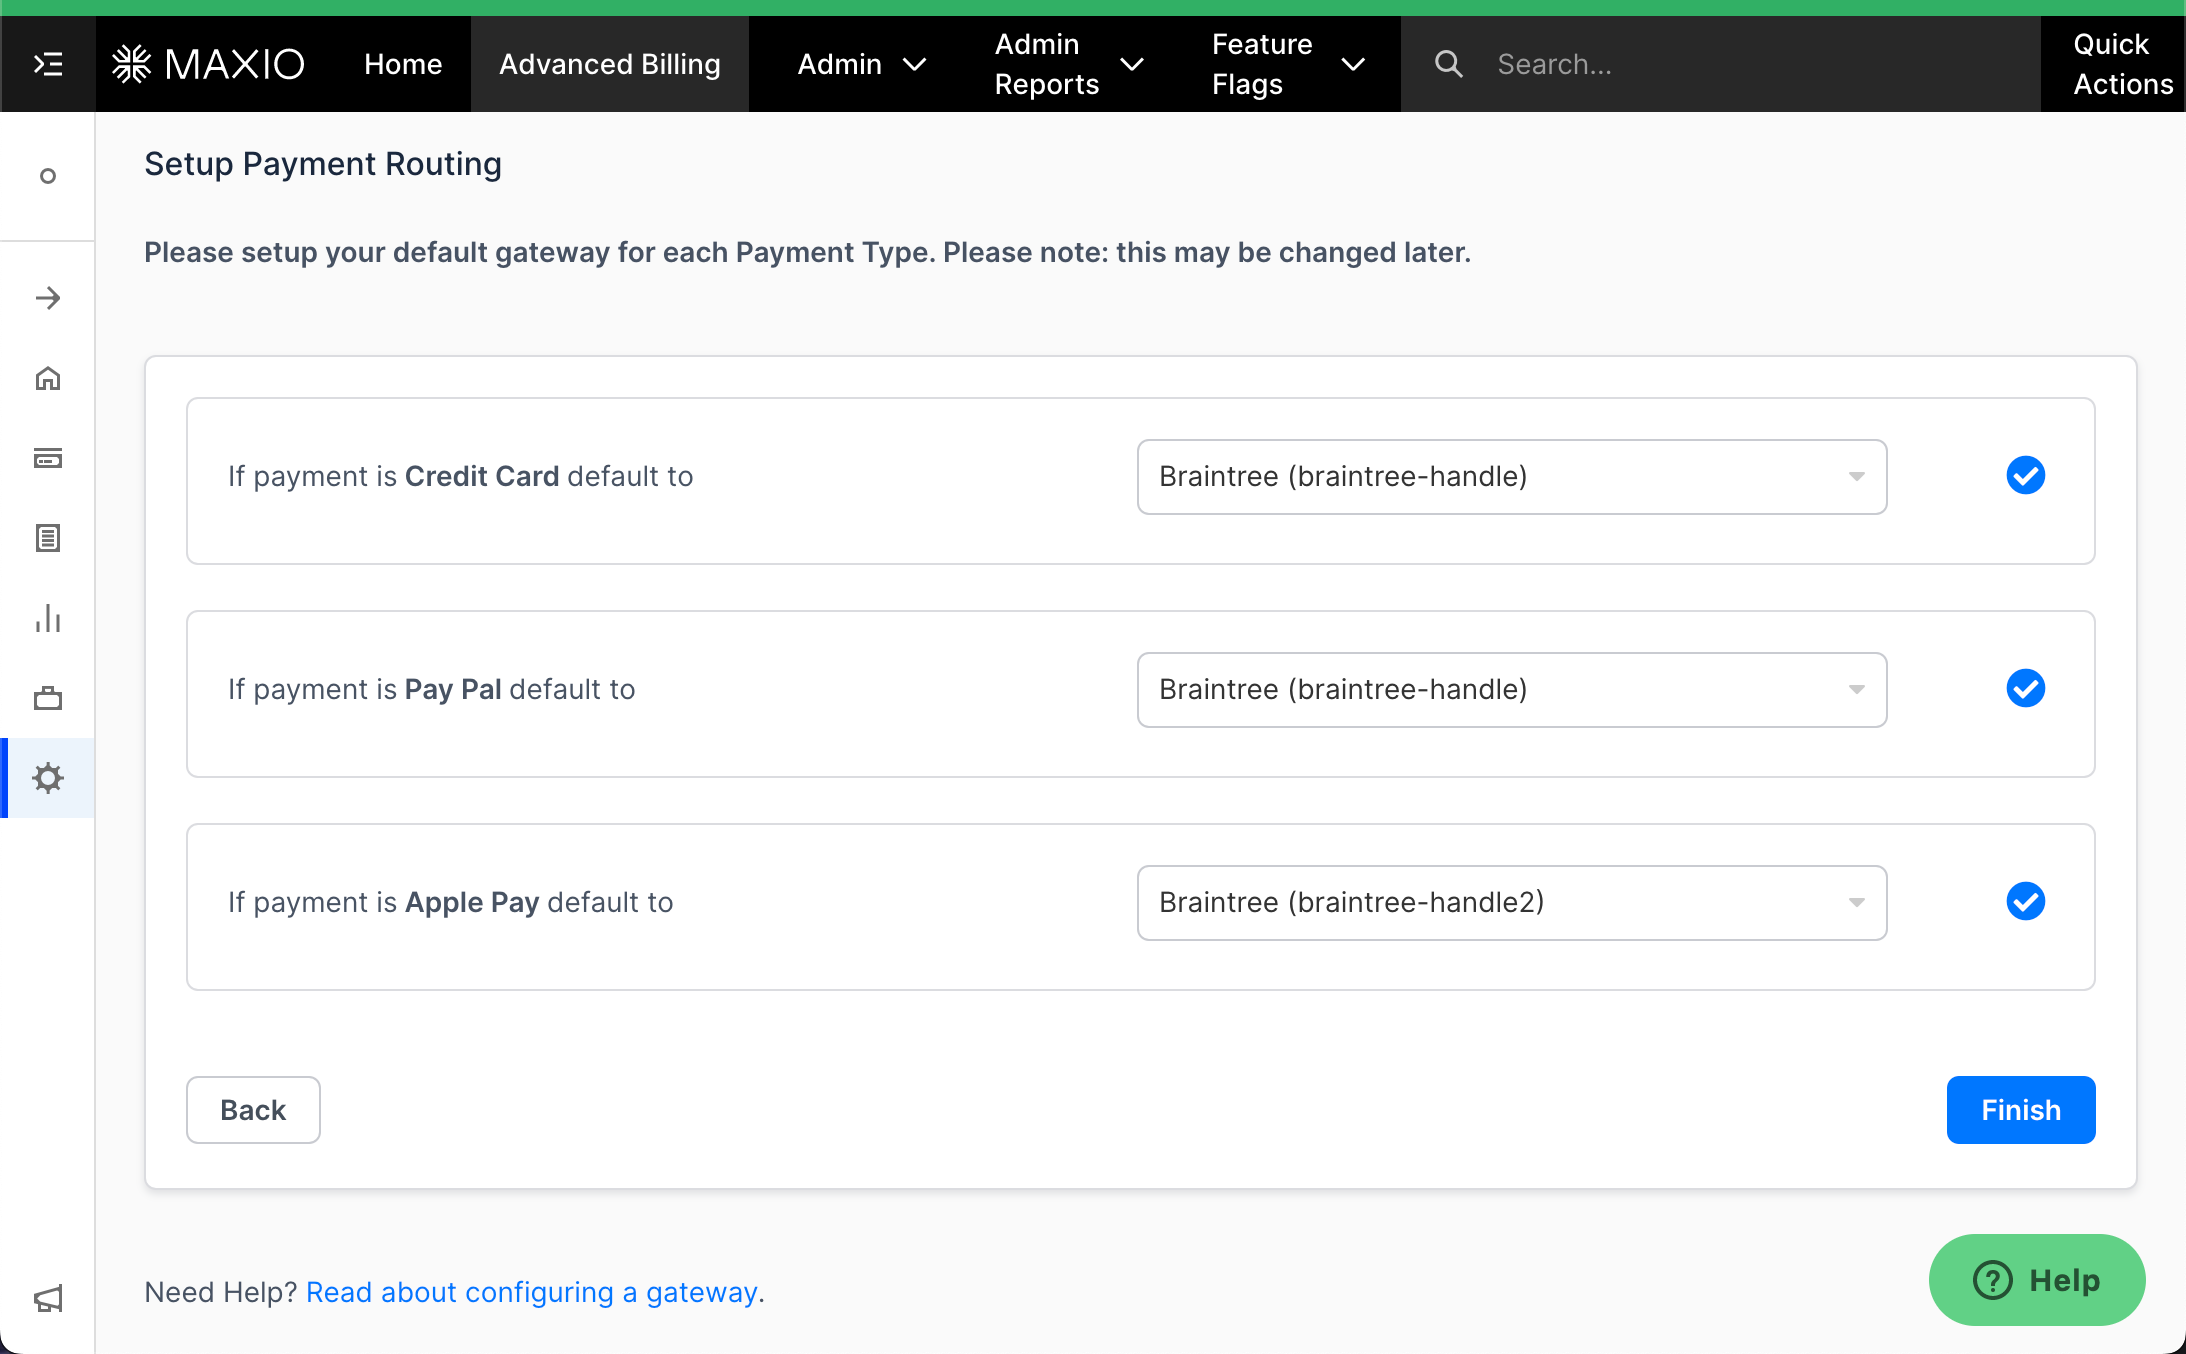
The gateway setup is complete.
You can make changes to a gateway by going into that gateway's Gateway Settings. Switching to a different provider is a larger undertaking than editing settings, because stored payment profiles live in the gateway that created them — see Understand the Gateway Change Process before you start.
Gateway terms
There are three terms associated with gateways that you should know: Gateway Handle, Accepted Payment Types, and a default gateway for a given payment type.
Gateway handle
Every gateway should have a unique gateway handle. A gateway handle must be specified when adding a gateway. A gateway handle can be passed via an API call or in Maxio.js (formerly Chargify.js) configuration to directly select which gateway a given payment profile should be stored in. You need to use a gateway_handle attribute via API for the request to process correctly if you've connected multiple gateways from the same provider.
Accepted payment types
Each gateway supports given payment types. For example, Stripe supports credit cards and ACH, GoCardless supports Direct Debit only, and Braintree supports credit cards and PayPal.
You can explicitly select which payment types are accepted for a given gateway. You can't store payment profiles of a given type in a gateway if that payment type isn't set as accepted for that gateway.
For example, if your site is connected with Stripe among other gateways and ACH only is marked as an accepted payment type for Stripe, you can't store credit cards in Stripe, regardless of whether the attempt was made via Maxio.js, the user interface, or the API. Only bank accounts can be created for Stripe.
If a given payment type is marked as accepted for a given gateway, that gateway can be selected as a default gateway for this payment type.
The default gateway for a given payment type
To become a default gateway for a given payment type, a gateway must accept that payment type.
Default gateways behave differently than regular gateways. If there's a default gateway for a given payment type, a customer can select that payment type on the Public Signup Pages and Self-Service Pages. Also, when you pass payment profile attributes of a given type via API or Maxio.js, the default gateway for that payment type is selected and a payment profile is created in that gateway.
For example, if credit card attributes are passed while creating a subscription or payment profile, the default gateway for credit cards is selected and a credit card is persisted in that gateway. You can bypass this behavior by specifying a gateway handle in the API call or the Maxio.js configuration. In this case, a payment profile is stored in the gateway that the gateway handle points to.
For Self-Service Pages and the Billing Portal, having a default gateway for a given payment type means that during updates, the payment profile is always stored in the default gateway for that payment type. This means that if a payment profile is stored in a gateway that's no longer the default for that payment type, updating it via a Self-Service Page or the Billing Portal stores the payment profile as a new one in the current default gateway.
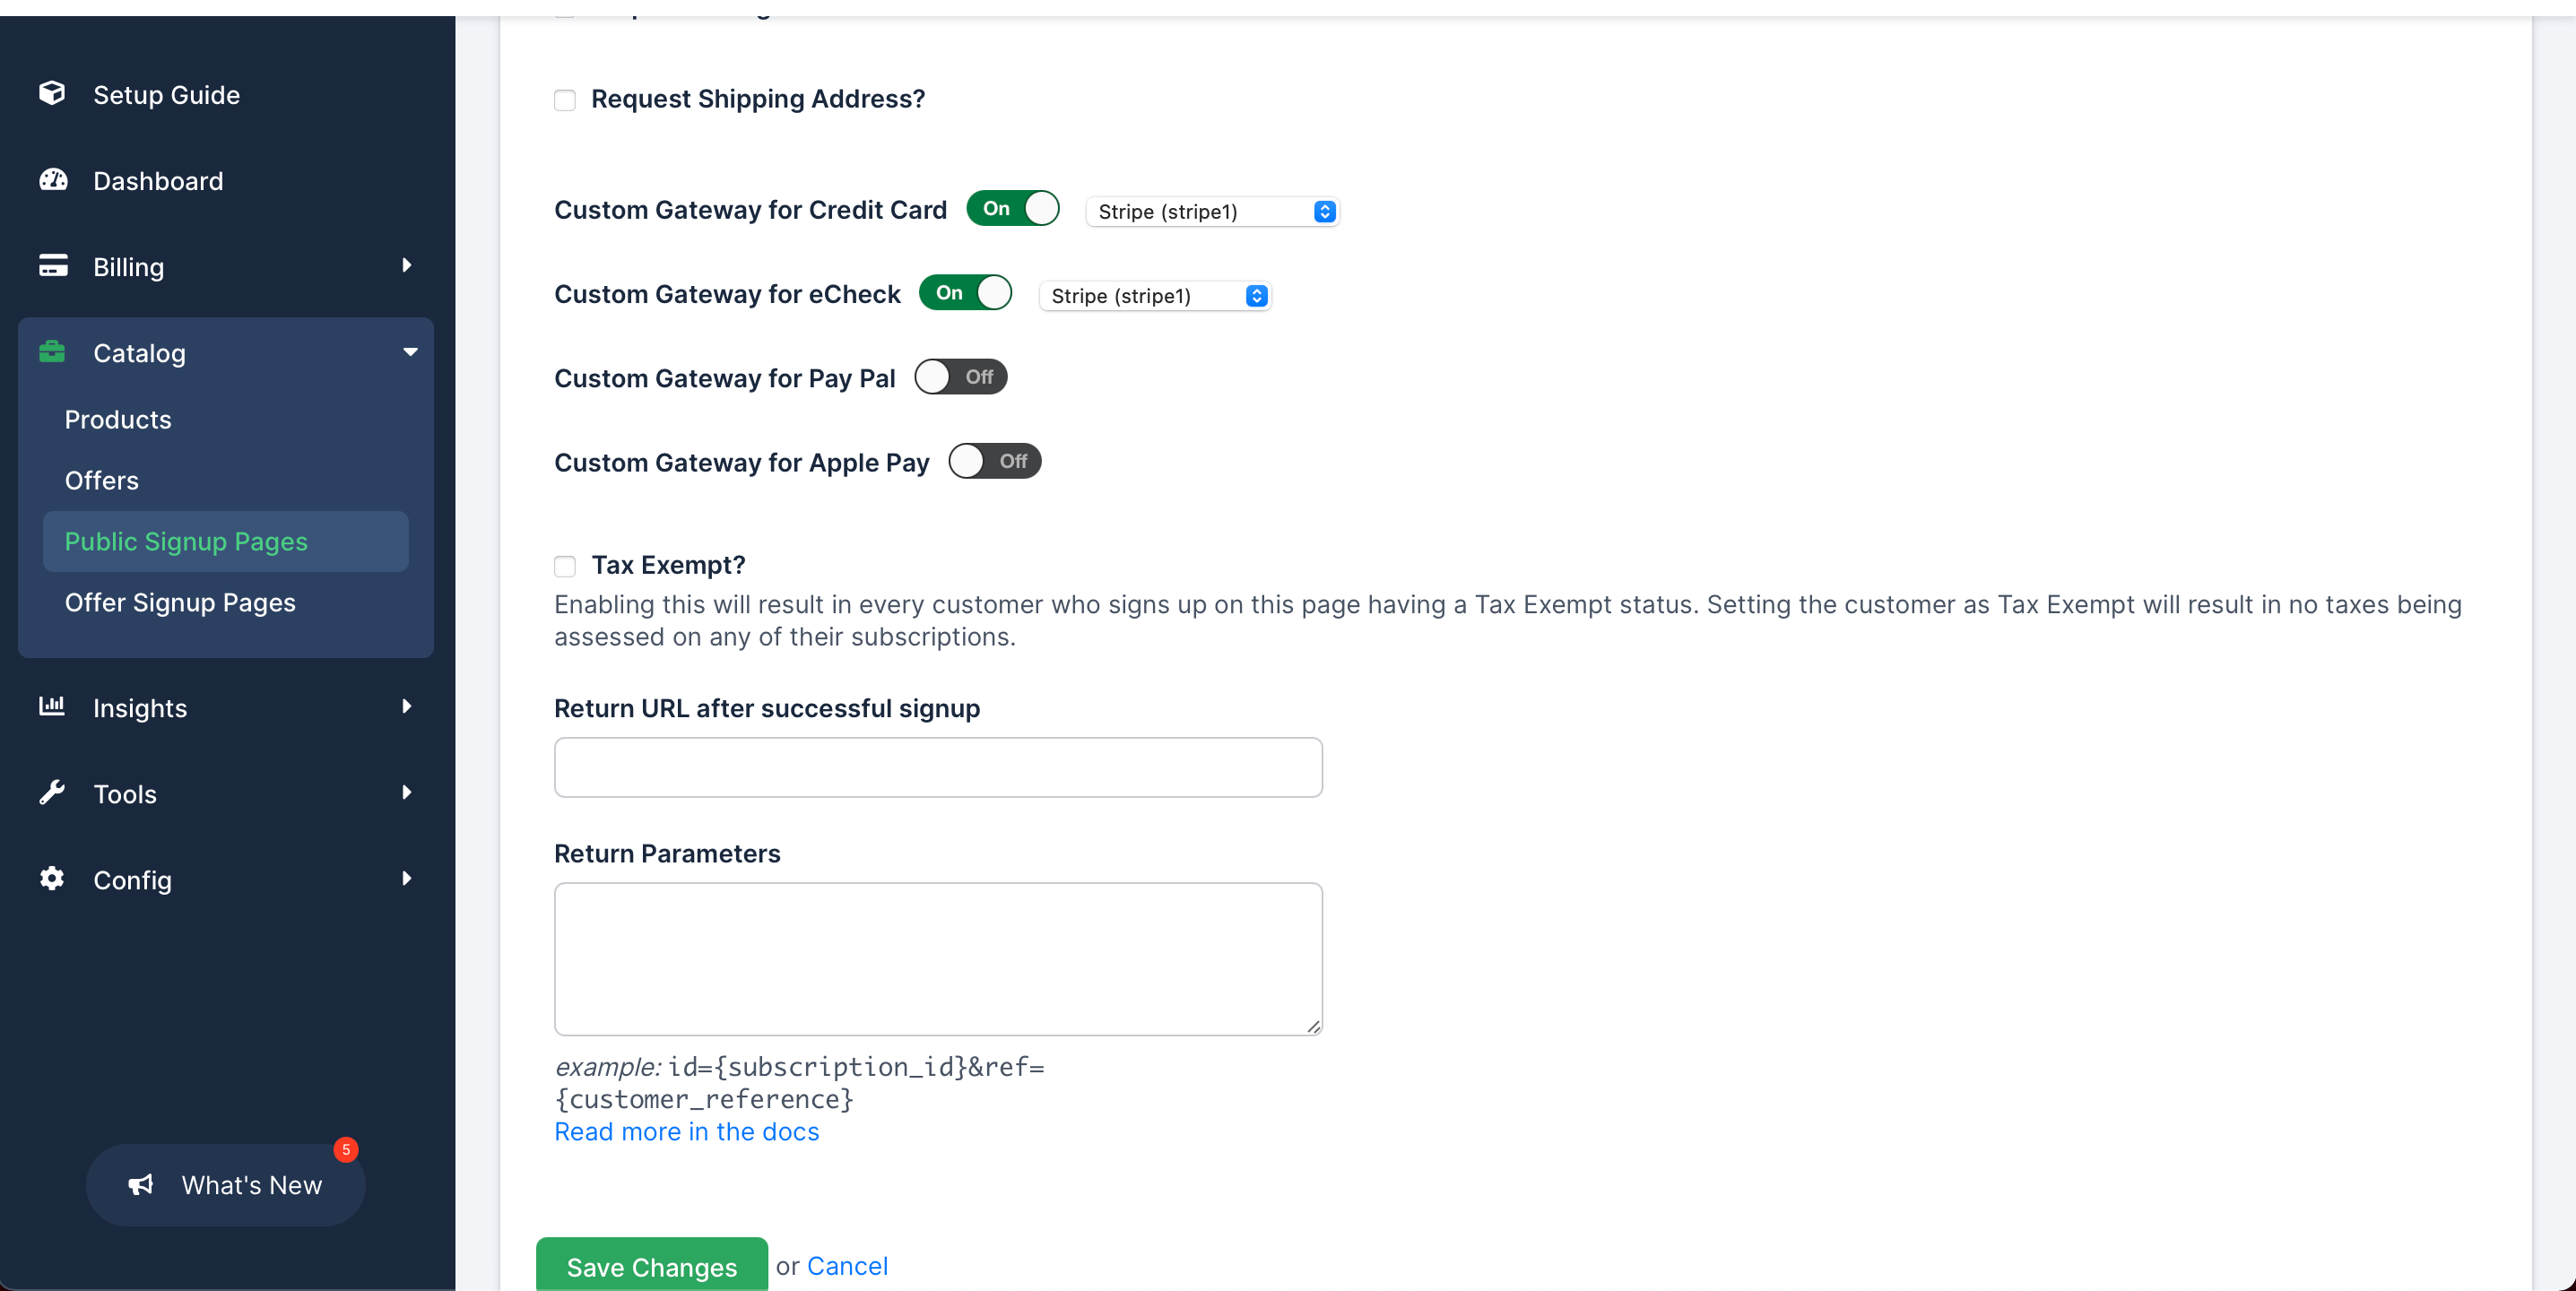
Custom gateway for Public Signup Pages
Public Signup Pages initially use the default gateway for a given payment type. That is, if a particular gateway is selected as the default, it's used to process signup payments on a Public Signup Page.
To override this default behavior, you can select a custom gateway for a Public Signup Page. Each configured gateway can be associated with the payment profile for a specific Public Signup Page, and each Public Signup Page has its own configuration and set of associated gateways.
Gateway setup guides
Each provider has its own setup guide covering the credentials Advanced Billing needs, where to find them in that provider's dashboard, and any provider-specific configuration:
- Adyen Gateway Setup Guide
- Authorize.Net Gateway Setup Guide
- Bambora Gateway Setup Guide
- BlueSnap Gateway Setup Guide
- BPOINT Gateway Setup Guide
- Braintree Gateway Setup Guide
- Chase Paymentech (Orbital) Gateway Setup Guide
- CyberSource Gateway Setup Guide
- Elavon VirtualMerchant Gateway Setup Guide
- eWAY Gateway Setup Guide
- eWAY Rapid 3.1 Gateway Setup Guide
- First Data Global Gateway e4 Gateway Setup Guide
- Forte (Beta) Gateway Setup Guide
- Moneris Gateway Setup Guide
- NMI Gateway Setup Guide
- PayPal Website Payments Pro Legacy Edition Gateway Setup Guide
- Pin Payments Gateway Setup Guide
- QuickPay Gateway Setup Guide
- Square Gateway Setup Guide
- TrustCommerce Gateway Setup Guide
- UNIPaaS Gateway Setup Guide
- Vantiv (Litle & Co.) Gateway Setup Guide
- Windcave PX Post Gateway Setup Guide
Not every provider appears in the gateway picker for every site. A provider is disabled if it doesn't support your site's selected currency, or if your site already has subscriptions.
Related information
For the test gateway's default behavior and how test vs. production mode affects which gateway accounts you can connect, see Understand the Test Gateway.
Some providers support configuration beyond the standard connection setup — eCheck/ACH on Authorize.Net, Advanced Fraud Protection and PayPal on Braintree. See Find Gateway-Specific Options and Compare Gateway Features.
Still need help?
Reach out and our support team will take it from here.